#react useState json update
Explore tagged Tumblr posts
Visit Tumblr Blog
Explore Tumblr blogs with no restrictions, modern design and the best experience.
Last Seen Tumblr Blogs


Fun Fact
Hackers stole 65M passwords from Tumblr in 2013.
Text
Top 20 MERN Stack Interview Questions You Need to Prepare

The MERN stack (MongoDB, Express.js, React, Node.js) is a popular full-stack development technology. Here’s a quick guide to the key questions you may encounter in MERN stack interviews:
What is the MERN stack? It includes MongoDB (NoSQL database), Express.js (web framework), React (UI library), and Node.js (runtime for backend).
MongoDB vs SQL? MongoDB is document-oriented, flexible, and scalable, while SQL is relational and uses tables.
How does Express.js support web development? Express simplifies routing, request handling, and middleware management, speeding up app development.
Main features of React? React is component-based, uses virtual DOM, and supports one-way data binding for efficient rendering.
Why Node.js is popular? Node.js is fast, event-driven, and non-blocking, making it efficient for handling multiple requests concurrently.
MongoDB-Specific Questions
What does a MongoDB document represent? A document is a JSON-like object that holds data, allowing complex structures.
CRUD operations in MongoDB? CRUD stands for Create, Read, Update, and Delete—basic operations to manage data.
What are indexes in MongoDB? Indexes improve query performance by speeding up data retrieval.
How do you handle relationships in MongoDB? You can embed related data or store references to other documents (embedding vs. referencing).
Express.js-Specific Questions
What is middleware in Express.js? Middleware functions are used for routing, request handling, and managing response flow.
How do you handle routes in Express? Routes map URLs to controller functions to handle HTTP requests (GET, POST, etc.).
Security practices in Express? Implement CORS, input validation, and authentication to secure your application.
React-Specific Questions
Class vs Functional components? Class components use lifecycle methods; functional components use hooks like useState and useEffect.
How to manage state in React? State can be managed locally or using tools like Context API or Redux for global state.
What are React hooks? Hooks like useState and useEffect enable functional components to manage state and side effects without classes.
Node.js-Specific Questions
How does Node.js handle asynchronous programming? Using callbacks, promises, and async/await, Node handles async operations efficiently.
What is npm? npm is a package manager for Node.js, helping manage dependencies and libraries in your project.
Full-Stack Development Questions
How to implement authentication in MERN? Use JWTs, sessions, or OAuth for secure user authentication and authorization.
Deployment options for MERN apps? Popular options include Heroku, AWS, and Docker for hosting and scaling MERN applications.
Advanced Topics
How to optimize MERN app performance? Optimize client-side rendering, cache data, improve queries, and minimize app load time for better performance.
Conclusion:
Mastering the MERN stack opens numerous web development opportunities. By practicing these interview questions and applying your knowledge in real projects, you’ll boost both your technical skills and interview confidence. Keep learning and stay updated with the latest trends!
Get Read Full Article: https://blog.iihtsrt.com/mern-stack-interview-questions/
#MERN Stack Interview Questions#MERN Stack Developer Guide#Coding Interview Preparation#React Interview Questions
0 notes
Text
Python Full Stack Development Course AI + IoT Integrated | TechEntry
Join TechEntry's No.1 Python Full Stack Developer Course in 2025. Learn Full Stack Development with Python and become the best Full Stack Python Developer. Master Python, AI, IoT, and build advanced applications.
Why Settle for Just Full Stack Development? Become an AI Full Stack Engineer!
Transform your development expertise with our AI-focused Full Stack Python course, where you'll master the integration of advanced machine learning algorithms with Python’s robust web frameworks to build intelligent, scalable applications from frontend to backend.
Kickstart Your Development Journey!
Frontend Development
React: Build Dynamic, Modern Web Experiences:
What is Web?
Markup with HTML & JSX
Flexbox, Grid & Responsiveness
Bootstrap Layouts & Components
Frontend UI Framework
Core JavaScript & Object Orientation
Async JS promises, async/await
DOM & Events
Event Bubbling & Delegation
Ajax, Axios & fetch API
Functional React Components
Props & State Management
Dynamic Component Styling
Functions as Props
Hooks in React: useState, useEffect
Material UI
Custom Hooks
Supplement: Redux & Redux Toolkit
Version Control: Git & Github
Angular: Master a Full-Featured Framework:
What is Web?
Markup with HTML & Angular Templates
Flexbox, Grid & Responsiveness
Angular Material Layouts & Components
Core JavaScript & TypeScript
Asynchronous Programming Promises, Observables, and RxJS
DOM Manipulation & Events
Event Binding & Event Bubbling
HTTP Client, Ajax, Axios & Fetch API
Angular Components
Input & Output Property Binding
Dynamic Component Styling
Services & Dependency Injection
Angular Directives (Structural & Attribute)
Routing & Navigation
Reactive Forms & Template-driven Forms
State Management with NgRx
Custom Pipes & Directives
Version Control: Git & GitHub
Backend
Python
Python Overview and Setup
Networking and HTTP Basics
REST API Overview
Setting Up a Python Environment (Virtual Environments, Pip)
Introduction to Django Framework
Django Project Setup and Configuration
Creating Basic HTTP Servers with Django
Django URL Routing and Views
Handling HTTP Requests and Responses
JSON Parsing and Form Handling
Using Django Templates for Rendering HTML
CRUD API Creation and RESTful Services with Django REST Framework
Models and Database Integration
Understanding SQL and NoSQL Database Concepts
CRUD Operations with Django ORM
Database Connection Setup in Django
Querying and Data Handling with Django ORM
User Authentication Basics in Django
Implementing JSON Web Tokens (JWT) for Security
Role-Based Access Control
Advanced API Concepts: Pagination, Filtering, and Sorting
Caching Techniques for Faster Response
Rate Limiting and Security Practices
Deployment of Django Applications
Best Practices for Django Development
Database
MongoDB (NoSQL)
Introduction to NoSQL and MongoDB
Understanding Collections and Documents
Basic CRUD Operations in MongoDB
MongoDB Query Language (MQL) Basics
Inserting, Finding, Updating, and Deleting Documents
Using Filters and Projections in Queries
Understanding Data Types in MongoDB
Indexing Basics in MongoDB
Setting Up a Simple MongoDB Database (e.g., MongoDB Atlas)
Connecting to MongoDB from a Simple Application
Basic Data Entry and Querying with MongoDB Compass
Data Modeling in MongoDB: Embedding vs. Referencing
Overview of Aggregation Framework in MongoDB
SQL
Introduction to SQL (Structured Query Language)
Basic CRUD Operations: Create, Read, Update, Delete
Understanding Tables, Rows, and Columns
Primary Keys and Unique Constraints
Simple SQL Queries: SELECT, WHERE, and ORDER BY
Filtering Data with Conditions
Using Aggregate Functions: COUNT, SUM, AVG
Grouping Data with GROUP BY
Basic Joins: Combining Tables (INNER JOIN)
Data Types in SQL (e.g., INT, VARCHAR, DATE)
Setting Up a Simple SQL Database (e.g., SQLite or MySQL)
Connecting to a SQL Database from a Simple Application
Basic Data Entry and Querying with a GUI Tool
Data Validation Basics
Overview of Transactions and ACID Properties
AI and IoT
Introduction to AI Concepts
Getting Started with Python for AI
Machine Learning Essentials with scikit-learn
Introduction to Deep Learning with TensorFlow and PyTorch
Practical AI Project Ideas
Introduction to IoT Fundamentals
Building IoT Solutions with Python
IoT Communication Protocols
Building IoT Applications and Dashboards
IoT Security Basics
TechEntry Highlights
In-Office Experience: Engage in a collaborative in-office environment (on-site) for hands-on learning and networking.
Learn from Software Engineers: Gain insights from experienced engineers actively working in the industry today.
Career Guidance: Receive tailored advice on career paths and job opportunities in tech.
Industry Trends: Explore the latest software development trends to stay ahead in your field.
1-on-1 Mentorship: Access personalized mentorship for project feedback and ongoing professional development.
Hands-On Projects: Work on real-world projects to apply your skills and build your portfolio.
What You Gain:
A deep understanding of Front-end React.js and Back-end Python.
Practical skills in AI tools and IoT integration.
The confidence to work on real-time solutions and prepare for high-paying jobs.
The skills that are in demand across the tech industry, ensuring you're not just employable but sought-after.
Frequently Asked Questions
Q: What is Python, and why should I learn it?
A: Python is a versatile, high-level programming language known for its readability and ease of learning. It's widely used in web development, data science, artificial intelligence, and more.
Q: What are the prerequisites for learning Angular?
A: A basic understanding of HTML, CSS, and JavaScript is recommended before learning Angular.
Q: Do I need any prior programming experience to learn Python?
A: No, Python is beginner-friendly and designed to be accessible to those with no prior programming experience.
Q: What is React, and why use it?
A: React is a JavaScript library developed by Facebook for building user interfaces, particularly for single-page applications. It offers reusable components, fast performance, and one-way data flow.
Q: What is Django, and why should I learn it?
A: Django is a high-level web framework for building web applications quickly and efficiently using Python. It includes many built-in features for web development, such as authentication and an admin interface.
Q: What is the virtual DOM in React?
A: The virtual DOM represents the real DOM in memory. React uses it to detect changes and update the real DOM as needed, improving UI performance.
Q: Do I need to know Python before learning Django?
A: Yes, a basic understanding of Python is essential before diving into Django.
Q: What are props in React?
A: Props in React are objects used to pass information to a component, allowing data to be shared and utilized within the component.
Q: Why should I learn Angular?
A: Angular is a powerful framework for building dynamic, single-page web applications. It enhances your ability to create scalable and maintainable web applications and is highly valued in the job market.
Q: What is the difference between class-based components and functional components with hooks in React?
A: Class-based components maintain state via instances, while functional components use hooks to manage state, making them more efficient and popular.
For more, visit our website:
https://techentry.in/courses/python-fullstack-developer-course
0 notes
Text
react useState iç içe json dosyasında güncelleme işlemi
şöyle bir json datası örneği düşünün. Biz burada files içine dosya ekleme çıkarma yapmak istiyoruz. Gördüğünüz gibi nested iç içe şekilde.
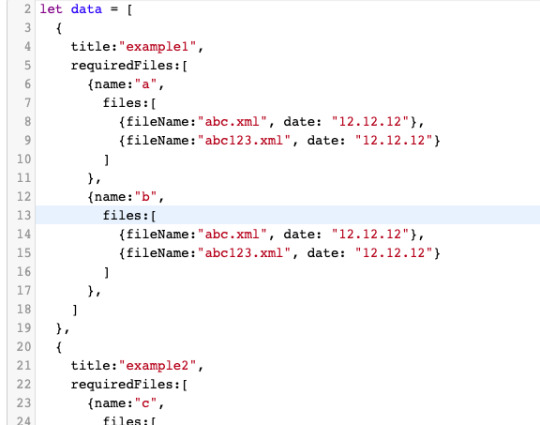
ben şöyle yaptım. Bunu bir list componenti düşünün 2. komponent grubuna dosya ekleyeceksek örneğin onun yolu bana lazım. Bunu bulmak içinde calenderID dediğim bu ilk jsondaki obje oluyor örneğin example 2 yazan obje. field lanı ise requiredFiles içerisindeki hangi obje olduğu. Bunlar lazım ki doğru dosya files güncelleyelim.
şöyle bir method yazdım
const uploadFileForCalenderItem = (calenderID, fileId, file) => { setCalenderItems(resultList => { const copy = [... resultList] const updateFiles = copy[calenderID].requiredFiles[fileId].files copy[calenderID].requiredFiles[fileId].files = [... updateFiles,file]
return copy }) }
0 notes
Link
The Jamstack way of thinking and building websites is becoming more and more popular. Have you already tried Gatsby, Nuxt, or Gridsome (to cite only a few)? Chances are that your first contact was a “Wow!” moment — so many things are automatically set up and ready to use. There are some challenges, though, one of which is search functionality. If you’re working on any sort of content-driven site, you’ll likely run into search and how to handle it. Can it be done without any external server-side technology? Search is not one of those things that come out of the box with Jamstack. Some extra decisions and implementation are required. Fortunately, we have a bunch of options that might be more or less adapted to a project. We could use Algolia’s powerful search-as-service API. It comes with a free plan that is restricted to non-commercial projects with a limited capacity. If we were to use WordPress with WPGraphQL as a data source, we could take advantage of WordPress native search functionality and Apollo Client. Raymond Camden recently explored a few Jamstack search options, including pointing a search form directly at Google. In this article, we will build a search index and add search functionality to a Gatsby website with Lunr, a lightweight JavaScript library providing an extensible and customizable search without the need for external, server-side services. We used it recently to add “Search by Tartan Name” to our Gatsby project tartanify.com. We absolutely wanted persistent search as-you-type functionality, which brought some extra challenges. But that’s what makes it interesting, right? I’ll discuss some of the difficulties we faced and how we dealt with them in the second half of this article.

Getting started
For the sake of simplicity, let’s use the official Gatsby blog starter. Using a generic starter lets us abstract many aspects of building a static website. If you’re following along, make sure to install and run it:
gatsby new gatsby-starter-blog https://github.com/gatsbyjs/gatsby-starter-blog cd gatsby-starter-blog gatsby develop
It’s a tiny blog with three posts we can view by opening up http://localhost:8000/___graphql in the browser.

Inverting index with Lunr.js 🙃
Lunr uses a record-level inverted index as its data structure. The inverted index stores the mapping for each word found within a website to its location (basically a set of page paths). It’s on us to decide which fields (e.g. title, content, description, etc.) provide the keys (words) for the index. For our blog example, I decided to include all titles and the content of each article. Dealing with titles is straightforward since they are composed uniquely of words. Indexing content is a little more complex. My first try was to use the rawMarkdownBody field. Unfortunately, rawMarkdownBody introduces some unwanted keys resulting from the markdown syntax.
I obtained a “clean” index using the html field in conjunction with the striptags package (which, as the name suggests, strips out the HTML tags). Before we get into the details, let’s look into the Lunr documentation. Here’s how we create and populate the Lunr index. We will use this snippet in a moment, specifically in our gatsby-node.js file.
const index = lunr(function () { this.ref('slug') this.field('title') this.field('content') for (const doc of documents) { this.add(doc) } })
documents is an array of objects, each with a slug, title and content property:
{ slug: '/post-slug/', title: 'Post Title', content: 'Post content with all HTML tags stripped out.' }
We will define a unique document key (the slug) and two fields (the title and content, or the key providers). Finally, we will add all of the documents, one by one. Let’s get started.
Creating an index in gatsby-node.js
Let’s start by installing the libraries that we are going to use.
yarn add lunr graphql-type-json striptags
Next, we need to edit the gatsby-node.js file. The code from this file runs once in the process of building a site, and our aim is to add index creation to the tasks that Gatsby executes on build. CreateResolvers is one of the Gatsby APIs controlling the GraphQL data layer. In this particular case, we will use it to create a new root field; Let’s call it LunrIndex. Gatsby’s internal data store and query capabilities are exposed to GraphQL field resolvers on context.nodeModel. With getAllNodes, we can get all nodes of a specified type:
/* gatsby-node.js */ const { GraphQLJSONObject } = require(`graphql-type-json`) const striptags = require(`striptags`) const lunr = require(`lunr`) exports.createResolvers = ({ cache, createResolvers }) => { createResolvers({ Query: { LunrIndex: { type: GraphQLJSONObject, resolve: (source, args, context, info) => { const blogNodes = context.nodeModel.getAllNodes({ type: `MarkdownRemark`, }) const type = info.schema.getType(`MarkdownRemark`) return createIndex(blogNodes, type, cache) }, }, }, }) }
Now let’s focus on the createIndex function. That’s where we will use the Lunr snippet we mentioned in the last section.
/* gatsby-node.js */ const createIndex = async (blogNodes, type, cache) => { const documents = [] // Iterate over all posts for (const node of blogNodes) { const html = await type.getFields().html.resolve(node) // Once html is resolved, add a slug-title-content object to the documents array documents.push({ slug: node.fields.slug, title: node.frontmatter.title, content: striptags(html), }) } const index = lunr(function() { this.ref(`slug`) this.field(`title`) this.field(`content`) for (const doc of documents) { this.add(doc) } }) return index.toJSON() }
Have you noticed that instead of accessing the HTML element directly with const html = node.html, we’re using an await expression? That’s because node.html isn’t available yet. The gatsby-transformer-remark plugin (used by our starter to parse Markdown files) does not generate HTML from markdown immediately when creating the MarkdownRemark nodes. Instead, html is generated lazily when the html field resolver is called in a query. The same actually applies to the excerpt that we will need in just a bit. Let’s look ahead and think about how we are going to display search results. Users expect to obtain a link to the matching post, with its title as the anchor text. Very likely, they wouldn’t mind a short excerpt as well. Lunr’s search returns an array of objects representing matching documents by the ref property (which is the unique document key slug in our example). This array does not contain the document title nor the content. Therefore, we need to store somewhere the post title and excerpt corresponding to each slug. We can do that within our LunrIndex as below:
/* gatsby-node.js */ const createIndex = async (blogNodes, type, cache) => { const documents = [] const store = {} for (const node of blogNodes) { const {slug} = node.fields const title = node.frontmatter.title const [html, excerpt] = await Promise.all([ type.getFields().html.resolve(node), type.getFields().excerpt.resolve(node, { pruneLength: 40 }), ]) documents.push({ // unchanged }) store[slug] = { title, excerpt, } } const index = lunr(function() { // unchanged }) return { index: index.toJSON(), store } }
Our search index changes only if one of the posts is modified or a new post is added. We don’t need to rebuild the index each time we run gatsby develop. To avoid unnecessary builds, let’s take advantage of the cache API:
/* gatsby-node.js */ const createIndex = async (blogNodes, type, cache) => { const cacheKey = `IndexLunr` const cached = await cache.get(cacheKey) if (cached) { return cached } // unchanged const json = { index: index.toJSON(), store } await cache.set(cacheKey, json) return json }
Enhancing pages with the search form component
We can now move on to the front end of our implementation. Let’s start by building a search form component.
touch src/components/search-form.js
I opt for a straightforward solution: an input of type="search", coupled with a label and accompanied by a submit button, all wrapped within a form tag with the search landmark role. We will add two event handlers, handleSubmit on form submit and handleChange on changes to the search input.
/* src/components/search-form.js */ import React, { useState, useRef } from "react" import { navigate } from "@reach/router" const SearchForm = ({ initialQuery = "" }) => { // Create a piece of state, and initialize it to initialQuery // query will hold the current value of the state, // and setQuery will let us change it const [query, setQuery] = useState(initialQuery) // We need to get reference to the search input element const inputEl = useRef(null) // On input change use the current value of the input field (e.target.value) // to update the state's query value const handleChange = e => { setQuery(e.target.value) } // When the form is submitted navigate to /search // with a query q paramenter equal to the value within the input search const handleSubmit = e => { e.preventDefault() // `inputEl.current` points to the mounted search input element const q = inputEl.current.value navigate(`/search?q=${q}`) } return ( <form role="search" onSubmit={handleSubmit}> <label htmlFor="search-input" style=> Search for: </label> <input ref={inputEl} id="search-input" type="search" value={query} placeholder="e.g. duck" onChange={handleChange} /> <button type="submit">Go</button> </form> ) } export default SearchForm
Have you noticed that we’re importing navigate from the @reach/router package? That is necessary since neither Gatsby’s <Link/> nor navigate provide in-route navigation with a query parameter. Instead, we can import @reach/router — there’s no need to install it since Gatsby already includes it — and use its navigate function. Now that we’ve built our component, let’s add it to our home page (as below) and 404 page.
/* src/pages/index.js */ // unchanged import SearchForm from "../components/search-form" const BlogIndex = ({ data, location }) => { // unchanged return ( <Layout location={location} title={siteTitle}> <SEO title="All posts" /> <Bio /> <SearchForm /> // unchanged
Search results page
Our SearchForm component navigates to the /search route when the form is submitted, but for the moment, there is nothing behing this URL. That means we need to add a new page:
touch src/pages/search.js
I proceeded by copying and adapting the content of the the index.js page. One of the essential modifications concerns the page query (see the very bottom of the file). We will replace allMarkdownRemark with the LunrIndex field.
/* src/pages/search.js */ import React from "react" import { Link, graphql } from "gatsby" import { Index } from "lunr" import Layout from "../components/layout" import SEO from "../components/seo" import SearchForm from "../components/search-form"
// We can access the results of the page GraphQL query via the data props const SearchPage = ({ data, location }) => { const siteTitle = data.site.siteMetadata.title // We can read what follows the ?q= here // URLSearchParams provides a native way to get URL params // location.search.slice(1) gets rid of the "?" const params = new URLSearchParams(location.search.slice(1)) const q = params.get("q") || ""
// LunrIndex is available via page query const { store } = data.LunrIndex // Lunr in action here const index = Index.load(data.LunrIndex.index) let results = [] try { // Search is a lunr method results = index.search(q).map(({ ref }) => { // Map search results to an array of {slug, title, excerpt} objects return { slug: ref, ...store[ref], } }) } catch (error) { console.log(error) } return ( // We will take care of this part in a moment ) } export default SearchPage export const pageQuery = graphql` query { site { siteMetadata { title } } LunrIndex } `
Now that we know how to retrieve the query value and the matching posts, let’s display the content of the page. Notice that on the search page we pass the query value to the <SearchForm /> component via the initialQuery props. When the user arrives to the search results page, their search query should remain in the input field.
return ( <Layout location={location} title={siteTitle}> <SEO title="Search results" /> {q ? <h1>Search results</h1> : <h1>What are you looking for?</h1>} <SearchForm initialQuery={q} /> {results.length ? ( results.map(result => { return ( <article key={result.slug}> <h2> <Link to={result.slug}> {result.title || result.slug} </Link> </h2> <p>{result.excerpt}</p> </article> ) }) ) : ( <p>Nothing found.</p> )} </Layout> )
You can find the complete code in this gatsby-starter-blog fork and the live demo deployed on Netlify.
Instant search widget
Finding the most “logical” and user-friendly way of implementing search may be a challenge in and of itself. Let’s now switch to the real-life example of tartanify.com — a Gatsby-powered website gathering 5,000+ tartan patterns. Since tartans are often associated with clans or organizations, the possibility to search a tartan by name seems to make sense. We built tartanify.com as a side project where we feel absolutely free to experiment with things. We didn’t want a classic search results page but an instant search “widget.” Often, a given search keyword corresponds with a number of results — for example, “Ramsay” comes in six variations. We imagined the search widget would be persistent, meaning it should stay in place when a user navigates from one matching tartan to another.
Let me show you how we made it work with Lunr. The first step of building the index is very similar to the gatsby-starter-blog example, only simpler:
/* gatsby-node.js */ exports.createResolvers = ({ cache, createResolvers }) => { createResolvers({ Query: { LunrIndex: { type: GraphQLJSONObject, resolve(source, args, context) { const siteNodes = context.nodeModel.getAllNodes({ type: `TartansCsv`, }) return createIndex(siteNodes, cache) }, }, }, }) } const createIndex = async (nodes, cache) => { const cacheKey = `LunrIndex` const cached = await cache.get(cacheKey) if (cached) { return cached } const store = {} const index = lunr(function() { this.ref(`slug`) this.field(`title`) for (node of nodes) { const { slug } = node.fields const doc = { slug, title: node.fields.Unique_Name, } store[slug] = { title: doc.title, } this.add(doc) } }) const json = { index: index.toJSON(), store } cache.set(cacheKey, json) return json }
We opted for instant search, which means that search is triggered by any change in the search input instead of a form submission.
/* src/components/searchwidget.js */ import React, { useState } from "react" import lunr, { Index } from "lunr" import { graphql, useStaticQuery } from "gatsby" import SearchResults from "./searchresults"
const SearchWidget = () => { const [value, setValue] = useState("") // results is now a state variable const [results, setResults] = useState([])
// Since it's not a page component, useStaticQuery for quering data // https://www.gatsbyjs.org/docs/use-static-query/ const { LunrIndex } = useStaticQuery(graphql` query { LunrIndex } `) const index = Index.load(LunrIndex.index) const { store } = LunrIndex const handleChange = e => { const query = e.target.value setValue(query) try { const search = index.search(query).map(({ ref }) => { return { slug: ref, ...store[ref], } }) setResults(search) } catch (error) { console.log(error) } } return ( <div className="search-wrapper"> // You can use a form tag as well, as long as we prevent the default submit behavior <div role="search"> <label htmlFor="search-input" className="visually-hidden"> Search Tartans by Name </label> <input id="search-input" type="search" value={value} onChange={handleChange} placeholder="Search Tartans by Name" /> </div> <SearchResults results={results} /> </div> ) } export default SearchWidget
The SearchResults are structured like this:
/* src/components/searchresults.js */ import React from "react" import { Link } from "gatsby" const SearchResults = ({ results }) => ( <div> {results.length ? ( <> <h2>{results.length} tartan(s) matched your query</h2> <ul> {results.map(result => ( <li key={result.slug}> <Link to={`/tartan/${result.slug}`}>{result.title}</Link> </li> ))} </ul> </> ) : ( <p>Sorry, no matches found.</p> )} </div> ) export default SearchResults
Making it persistent
Where should we use this component? We could add it to the Layout component. The problem is that our search form will get unmounted on page changes that way. If a user wants to browser all tartans associated with the “Ramsay” clan, they will have to retype their query several times. That’s not ideal. Thomas Weibenfalk has written a great article on keeping state between pages with local state in Gatsby.js. We will use the same technique, where the wrapPageElement browser API sets persistent UI elements around pages. Let’s add the following code to the gatsby-browser.js. You might need to add this file to the root of your project.
/* gatsby-browser.js */ import React from "react" import SearchWrapper from "./src/components/searchwrapper" export const wrapPageElement = ({ element, props }) => ( <SearchWrapper {...props}>{element}</SearchWrapper> )
Now let’s add a new component file:
touch src/components/searchwrapper.js
Instead of adding SearchWidget component to the Layout, we will add it to the SearchWrapper and the magic happens. ✨
/* src/components/searchwrapper.js */ import React from "react" import SearchWidget from "./searchwidget"
const SearchWrapper = ({ children }) => ( <> {children} <SearchWidget /> </> ) export default SearchWrapper
Creating a custom search query
At this point, I started to try different keywords but very quickly realized that Lunr’s default search query might not be the best solution when used for instant search. Why? Imagine that we are looking for tartans associated with the name MacCallum. While typing “MacCallum” letter-by-letter, this is the evolution of the results:
m – 2 matches (Lyon, Jeffrey M, Lyon, Jeffrey M (Hunting))
ma – no matches
mac – 1 match (Brighton Mac Dermotte)
macc – no matches
macca – no matches
maccal – 1 match (MacCall)
maccall – 1 match (MacCall)
maccallu – no matches
maccallum – 3 matches (MacCallum, MacCallum #2, MacCallum of Berwick)
Users will probably type the full name and hit the button if we make a button available. But with instant search, a user is likely to abandon early because they may expect that the results can only narrow down letters are added to the keyword query. That’s not the only problem. Here’s what we get with “Callum”:
c – 3 unrelated matches
ca – no matches
cal – no matches
call – no matches
callu – no matches
callum – one match
You can see the trouble if someone gives up halfway into typing the full query. Fortunately, Lunr supports more complex queries, including fuzzy matches, wildcards and boolean logic (e.g. AND, OR, NOT) for multiple terms. All of these are available either via a special query syntax, for example:
index.search("+*callum mac*")
We could also reach for the index query method to handle it programatically. The first solution is not satisfying since it requires more effort from the user. I used the index.query method instead:
/* src/components/searchwidget.js */ const search = index .query(function(q) { // full term matching q.term(el) // OR (default) // trailing or leading wildcard q.term(el, { wildcard: lunr.Query.wildcard.LEADING | lunr.Query.wildcard.TRAILING, }) }) .map(({ ref }) => { return { slug: ref, ...store[ref], } })
Why use full term matching with wildcard matching? That’s necessary for all keywords that “benefit” from the stemming process. For example, the stem of “different” is “differ.” As a consequence, queries with wildcards — such as differe*, differen* or different* — all result in no matches, while the full term queries differe, differen and different return matches. Fuzzy matches can be used as well. In our case, they are allowed uniquely for terms of five or more characters:
q.term(el, { editDistance: el.length > 5 ? 1 : 0 }) q.term(el, { wildcard: lunr.Query.wildcard.LEADING | lunr.Query.wildcard.TRAILING, })
The handleChange function also “cleans up” user inputs and ignores single-character terms:
/* src/components/searchwidget.js */ const handleChange = e => { const query = e.target.value || "" setValue(query) if (!query.length) { setResults([]) } const keywords = query .trim() // remove trailing and leading spaces .replace(/\*/g, "") // remove user's wildcards .toLowerCase() .split(/\s+/) // split by whitespaces // do nothing if the last typed keyword is shorter than 2 if (keywords[keywords.length - 1].length < 2) { return } try { const search = index .query(function(q) { keywords // filter out keywords shorter than 2 .filter(el => el.length > 1) // loop over keywords .forEach(el => { q.term(el, { editDistance: el.length > 5 ? 1 : 0 }) q.term(el, { wildcard: lunr.Query.wildcard.LEADING | lunr.Query.wildcard.TRAILING, }) }) }) .map(({ ref }) => { return { slug: ref, ...store[ref], } }) setResults(search) } catch (error) { console.log(error) } }
Let’s check it in action:
m – pending
ma – 861 matches
mac – 600 matches
macc – 35 matches
macca – 12 matches
maccal – 9 matches
maccall – 9 matches
maccallu – 3 matches
maccallum – 3 matches
Searching for “Callum” works as well, resulting in four matches: Callum, MacCallum, MacCallum #2, and MacCallum of Berwick. There is one more problem, though: multi-terms queries. Say, you’re looking for “Loch Ness.” There are two tartans associated with that term, but with the default OR logic, you get a grand total of 96 results. (There are plenty of other lakes in Scotland.) I wound up deciding that an AND search would work better for this project. Unfortunately, Lunr does not support nested queries, and what we actually need is (keyword1 OR *keyword*) AND (keyword2 OR *keyword2*). To overcome this, I ended up moving the terms loop outside the query method and intersecting the results per term. (By intersecting, I mean finding all slugs that appear in all of the per-single-keyword results.)
/* src/components/searchwidget.js */ try { // andSearch stores the intersection of all per-term results let andSearch = [] keywords .filter(el => el.length > 1) // loop over keywords .forEach((el, i) => { // per-single-keyword results const keywordSearch = index .query(function(q) { q.term(el, { editDistance: el.length > 5 ? 1 : 0 }) q.term(el, { wildcard: lunr.Query.wildcard.LEADING | lunr.Query.wildcard.TRAILING, }) }) .map(({ ref }) => { return { slug: ref, ...store[ref], } }) // intersect current keywordSearch with andSearch andSearch = i > 0 ? andSearch.filter(x => keywordSearch.some(el => el.slug === x.slug)) : keywordSearch }) setResults(andSearch) } catch (error) { console.log(error) }
The source code for tartanify.com is published on GitHub. You can see the complete implementation of the Lunr search there.
Final thoughts
Search is often a non-negotiable feature for finding content on a site. How important the search functionality actually is may vary from one project to another. Nevertheless, there is no reason to abandon it under the pretext that it does not tally with the static character of Jamstack websites. There are many possibilities. We’ve just discussed one of them. And, paradoxically in this specific example, the result was a better all-around user experience, thanks to the fact that implementing search was not an obvious task but instead required a lot of deliberation. We may not have been able to say the same with an over-the-counter solution.
0 notes
Text
How to Add Lunr Search to your Gatsby Website
The Jamstack way of thinking and building websites is becoming more and more popular.
Have you already tried Gatsby, Nuxt, or Gridsome (to cite only a few)? Chances are that your first contact was a “Wow!” moment — so many things are automatically set up and ready to use.
There are some challenges, though, one of which is search functionality. If you’re working on any sort of content-driven site, you’ll likely run into search and how to handle it. Can it be done without any external server-side technology?
Search is not one of those things that come out of the box with Jamstack. Some extra decisions and implementation are required.
Fortunately, we have a bunch of options that might be more or less adapted to a project. We could use Algolia’s powerful search-as-service API. It comes with a free plan that is restricted to non-commercial projects with a limited capacity. If we were to use WordPress with WPGraphQL as a data source, we could take advantage of WordPress native search functionality and Apollo Client. Raymond Camden recently explored a few Jamstack search options, including pointing a search form directly at Google.
In this article, we will build a search index and add search functionality to a Gatsby website with Lunr, a lightweight JavaScript library providing an extensible and customizable search without the need for external, server-side services. We used it recently to add “Search by Tartan Name” to our Gatsby project tartanify.com. We absolutely wanted persistent search as-you-type functionality, which brought some extra challenges. But that’s what makes it interesting, right? I’ll discuss some of the difficulties we faced and how we dealt with them in the second half of this article.

Getting started
For the sake of simplicity, let’s use the official Gatsby blog starter. Using a generic starter lets us abstract many aspects of building a static website. If you’re following along, make sure to install and run it:
gatsby new gatsby-starter-blog https://github.com/gatsbyjs/gatsby-starter-blog cd gatsby-starter-blog gatsby develop
It’s a tiny blog with three posts we can view by opening up http://localhost:8000/___graphql in the browser.
Inverting index with Lunr.js 🙃
Lunr uses a record-level inverted index as its data structure. The inverted index stores the mapping for each word found within a website to its location (basically a set of page paths). It’s on us to decide which fields (e.g. title, content, description, etc.) provide the keys (words) for the index.
For our blog example, I decided to include all titles and the content of each article. Dealing with titles is straightforward since they are composed uniquely of words. Indexing content is a little more complex. My first try was to use the rawMarkdownBody field. Unfortunately, rawMarkdownBody introduces some unwanted keys resulting from the markdown syntax.

I obtained a “clean” index using the html field in conjunction with the striptags package (which, as the name suggests, strips out the HTML tags). Before we get into the details, let’s look into the Lunr documentation.
Here’s how we create and populate the Lunr index. We will use this snippet in a moment, specifically in our gatsby-node.js file.
const index = lunr(function () { this.ref('slug') this.field('title') this.field('content') for (const doc of documents) { this.add(doc) } })
documents is an array of objects, each with a slug, title and content property:
{ slug: '/post-slug/', title: 'Post Title', content: 'Post content with all HTML tags stripped out.' }
We will define a unique document key (the slug) and two fields (the title and content, or the key providers). Finally, we will add all of the documents, one by one.
Let’s get started.
Creating an index in gatsby-node.js
Let’s start by installing the libraries that we are going to use.
yarn add lunr graphql-type-json striptags
Next, we need to edit the gatsby-node.js file. The code from this file runs once in the process of building a site, and our aim is to add index creation to the tasks that Gatsby executes on build.
CreateResolvers is one of the Gatsby APIs controlling the GraphQL data layer. In this particular case, we will use it to create a new root field; Let’s call it LunrIndex.
Gatsby’s internal data store and query capabilities are exposed to GraphQL field resolvers on context.nodeModel. With getAllNodes, we can get all nodes of a specified type:
/* gatsby-node.js */ const { GraphQLJSONObject } = require(`graphql-type-json`) const striptags = require(`striptags`) const lunr = require(`lunr`) exports.createResolvers = ({ cache, createResolvers }) => { createResolvers({ Query: { LunrIndex: { type: GraphQLJSONObject, resolve: (source, args, context, info) => { const blogNodes = context.nodeModel.getAllNodes({ type: `MarkdownRemark`, }) const type = info.schema.getType(`MarkdownRemark`) return createIndex(blogNodes, type, cache) }, }, }, }) }
Now let’s focus on the createIndex function. That’s where we will use the Lunr snippet we mentioned in the last section.
/* gatsby-node.js */ const createIndex = async (blogNodes, type, cache) => { const documents = [] // Iterate over all posts for (const node of blogNodes) { const html = await type.getFields().html.resolve(node) // Once html is resolved, add a slug-title-content object to the documents array documents.push({ slug: node.fields.slug, title: node.frontmatter.title, content: striptags(html), }) } const index = lunr(function() { this.ref(`slug`) this.field(`title`) this.field(`content`) for (const doc of documents) { this.add(doc) } }) return index.toJSON() }
Have you noticed that instead of accessing the HTML element directly with const html = node.html, we’re using an await expression? That’s because node.html isn’t available yet. The gatsby-transformer-remark plugin (used by our starter to parse Markdown files) does not generate HTML from markdown immediately when creating the MarkdownRemark nodes. Instead, html is generated lazily when the html field resolver is called in a query. The same actually applies to the excerpt that we will need in just a bit.
Let’s look ahead and think about how we are going to display search results. Users expect to obtain a link to the matching post, with its title as the anchor text. Very likely, they wouldn’t mind a short excerpt as well.
Lunr’s search returns an array of objects representing matching documents by the ref property (which is the unique document key slug in our example). This array does not contain the document title nor the content. Therefore, we need to store somewhere the post title and excerpt corresponding to each slug. We can do that within our LunrIndex as below:
/* gatsby-node.js */ const createIndex = async (blogNodes, type, cache) => { const documents = [] const store = {} for (const node of blogNodes) { const {slug} = node.fields const title = node.frontmatter.title const [html, excerpt] = await Promise.all([ type.getFields().html.resolve(node), type.getFields().excerpt.resolve(node, { pruneLength: 40 }), ]) documents.push({ // unchanged }) store[slug] = { title, excerpt, } } const index = lunr(function() { // unchanged }) return { index: index.toJSON(), store } }
Our search index changes only if one of the posts is modified or a new post is added. We don’t need to rebuild the index each time we run gatsby develop. To avoid unnecessary builds, let’s take advantage of the cache API:
/* gatsby-node.js */ const createIndex = async (blogNodes, type, cache) => { const cacheKey = `IndexLunr` const cached = await cache.get(cacheKey) if (cached) { return cached } // unchanged const json = { index: index.toJSON(), store } await cache.set(cacheKey, json) return json }
Enhancing pages with the search form component
We can now move on to the front end of our implementation. Let’s start by building a search form component.
touch src/components/search-form.js
I opt for a straightforward solution: an input of type="search", coupled with a label and accompanied by a submit button, all wrapped within a form tag with the search landmark role.
We will add two event handlers, handleSubmit on form submit and handleChange on changes to the search input.
/* src/components/search-form.js */ import React, { useState, useRef } from "react" import { navigate } from "@reach/router" const SearchForm = ({ initialQuery = "" }) => { // Create a piece of state, and initialize it to initialQuery // query will hold the current value of the state, // and setQuery will let us change it const [query, setQuery] = useState(initialQuery) // We need to get reference to the search input element const inputEl = useRef(null) // On input change use the current value of the input field (e.target.value) // to update the state's query value const handleChange = e => { setQuery(e.target.value) } // When the form is submitted navigate to /search // with a query q paramenter equal to the value within the input search const handleSubmit = e => { e.preventDefault() // `inputEl.current` points to the mounted search input element const q = inputEl.current.value navigate(`/search?q=${q}`) } return ( <form role="search" onSubmit={handleSubmit}> <label htmlFor="search-input" style=> Search for: </label> <input ref={inputEl} id="search-input" type="search" value={query} placeholder="e.g. duck" onChange={handleChange} /> <button type="submit">Go</button> </form> ) } export default SearchForm
Have you noticed that we’re importing navigate from the @reach/router package? That is necessary since neither Gatsby’s <Link/> nor navigate provide in-route navigation with a query parameter. Instead, we can import @reach/router — there’s no need to install it since Gatsby already includes it — and use its navigate function.
Now that we’ve built our component, let’s add it to our home page (as below) and 404 page.
/* src/pages/index.js */ // unchanged import SearchForm from "../components/search-form" const BlogIndex = ({ data, location }) => { // unchanged return ( <Layout location={location} title={siteTitle}> <SEO title="All posts" /> <Bio /> <SearchForm /> // unchanged
Search results page
Our SearchForm component navigates to the /search route when the form is submitted, but for the moment, there is nothing behing this URL. That means we need to add a new page:
touch src/pages/search.js
I proceeded by copying and adapting the content of the the index.js page. One of the essential modifications concerns the page query (see the very bottom of the file). We will replace allMarkdownRemark with the LunrIndex field.
/* src/pages/search.js */ import React from "react" import { Link, graphql } from "gatsby" import { Index } from "lunr" import Layout from "../components/layout" import SEO from "../components/seo" import SearchForm from "../components/search-form"
// We can access the results of the page GraphQL query via the data props const SearchPage = ({ data, location }) => { const siteTitle = data.site.siteMetadata.title // We can read what follows the ?q= here // URLSearchParams provides a native way to get URL params // location.search.slice(1) gets rid of the "?" const params = new URLSearchParams(location.search.slice(1)) const q = params.get("q") || ""
// LunrIndex is available via page query const { store } = data.LunrIndex // Lunr in action here const index = Index.load(data.LunrIndex.index) let results = [] try { // Search is a lunr method results = index.search(q).map(({ ref }) => { // Map search results to an array of {slug, title, excerpt} objects return { slug: ref, ...store[ref], } }) } catch (error) { console.log(error) } return ( // We will take care of this part in a moment ) } export default SearchPage export const pageQuery = graphql` query { site { siteMetadata { title } } LunrIndex } `
Now that we know how to retrieve the query value and the matching posts, let’s display the content of the page. Notice that on the search page we pass the query value to the <SearchForm /> component via the initialQuery props. When the user arrives to the search results page, their search query should remain in the input field.
return ( <Layout location={location} title={siteTitle}> <SEO title="Search results" /> {q ? <h1>Search results</h1> : <h1>What are you looking for?</h1>} <SearchForm initialQuery={q} /> {results.length ? ( results.map(result => { return ( <article key={result.slug}> <h2> <Link to={result.slug}> {result.title || result.slug} </Link> </h2> <p>{result.excerpt}</p> </article> ) }) ) : ( <p>Nothing found.</p> )} </Layout> )
You can find the complete code in this gatsby-starter-blog fork and the live demo deployed on Netlify.
Instant search widget
Finding the most “logical” and user-friendly way of implementing search may be a challenge in and of itself. Let’s now switch to the real-life example of tartanify.com — a Gatsby-powered website gathering 5,000+ tartan patterns. Since tartans are often associated with clans or organizations, the possibility to search a tartan by name seems to make sense.
We built tartanify.com as a side project where we feel absolutely free to experiment with things. We didn’t want a classic search results page but an instant search “widget.” Often, a given search keyword corresponds with a number of results — for example, “Ramsay” comes in six variations. We imagined the search widget would be persistent, meaning it should stay in place when a user navigates from one matching tartan to another.
Let me show you how we made it work with Lunr. The first step of building the index is very similar to the gatsby-starter-blog example, only simpler:
/* gatsby-node.js */ exports.createResolvers = ({ cache, createResolvers }) => { createResolvers({ Query: { LunrIndex: { type: GraphQLJSONObject, resolve(source, args, context) { const siteNodes = context.nodeModel.getAllNodes({ type: `TartansCsv`, }) return createIndex(siteNodes, cache) }, }, }, }) } const createIndex = async (nodes, cache) => { const cacheKey = `LunrIndex` const cached = await cache.get(cacheKey) if (cached) { return cached } const store = {} const index = lunr(function() { this.ref(`slug`) this.field(`title`) for (node of nodes) { const { slug } = node.fields const doc = { slug, title: node.fields.Unique_Name, } store[slug] = { title: doc.title, } this.add(doc) } }) const json = { index: index.toJSON(), store } cache.set(cacheKey, json) return json }
We opted for instant search, which means that search is triggered by any change in the search input instead of a form submission.
/* src/components/searchwidget.js */ import React, { useState } from "react" import lunr, { Index } from "lunr" import { graphql, useStaticQuery } from "gatsby" import SearchResults from "./searchresults"
const SearchWidget = () => { const [value, setValue] = useState("") // results is now a state variable const [results, setResults] = useState([])
// Since it's not a page component, useStaticQuery for quering data // https://www.gatsbyjs.org/docs/use-static-query/ const { LunrIndex } = useStaticQuery(graphql` query { LunrIndex } `) const index = Index.load(LunrIndex.index) const { store } = LunrIndex const handleChange = e => { const query = e.target.value setValue(query) try { const search = index.search(query).map(({ ref }) => { return { slug: ref, ...store[ref], } }) setResults(search) } catch (error) { console.log(error) } } return ( <div className="search-wrapper"> // You can use a form tag as well, as long as we prevent the default submit behavior <div role="search"> <label htmlFor="search-input" className="visually-hidden"> Search Tartans by Name </label> <input id="search-input" type="search" value={value} onChange={handleChange} placeholder="Search Tartans by Name" /> </div> <SearchResults results={results} /> </div> ) } export default SearchWidget
The SearchResults are structured like this:
/* src/components/searchresults.js */ import React from "react" import { Link } from "gatsby" const SearchResults = ({ results }) => ( <div> {results.length ? ( <> <h2>{results.length} tartan(s) matched your query</h2> <ul> {results.map(result => ( <li key={result.slug}> <Link to={`/tartan/${result.slug}`}>{result.title}</Link> </li> ))} </ul> </> ) : ( <p>Sorry, no matches found.</p> )} </div> ) export default SearchResults
Making it persistent
Where should we use this component? We could add it to the Layout component. The problem is that our search form will get unmounted on page changes that way. If a user wants to browser all tartans associated with the “Ramsay” clan, they will have to retype their query several times. That’s not ideal.
Thomas Weibenfalk has written a great article on keeping state between pages with local state in Gatsby.js. We will use the same technique, where the wrapPageElement browser API sets persistent UI elements around pages.
Let’s add the following code to the gatsby-browser.js. You might need to add this file to the root of your project.
/* gatsby-browser.js */ import React from "react" import SearchWrapper from "./src/components/searchwrapper" export const wrapPageElement = ({ element, props }) => ( <SearchWrapper {...props}>{element}</SearchWrapper> )
Now let’s add a new component file:
touch src/components/searchwrapper.js
Instead of adding SearchWidget component to the Layout, we will add it to the SearchWrapper and the magic happens. ✨
/* src/components/searchwrapper.js */ import React from "react" import SearchWidget from "./searchwidget"
const SearchWrapper = ({ children }) => ( <> {children} <SearchWidget /> </> ) export default SearchWrapper
Creating a custom search query
At this point, I started to try different keywords but very quickly realized that Lunr’s default search query might not be the best solution when used for instant search.
Why? Imagine that we are looking for tartans associated with the name MacCallum. While typing “MacCallum” letter-by-letter, this is the evolution of the results:
m – 2 matches (Lyon, Jeffrey M, Lyon, Jeffrey M (Hunting))
ma – no matches
mac – 1 match (Brighton Mac Dermotte)
macc – no matches
macca – no matches
maccal – 1 match (MacCall)
maccall – 1 match (MacCall)
maccallu – no matches
maccallum – 3 matches (MacCallum, MacCallum #2, MacCallum of Berwick)
Users will probably type the full name and hit the button if we make a button available. But with instant search, a user is likely to abandon early because they may expect that the results can only narrow down letters are added to the keyword query.
That’s not the only problem. Here’s what we get with “Callum”:
c – 3 unrelated matches
ca – no matches
cal – no matches
call – no matches
callu – no matches
callum – one match
You can see the trouble if someone gives up halfway into typing the full query.
Fortunately, Lunr supports more complex queries, including fuzzy matches, wildcards and boolean logic (e.g. AND, OR, NOT) for multiple terms. All of these are available either via a special query syntax, for example:
index.search("+*callum mac*")
We could also reach for the index query method to handle it programatically.
The first solution is not satisfying since it requires more effort from the user. I used the index.query method instead:
/* src/components/searchwidget.js */ const search = index .query(function(q) { // full term matching q.term(el) // OR (default) // trailing or leading wildcard q.term(el, { wildcard: lunr.Query.wildcard.LEADING | lunr.Query.wildcard.TRAILING, }) }) .map(({ ref }) => { return { slug: ref, ...store[ref], } })
Why use full term matching with wildcard matching? That’s necessary for all keywords that “benefit” from the stemming process. For example, the stem of “different” is “differ.” As a consequence, queries with wildcards — such as differe*, differen* or different* — all result in no matches, while the full term queries differe, differen and different return matches.
Fuzzy matches can be used as well. In our case, they are allowed uniquely for terms of five or more characters:
q.term(el, { editDistance: el.length > 5 ? 1 : 0 }) q.term(el, { wildcard: lunr.Query.wildcard.LEADING | lunr.Query.wildcard.TRAILING, })
The handleChange function also “cleans up” user inputs and ignores single-character terms:
/* src/components/searchwidget.js */ const handleChange = e => { const query = e.target.value || "" setValue(query) if (!query.length) { setResults([]) } const keywords = query .trim() // remove trailing and leading spaces .replace(/\*/g, "") // remove user's wildcards .toLowerCase() .split(/\s+/) // split by whitespaces // do nothing if the last typed keyword is shorter than 2 if (keywords[keywords.length - 1].length < 2) { return } try { const search = index .query(function(q) { keywords // filter out keywords shorter than 2 .filter(el => el.length > 1) // loop over keywords .forEach(el => { q.term(el, { editDistance: el.length > 5 ? 1 : 0 }) q.term(el, { wildcard: lunr.Query.wildcard.LEADING | lunr.Query.wildcard.TRAILING, }) }) }) .map(({ ref }) => { return { slug: ref, ...store[ref], } }) setResults(search) } catch (error) { console.log(error) } }
Let’s check it in action:
m – pending
ma – 861 matches
mac – 600 matches
macc – 35 matches
macca – 12 matches
maccal – 9 matches
maccall – 9 matches
maccallu – 3 matches
maccallum – 3 matches
Searching for “Callum” works as well, resulting in four matches: Callum, MacCallum, MacCallum #2, and MacCallum of Berwick.
There is one more problem, though: multi-terms queries. Say, you’re looking for “Loch Ness.” There are two tartans associated with that term, but with the default OR logic, you get a grand total of 96 results. (There are plenty of other lakes in Scotland.)
I wound up deciding that an AND search would work better for this project. Unfortunately, Lunr does not support nested queries, and what we actually need is (keyword1 OR *keyword*) AND (keyword2 OR *keyword2*).
To overcome this, I ended up moving the terms loop outside the query method and intersecting the results per term. (By intersecting, I mean finding all slugs that appear in all of the per-single-keyword results.)
/* src/components/searchwidget.js */ try { // andSearch stores the intersection of all per-term results let andSearch = [] keywords .filter(el => el.length > 1) // loop over keywords .forEach((el, i) => { // per-single-keyword results const keywordSearch = index .query(function(q) { q.term(el, { editDistance: el.length > 5 ? 1 : 0 }) q.term(el, { wildcard: lunr.Query.wildcard.LEADING | lunr.Query.wildcard.TRAILING, }) }) .map(({ ref }) => { return { slug: ref, ...store[ref], } }) // intersect current keywordSearch with andSearch andSearch = i > 0 ? andSearch.filter(x => keywordSearch.some(el => el.slug === x.slug)) : keywordSearch }) setResults(andSearch) } catch (error) { console.log(error) }
The source code for tartanify.com is published on GitHub. You can see the complete implementation of the Lunr search there.
Final thoughts
Search is often a non-negotiable feature for finding content on a site. How important the search functionality actually is may vary from one project to another. Nevertheless, there is no reason to abandon it under the pretext that it does not tally with the static character of Jamstack websites. There are many possibilities. We’ve just discussed one of them.
And, paradoxically in this specific example, the result was a better all-around user experience, thanks to the fact that implementing search was not an obvious task but instead required a lot of deliberation. We may not have been able to say the same with an over-the-counter solution.
The post How to Add Lunr Search to your Gatsby Website appeared first on CSS-Tricks.
How to Add Lunr Search to your Gatsby Website published first on https://deskbysnafu.tumblr.com/
0 notes
Text
How to Add Lunr Search to your Gatsby Website
The Jamstack way of thinking and building websites is becoming more and more popular.
Have you already tried Gatsby, Nuxt, or Gridsome (to cite only a few)? Chances are that your first contact was a “Wow!” moment — so many things are automatically set up and ready to use.
There are some challenges, though, one of which is search functionality. If you’re working on any sort of content-driven site, you’ll likely run into search and how to handle it. Can it be done without any external server-side technology?
Search is not one of those things that come out of the box with Jamstack. Some extra decisions and implementation are required.
Fortunately, we have a bunch of options that might be more or less adapted to a project. We could use Algolia’s powerful search-as-service API. It comes with a free plan that is restricted to non-commercial projects with a limited capacity. If we were to use WordPress with WPGraphQL as a data source, we could take advantage of WordPress native search functionality and Apollo Client. Raymond Camden recently explored a few Jamstack search options, including pointing a search form directly at Google.
In this article, we will build a search index and add search functionality to a Gatsby website with Lunr, a lightweight JavaScript library providing an extensible and customizable search without the need for external, server-side services. We used it recently to add “Search by Tartan Name” to our Gatsby project tartanify.com. We absolutely wanted persistent search as-you-type functionality, which brought some extra challenges. But that’s what makes it interesting, right? I’ll discuss some of the difficulties we faced and how we dealt with them in the second half of this article.

Getting started
For the sake of simplicity, let’s use the official Gatsby blog starter. Using a generic starter lets us abstract many aspects of building a static website. If you’re following along, make sure to install and run it:
gatsby new gatsby-starter-blog https://github.com/gatsbyjs/gatsby-starter-blog cd gatsby-starter-blog gatsby develop
It’s a tiny blog with three posts we can view by opening up http://localhost:8000/___graphql in the browser.

Inverting index with Lunr.js

Lunr uses a record-level inverted index as its data structure. The inverted index stores the mapping for each word found within a website to its location (basically a set of page paths). It’s on us to decide which fields (e.g. title, content, description, etc.) provide the keys (words) for the index.
For our blog example, I decided to include all titles and the content of each article. Dealing with titles is straightforward since they are composed uniquely of words. Indexing content is a little more complex. My first try was to use the rawMarkdownBody field. Unfortunately, rawMarkdownBody introduces some unwanted keys resulting from the markdown syntax.

I obtained a “clean” index using the html field in conjunction with the striptags package (which, as the name suggests, strips out the HTML tags). Before we get into the details, let’s look into the Lunr documentation.
Here’s how we create and populate the Lunr index. We will use this snippet in a moment, specifically in our gatsby-node.js file.
const index = lunr(function () { this.ref('slug') this.field('title') this.field('content') for (const doc of documents) { this.add(doc) } })
documents is an array of objects, each with a slug, title and content property:
{ slug: '/post-slug/', title: 'Post Title', content: 'Post content with all HTML tags stripped out.' }
We will define a unique document key (the slug) and two fields (the title and content, or the key providers). Finally, we will add all of the documents, one by one.
Let’s get started.
Creating an index in gatsby-node.js
Let’s start by installing the libraries that we are going to use.
yarn add lunr graphql-type-json striptags
Next, we need to edit the gatsby-node.js file. The code from this file runs once in the process of building a site, and our aim is to add index creation to the tasks that Gatsby executes on build.
CreateResolvers is one of the Gatsby APIs controlling the GraphQL data layer. In this particular case, we will use it to create a new root field; Let’s call it LunrIndex.
Gatsby’s internal data store and query capabilities are exposed to GraphQL field resolvers on context.nodeModel. With getAllNodes, we can get all nodes of a specified type:
/* gatsby-node.js */ const { GraphQLJSONObject } = require(`graphql-type-json`) const striptags = require(`striptags`) const lunr = require(`lunr`) exports.createResolvers = ({ cache, createResolvers }) => { createResolvers({ Query: { LunrIndex: { type: GraphQLJSONObject, resolve: (source, args, context, info) => { const blogNodes = context.nodeModel.getAllNodes({ type: `MarkdownRemark`, }) const type = info.schema.getType(`MarkdownRemark`) return createIndex(blogNodes, type, cache) }, }, }, }) }
Now let’s focus on the createIndex function. That’s where we will use the Lunr snippet we mentioned in the last section.
/* gatsby-node.js */ const createIndex = async (blogNodes, type, cache) => { const documents = [] // Iterate over all posts for (const node of blogNodes) { const html = await type.getFields().html.resolve(node) // Once html is resolved, add a slug-title-content object to the documents array documents.push({ slug: node.fields.slug, title: node.frontmatter.title, content: striptags(html), }) } const index = lunr(function() { this.ref(`slug`) this.field(`title`) this.field(`content`) for (const doc of documents) { this.add(doc) } }) return index.toJSON() }
Have you noticed that instead of accessing the HTML element directly with const html = node.html, we’re using an await expression? That’s because node.html isn’t available yet. The gatsby-transformer-remark plugin (used by our starter to parse Markdown files) does not generate HTML from markdown immediately when creating the MarkdownRemark nodes. Instead, html is generated lazily when the html field resolver is called in a query. The same actually applies to the excerpt that we will need in just a bit.
Let’s look ahead and think about how we are going to display search results. Users expect to obtain a link to the matching post, with its title as the anchor text. Very likely, they wouldn’t mind a short excerpt as well.
Lunr’s search returns an array of objects representing matching documents by the ref property (which is the unique document key slug in our example). This array does not contain the document title nor the content. Therefore, we need to store somewhere the post title and excerpt corresponding to each slug. We can do that within our LunrIndex as below:
/* gatsby-node.js */ const createIndex = async (blogNodes, type, cache) => { const documents = [] const store = {} for (const node of blogNodes) { const {slug} = node.fields const title = node.frontmatter.title const [html, excerpt] = await Promise.all([ type.getFields().html.resolve(node), type.getFields().excerpt.resolve(node, { pruneLength: 40 }), ]) documents.push({ // unchanged }) store[slug] = { title, excerpt, } } const index = lunr(function() { // unchanged }) return { index: index.toJSON(), store } }
Our search index changes only if one of the posts is modified or a new post is added. We don’t need to rebuild the index each time we run gatsby develop. To avoid unnecessary builds, let’s take advantage of the cache API:
/* gatsby-node.js */ const createIndex = async (blogNodes, type, cache) => { const cacheKey = `IndexLunr` const cached = await cache.get(cacheKey) if (cached) { return cached } // unchanged const json = { index: index.toJSON(), store } await cache.set(cacheKey, json) return json }
Enhancing pages with the search form component
We can now move on to the front end of our implementation. Let’s start by building a search form component.
touch src/components/search-form.js
I opt for a straightforward solution: an input of type="search", coupled with a label and accompanied by a submit button, all wrapped within a form tag with the search landmark role.
We will add two event handlers, handleSubmit on form submit and handleChange on changes to the search input.
/* src/components/search-form.js */ import React, { useState, useRef } from "react" import { navigate } from "@reach/router" const SearchForm = ({ initialQuery = "" }) => { // Create a piece of state, and initialize it to initialQuery // query will hold the current value of the state, // and setQuery will let us change it const [query, setQuery] = useState(initialQuery) // We need to get reference to the search input element const inputEl = useRef(null) // On input change use the current value of the input field (e.target.value) // to update the state's query value const handleChange = e => { setQuery(e.target.value) } // When the form is submitted navigate to /search // with a query q paramenter equal to the value within the input search const handleSubmit = e => { e.preventDefault() // `inputEl.current` points to the mounted search input element const q = inputEl.current.value navigate(`/search?q=${q}`) } return ( <form role="search" onSubmit={handleSubmit}> <label htmlFor="search-input" style=> Search for: </label> <input ref={inputEl} id="search-input" type="search" value={query} placeholder="e.g. duck" onChange={handleChange} /> <button type="submit">Go</button> </form> ) } export default SearchForm
Have you noticed that we’re importing navigate from the @reach/router package? That is necessary since neither Gatsby’s <Link/> nor navigate provide in-route navigation with a query parameter. Instead, we can import @reach/router — there’s no need to install it since Gatsby already includes it — and use its navigate function.
Now that we’ve built our component, let’s add it to our home page (as below) and 404 page.
/* src/pages/index.js */ // unchanged import SearchForm from "../components/search-form" const BlogIndex = ({ data, location }) => { // unchanged return ( <Layout location={location} title={siteTitle}> <SEO title="All posts" /> <Bio /> <SearchForm /> // unchanged
Search results page
Our SearchForm component navigates to the /search route when the form is submitted, but for the moment, there is nothing behing this URL. That means we need to add a new page:
touch src/pages/search.js
I proceeded by copying and adapting the content of the the index.js page. One of the essential modifications concerns the page query (see the very bottom of the file). We will replace allMarkdownRemark with the LunrIndex field.
/* src/pages/search.js */ import React from "react" import { Link, graphql } from "gatsby" import { Index } from "lunr" import Layout from "../components/layout" import SEO from "../components/seo" import SearchForm from "../components/search-form"
// We can access the results of the page GraphQL query via the data props const SearchPage = ({ data, location }) => { const siteTitle = data.site.siteMetadata.title // We can read what follows the ?q= here // URLSearchParams provides a native way to get URL params // location.search.slice(1) gets rid of the "?" const params = new URLSearchParams(location.search.slice(1)) const q = params.get("q") || ""
// LunrIndex is available via page query const { store } = data.LunrIndex // Lunr in action here const index = Index.load(data.LunrIndex.index) let results = [] try { // Search is a lunr method results = index.search(q).map(({ ref }) => { // Map search results to an array of {slug, title, excerpt} objects return { slug: ref, ...store[ref], } }) } catch (error) { console.log(error) } return ( // We will take care of this part in a moment ) } export default SearchPage export const pageQuery = graphql` query { site { siteMetadata { title } } LunrIndex } `
Now that we know how to retrieve the query value and the matching posts, let’s display the content of the page. Notice that on the search page we pass the query value to the <SearchForm /> component via the initialQuery props. When the user arrives to the search results page, their search query should remain in the input field.
return ( <Layout location={location} title={siteTitle}> <SEO title="Search results" /> {q ? <h1>Search results</h1> : <h1>What are you looking for?</h1>} <SearchForm initialQuery={q} /> {results.length ? ( results.map(result => { return ( <article key={result.slug}> <h2> <Link to={result.slug}> {result.title || result.slug} </Link> </h2> <p>{result.excerpt}</p> </article> ) }) ) : ( <p>Nothing found.</p> )} </Layout> )
You can find the complete code in this gatsby-starter-blog fork and the live demo deployed on Netlify.
Instant search widget
Finding the most “logical” and user-friendly way of implementing search may be a challenge in and of itself. Let’s now switch to the real-life example of tartanify.com — a Gatsby-powered website gathering 5,000+ tartan patterns. Since tartans are often associated with clans or organizations, the possibility to search a tartan by name seems to make sense.
We built tartanify.com as a side project where we feel absolutely free to experiment with things. We didn’t want a classic search results page but an instant search “widget.” Often, a given search keyword corresponds with a number of results — for example, “Ramsay” comes in six variations. We imagined the search widget would be persistent, meaning it should stay in place when a user navigates from one matching tartan to another.
Let me show you how we made it work with Lunr. The first step of building the index is very similar to the gatsby-starter-blog example, only simpler:
/* gatsby-node.js */ exports.createResolvers = ({ cache, createResolvers }) => { createResolvers({ Query: { LunrIndex: { type: GraphQLJSONObject, resolve(source, args, context) { const siteNodes = context.nodeModel.getAllNodes({ type: `TartansCsv`, }) return createIndex(siteNodes, cache) }, }, }, }) } const createIndex = async (nodes, cache) => { const cacheKey = `LunrIndex` const cached = await cache.get(cacheKey) if (cached) { return cached } const store = {} const index = lunr(function() { this.ref(`slug`) this.field(`title`) for (node of nodes) { const { slug } = node.fields const doc = { slug, title: node.fields.Unique_Name, } store[slug] = { title: doc.title, } this.add(doc) } }) const json = { index: index.toJSON(), store } cache.set(cacheKey, json) return json }
We opted for instant search, which means that search is triggered by any change in the search input instead of a form submission.
/* src/components/searchwidget.js */ import React, { useState } from "react" import lunr, { Index } from "lunr" import { graphql, useStaticQuery } from "gatsby" import SearchResults from "./searchresults"
const SearchWidget = () => { const [value, setValue] = useState("") // results is now a state variable const [results, setResults] = useState([])
// Since it's not a page component, useStaticQuery for quering data // https://www.gatsbyjs.org/docs/use-static-query/ const { LunrIndex } = useStaticQuery(graphql` query { LunrIndex } `) const index = Index.load(LunrIndex.index) const { store } = LunrIndex const handleChange = e => { const query = e.target.value setValue(query) try { const search = index.search(query).map(({ ref }) => { return { slug: ref, ...store[ref], } }) setResults(search) } catch (error) { console.log(error) } } return ( <div className="search-wrapper"> // You can use a form tag as well, as long as we prevent the default submit behavior <div role="search"> <label htmlFor="search-input" className="visually-hidden"> Search Tartans by Name </label> <input id="search-input" type="search" value={value} onChange={handleChange} placeholder="Search Tartans by Name" /> </div> <SearchResults results={results} /> </div> ) } export default SearchWidget
The SearchResults are structured like this:
/* src/components/searchresults.js */ import React from "react" import { Link } from "gatsby" const SearchResults = ({ results }) => ( <div> {results.length ? ( <> <h2>{results.length} tartan(s) matched your query</h2> <ul> {results.map(result => ( <li key={result.slug}> <Link to={`/tartan/${result.slug}`}>{result.title}</Link> </li> ))} </ul> </> ) : ( <p>Sorry, no matches found.</p> )} </div> ) export default SearchResults
Making it persistent
Where should we use this component? We could add it to the Layout component. The problem is that our search form will get unmounted on page changes that way. If a user wants to browser all tartans associated with the “Ramsay” clan, they will have to retype their query several times. That’s not ideal.
Thomas Weibenfalk has written a great article on keeping state between pages with local state in Gatsby.js. We will use the same technique, where the wrapPageElement browser API sets persistent UI elements around pages.
Let’s add the following code to the gatsby-browser.js. You might need to add this file to the root of your project.
/* gatsby-browser.js */ import React from "react" import SearchWrapper from "./src/components/searchwrapper" export const wrapPageElement = ({ element, props }) => ( <SearchWrapper {...props}>{element}</SearchWrapper> )
Now let’s add a new component file:
touch src/components/searchwrapper.js
Instead of adding SearchWidget component to the Layout, we will add it to the SearchWrapper and the magic happens.

/* src/components/searchwrapper.js */ import React from "react" import SearchWidget from "./searchwidget"
const SearchWrapper = ({ children }) => ( <> {children} <SearchWidget /> </> ) export default SearchWrapper
Creating a custom search query
At this point, I started to try different keywords but very quickly realized that Lunr’s default search query might not be the best solution when used for instant search.
Why? Imagine that we are looking for tartans associated with the name MacCallum. While typing “MacCallum” letter-by-letter, this is the evolution of the results:
m – 2 matches (Lyon, Jeffrey M, Lyon, Jeffrey M (Hunting))
ma – no matches
mac – 1 match (Brighton Mac Dermotte)
macc – no matches
macca – no matches
maccal – 1 match (MacCall)
maccall – 1 match (MacCall)
maccallu – no matches
maccallum – 3 matches (MacCallum, MacCallum #2, MacCallum of Berwick)
Users will probably type the full name and hit the button if we make a button available. But with instant search, a user is likely to abandon early because they may expect that the results can only narrow down letters are added to the keyword query.
That’s not the only problem. Here’s what we get with “Callum”:
c – 3 unrelated matches
ca – no matches
cal – no matches
call – no matches
callu – no matches
callum – one match
You can see the trouble if someone gives up halfway into typing the full query.
Fortunately, Lunr supports more complex queries, including fuzzy matches, wildcards and boolean logic (e.g. AND, OR, NOT) for multiple terms. All of these are available either via a special query syntax, for example:
index.search("+*callum mac*")
We could also reach for the index query method to handle it programatically.
The first solution is not satisfying since it requires more effort from the user. I used the index.query method instead:
/* src/components/searchwidget.js */ const search = index .query(function(q) { // full term matching q.term(el) // OR (default) // trailing or leading wildcard q.term(el, { wildcard: lunr.Query.wildcard.LEADING | lunr.Query.wildcard.TRAILING, }) }) .map(({ ref }) => { return { slug: ref, ...store[ref], } })
Why use full term matching with wildcard matching? That’s necessary for all keywords that “benefit” from the stemming process. For example, the stem of “different” is “differ.” As a consequence, queries with wildcards — such as differe*, differen* or different* — all result in no matches, while the full term queries differe, differen and different return matches.
Fuzzy matches can be used as well. In our case, they are allowed uniquely for terms of five or more characters:
q.term(el, { editDistance: el.length > 5 ? 1 : 0 }) q.term(el, { wildcard: lunr.Query.wildcard.LEADING | lunr.Query.wildcard.TRAILING, })
The handleChange function also “cleans up” user inputs and ignores single-character terms:
/* src/components/searchwidget.js */ const handleChange = e => { const query = e.target.value || "" setValue(query) if (!query.length) { setResults([]) } const keywords = query .trim() // remove trailing and leading spaces .replace(/\*/g, "") // remove user's wildcards .toLowerCase() .split(/\s+/) // split by whitespaces // do nothing if the last typed keyword is shorter than 2 if (keywords[keywords.length - 1].length < 2) { return } try { const search = index .query(function(q) { keywords // filter out keywords shorter than 2 .filter(el => el.length > 1) // loop over keywords .forEach(el => { q.term(el, { editDistance: el.length > 5 ? 1 : 0 }) q.term(el, { wildcard: lunr.Query.wildcard.LEADING | lunr.Query.wildcard.TRAILING, }) }) }) .map(({ ref }) => { return { slug: ref, ...store[ref], } }) setResults(search) } catch (error) { console.log(error) } }
Let’s check it in action:
m – pending
ma – 861 matches
mac – 600 matches
macc – 35 matches
macca – 12 matches
maccal – 9 matches
maccall – 9 matches
maccallu – 3 matches
maccallum – 3 matches
Searching for “Callum” works as well, resulting in four matches: Callum, MacCallum, MacCallum #2, and MacCallum of Berwick.
There is one more problem, though: multi-terms queries. Say, you’re looking for “Loch Ness.” There are two tartans associated with that term, but with the default OR logic, you get a grand total of 96 results. (There are plenty of other lakes in Scotland.)
I wound up deciding that an AND search would work better for this project. Unfortunately, Lunr does not support nested queries, and what we actually need is (keyword1 OR *keyword*) AND (keyword2 OR *keyword2*).
To overcome this, I ended up moving the terms loop outside the query method and intersecting the results per term. (By intersecting, I mean finding all slugs that appear in all of the per-single-keyword results.)
/* src/components/searchwidget.js */ try { // andSearch stores the intersection of all per-term results let andSearch = [] keywords .filter(el => el.length > 1) // loop over keywords .forEach((el, i) => { // per-single-keyword results const keywordSearch = index .query(function(q) { q.term(el, { editDistance: el.length > 5 ? 1 : 0 }) q.term(el, { wildcard: lunr.Query.wildcard.LEADING | lunr.Query.wildcard.TRAILING, }) }) .map(({ ref }) => { return { slug: ref, ...store[ref], } }) // intersect current keywordSearch with andSearch andSearch = i > 0 ? andSearch.filter(x => keywordSearch.some(el => el.slug === x.slug)) : keywordSearch }) setResults(andSearch) } catch (error) { console.log(error) }
The source code for tartanify.com is published on GitHub. You can see the complete implementation of the Lunr search there.
Final thoughts
Search is often a non-negotiable feature for finding content on a site. How important the search functionality actually is may vary from one project to another. Nevertheless, there is no reason to abandon it under the pretext that it does not tally with the static character of Jamstack websites. There are many possibilities. We’ve just discussed one of them.
And, paradoxically in this specific example, the result was a better all-around user experience, thanks to the fact that implementing search was not an obvious task but instead required a lot of deliberation. We may not have been able to say the same with an over-the-counter solution.
The post How to Add Lunr Search to your Gatsby Website appeared first on CSS-Tricks.
source https://css-tricks.com/how-to-add-lunr-search-to-your-gatsby-website/
from WordPress https://ift.tt/3eKOx2M via IFTTT
0 notes
Text
How To Build Your Own Comment System Using Firebase
How To Build Your Own Comment System Using Firebase
Aman Thakur
2020-08-24T10:30:00+00:00 2020-08-24T12:31:29+00:00
A comments section is a great way to build a community for your blog. Recently when I started blogging, I thought of adding a comments section. However, it wasn’t easy. Hosted comments systems, such as Disqus and Commento, come with their own set of problems:
They own your data.
They are not free.
You cannot customize them much.
So, I decided to build my own comments system. Firebase seemed like a perfect hosting alternative to running a back-end server.
First of all, you get all of the benefits of having your own database: You control the data, and you can structure it however you want. Secondly, you don’t need to set up a back-end server. You can easily control it from the front end. It’s like having the best of both worlds: a hosted system without the hassle of a back end.
In this post, that’s what we’ll do. We will learn how to set up Firebase with Gatsby, a static site generator. But the principles can be applied to any static site generator.
Let’s dive in!
What Is Firebase?
Firebase is a back end as a service that offers tools for app developers such as database, hosting, cloud functions, authentication, analytics, and storage.
Cloud Firestore (Firebase’s database) is the functionality we will be using for this project. It is a NoSQL database. This means it’s not structured like a SQL database with rows, columns, and tables. You can think of it as a large JSON tree.
Introduction to the Project
Let’s initialize the project by cloning or downloading the repository from GitHub.
I’ve created two branches for every step (one at the beginning and one at the end) to make it easier for you to track the changes as we go.
Let’s run the project using the following command:
gatsby develop
If you open the project in your browser, you will see the bare bones of a basic blog.
(Large preview)
The comments section is not working. It is simply loading a sample comment, and, upon the comment’s submission, it logs the details to the console.
Our main task is to get the comments section working.
How the Comments Section Works
Before doing anything, let’s understand how the code for the comments section works.
Four components are handling the comments sections:
blog-post.js
Comments.js
CommentForm.js
Comment.js
First, we need to identify the comments for a post. This can be done by making a unique ID for each blog post, or we can use the slug, which is always unique.
The blog-post.js file is the layout component for all blog posts. It is the perfect entry point for getting the slug of a blog post. This is done using a GraphQL query.
export const query = graphql` query($slug: String!) { markdownRemark(fields: { slug: { eq: $slug } }) { html frontmatter { title } fields { slug } } } `
Before sending it over to the Comments.js component, let’s use the substring() method to get rid of the trailing slash (/) that Gatsby adds to the slug.
const slug = post.fields.slug.substring(1, post.fields.slug.length - 1) return ( ) }
The Comments.js component maps each comment and passes its data over to Comment.js, along with any replies. For this project, I have decided to go one level deep with the commenting system.
The component also loads CommentForm.js to capture any top-level comments.
const Comments = ({ comments, slug }) => { return (
Join the discussion
) }
Let’s move over to CommentForm.js. This file is simple, rendering a comment form and handling its submission. The submission method simply logs the details to the console.
const handleCommentSubmission = async e => { e. preventDefault() let comment = { name: name, content: content, pId: parentId ∣∣ null, time: new Date(), } setName("") setContent("") console.log(comment) }
The Comment.js file has a lot going on. Let’s break it down into smaller pieces.
First, there is a SingleComment component, which renders a comment.
I am using the Adorable API to get a cool avatar. The Moment.js library is used to render time in a human-readable format.
const SingleComment = ({ comment }) => (
{comment.name} says
{comment.time} &&((moment(comment.time.toDate()).calendar()})}
{comment.content}
)
Next in the file is the Comment component. This component shows a child comment if any child comment was passed to it. Otherwise, it renders a reply box, which can be toggled on and off by clicking the “Reply” button or “Cancel Reply” button.
const Comment = ({ comment, child, slug }) => { const [showReplyBox, setShowReplyBox] = useState(false) return (
Now that we have an overview, let’s go through the steps of making our comments section.
1. Add Firebase
First, let’s set up Firebase for our project.
Start by signing up. Go to Firebase, and sign up for a Google account. If you don’t have one, then click “Get Started”.
Click on “Add Project” to add a new project. Add a name for your project, and click “Create a project”.
(Large preview)
Once we have created a project, we’ll need to set up Cloud Firestore.
In the left-side menu, click “Database”. Once a page opens saying “Cloud Firestore”, click “Create database” to create a new Cloud Firestore database.
(Large preview)
When the popup appears, choose “Start in test mode”. Next, pick the Cloud Firestore location closest to you.
(Large preview)
Once you see a page like this, it means you’ve successfully created your Cloud Firestore database.
(Large preview)
Let’s finish by setting up the logic for the application. Go back to the application and install Firebase:
yarn add firebase
Add a new file, firebase.js, in the root directory. Paste this content in it:
import firebase from "firebase/app" import "firebase/firestore" var firebaseConfig = 'yourFirebaseConfig' firebase.initializeApp(firebaseConfig) export const firestore = firebase.firestore() export default firebase
You’ll need to replace yourFirebaseConfig with the one for your project. To find it, click on the gear icon next to “Project Overview” in the Firebase app.
(Large preview)
This opens up the settings page. Under your app’s subheading, click the web icon, which looks like this:
(Large preview)
This opens a popup. In the “App nickname” field, enter any name, and click “Register app”. This will give your firebaseConfig object.
Copy just the contents of the firebaseConfig object, and paste it in the firebase.js file.
Is It OK to Expose Your Firebase API Key?
Yes. As stated by a Google engineer, exposing your API key is OK.
The only purpose of the API key is to identify your project with the database at Google. If you have set strong security rules for Cloud Firestore, then you don’t need to worry if someone gets ahold of your API key.
We’ll talk about security rules in the last section.
For now, we are running Firestore in test mode, so you should not reveal the API key to the public.
How to Use Firestore?
You can store data in one of two types:
collection A collection contains documents. It is like an array of documents.
document A document contains data in a field-value pair.
Remember that a collection may contain only documents and not other collections. But a document may contain other collections.
This means that if we want to store a collection within a collection, then we would store the collection in a document and store that document in a collection, like so:
{collection-1}/{document}/{collection-2}
How to Structure the Data?
Cloud Firestore is hierarchical in nature, so people tend to store data like this:
blog/{blog-post-1}/content/comments/{comment-1}
But storing data in this way often introduces problems.
Say you want to get a comment. You’ll have to look for the comment stored deep inside the blog collection. This will make your code more error-prone. Chris Esplin recommends never using sub-collections.
I would recommend storing data as a flattened object:
blog-posts/{blog-post-1} comments/{comment-1}
This way, you can get and send data easily.
How to Get Data From Firestore?
To get data, Firebase gives you two methods:
get() This is for getting the content once.
onSnapshot() This method sends you data and then continues to send updates unless you unsubscribe.
How to Send Data to Firestore?
Just like with getting data, Firebase has two methods for saving data:
set() This is used to specify the ID of a document.
add() This is used to create documents with automatic IDs.
I know, this has been a lot to grasp. But don’t worry, we’ll revisit these concepts again when we reach the project.
2. Create Sample Date
The next step is to create some sample data for us to query. Let’s do this by going to Firebase.
Go to Cloud Firestore. Click “Start a collection”. Enter comments for the “Collection ID”, then click “Next”.
(Large preview)
For the “Document ID”, click “Auto-ID. Enter the following data and click “Save”.
(Large preview)
While you’re entering data, make sure the “Fields” and “Types” match the screenshot above. Then, click “Save”.
That’s how you add a comment manually in Firestore. The process looks cumbersome, but don’t worry: From now on, our app will take care of adding comments.
At this point, our database looks like this: comments/{comment}.
3. Get the Comments Data
Our sample data is ready to query. Let’s get started by getting the data for our blog.
Go to blog-post.js, and import the Firestore from the Firebase file that we just created.
import {firestore} from "../../firebase.js"
To query, we will use the useEffect hook from React. If you haven’t already, let’s import it as well.
useEffect(() => { firestore .collection(`comments`) .onSnapshot(snapshot => { const posts = snapshot.docs .filter(doc => doc.data().slug === slug) .map(doc => { return { id: doc.id, ...doc.data() } }) setComments(posts) }) }, [slug])
The method used to get data is onSnapshot. This is because we also want to listen to state changes. So, the comments will get updated without the user having to refresh the browser.
We used the filter and map methods to find the comments whose slug matches the current slug.
One last thing we need to think about is cleanup. Because onSnapshot continues to send updates, this could introduce a memory leak in our application. Fortunately, Firebase provides a neat fix.
useEffect(() => { const cleanUp = firestore .doc(`comments/${slug}`) .collection("comments") .onSnapshot(snapshot => { const posts = snapshot.docs.map(doc => { return { id: doc.id, ...doc.data() } }) setComments(posts) }) return () => cleanUp() }, [slug])
Once you’re done, run gatsby develop to see the changes. We can now see our comments section getting data from Firebase.
(Large preview)
Let’s work on storing the comments.
4. Store Comments
To store comments, navigate to the CommentForm.js file. Let’s import Firestore into this file as well.
import { firestore } from "../../firebase.js"
To save a comment to Firebase, we’ll use the add() method, because we want Firestore to create documents with an auto-ID.
Let’s do that in the handleCommentSubmission method.
firestore .collection(`comments`) .add(comment) .catch(err => { console.error('error adding comment: ', err) })
First, we get the reference to the comments collection, and then add the comment. We’re also using the catch method to catch any errors while adding comments.
At this point, if you open a browser, you can see the comments section working. We can add new comments, as well as post replies. What’s more amazing is that everything works without our having to refresh the page.
(Large preview)
You can also check Firestore to see that it is storing the data.
(Large preview)
Finally, let’s talk about one crucial thing in Firebase: security rules.
5. Tighten Security Rules
Until now, we’ve been running Cloud Firestore in test mode. This means that anybody with access to the URL can add to and read our database. That is scary.
To tackle that, Firebase provides us with security rules. We can create a database pattern and restrict certain activities in Cloud Firestore.
In addition to the two basic operations (read and write), Firebase offers more granular operations: get, list, create, update, and delete.
A read operation can be broken down as:
get Get a single document.
list Get a list of documents or a collection.
A write operation can be broken down as:
create Create a new document.
update Update an existing document.
delete Delete a document.
To secure the application, head back to Cloud Firestore. Under “Rules”, enter this:
service cloud.firestore { match /databases/{database}/documents { match /comments/{id=**} { allow read, create; } } }
On the first line, we define the service, which, in our case, is Firestore. The next lines tell Firebase that anything inside the comments collection may be read and created.
If we had used this:
allow read, write;
… that would mean that users could update and delete existing comments, which we don’t want.
Firebase’s security rules are extremely powerful, allowing us to restrict certain data, activities, and even users.
On To Building Your Own Comments Section
Congrats! You have just seen the power of Firebase. It is such an excellent tool to build secure and fast applications.
We’ve built a super-simple comments section. But there’s no stopping you from exploring further possibilities:
Add profile pictures, and store them in Cloud Storage for Firebase;
Use Firebase to allow users to create an account, and authenticate them using Firebase authentication;
Use Firebase to create inline Medium-like comments.
A great way to start would be to head over to Firestore’s documentation.
Finally, let’s head over to the comments section below and discuss your experience with building a comments section using Firebase.
Smashing Newsletter
Every week, we send out useful front-end & UX techniques. Subscribe and get the Smart Interface Design Checklists PDF delivered to your inbox.
Front-end, design and UX. Sent 2× a month. You can always unsubscribe with just one click.
(ra, yk, al, il)
via Articles on Smashing Magazine — For Web Designers And Developers https://ift.tt/3hBcASM
0 notes
Text
From Static Sites To End User JAMstack Apps With FaunaDB
About The Author
Bryan is a designer, developer, and educator with a passion for CSS and static sites. He actively works to mentor and teach developers and designers the value … More about Bryan Robinson …
To make the move from “site” to app, we’ll need to dive into the world of “app-generated” content. In this article, we’ll get started in this world with the power of serverless data. We’ll start with a simple demo by ingesting and posting data to FaunaDB and then extend that functionality in a full-fledged application using Auth0, FaunaDB’s Token system and User-Defined Functions.
The JAMstack has proven itself to be one of the top ways of producing content-driven sites, but it’s also a great place to house applications, as well. If you’ve been using the JAMstack for your performant websites, the demos in this article will help you extend those philosophies to applications as well.
When using the JAMstack to build applications, you need a data service that fits into the most important aspects of the JAMstack philosophy:
Global distribution
Zero operational needs
A developer-friendly API.
In the JAMstack ecosystem there are plenty of software-as-a-service companies that provide ways of getting and storing specific types of data. Whether you want to send emails, SMS or make phone calls (Twilio) or accept form submissions efficiently (Formspree, Formingo, Formstack, etc.), it seems there’s an API for almost everything.
These are great services that can do a lot of the low-level work of many applications, but once your data is more complex than a spreadsheet or needs to be updated and store in real-time, it might be time to look into a database.
The service API can still be in use, but a central database managing the state and operations of your app becomes much more important. Even if you need a database, you still want it to follow the core JAMstack philosophies we outlined above. That means, we don’t want to host our own database server. We need a Database-as-a-Service solution. Our database needs to be optimized for the JAMstack:
Optimized for API calls from a browser or build process.
Flexible to model your data in the specific ways your app needs.
Global distribution of our data like a CDN houses our sites.
Hands-free scaling with no need of a database administrator or developer intervention.
Whatever service you look into needs to follow these tenets of serverless data. In our demos, we’ll explore FaunaDB, a global serverless database, featuring native GraphQL to assure that we keep our apps in step with the philosophies of the JAMstack.
Let’s dive into the code!
A JAMstack Guestbook App With Gatsby And Fauna
I’m a big fan of reimagining the internet tools and concepts of the 1990s and early 2000s. We can take these concepts and make them feel fresh with the new set of tools and interactions.
A look at the app we’re creating. A signature form with a signature list below. The form will populate a FaunaDB database and that database will create the view list. (Large preview)
In this demo, we’ll create an application that was all the rage in that time period: the guestbook. A guestbook is nothing but app-generated content and interaction. A user can come to the site, see all the signatures of past “guests” and then leave their own.
To start, we’ll statically render our site and build our data from Fauna during our build step. This will provide the fast performance we expect from a JAMstack site. To do this, we’ll use GatsbyJS.
Initial setup
Our first step will be to install Gatsby globally on our computer. If you’ve never spent much time in the command line, Gatsby’s “part 0” tutorial will help you get up and running. If you already have Node and NPM installed, you’ll install the Gatsby CLI globally and create a new site with it using the following commands:
npm install -g gatsby-cli
gatsby new <directory-to-install-into> <starter>
Gatsby comes with a large repository of starters that can help bootstrap your project. For this demo, I chose a simple starter that came equipped with the Bulma CSS framework.
gatsby new guestbook-app https://github.com/amandeepmittal/gatsby-bulma-quickstart
This gives us a good starting point and structure. It also has the added benefit of coming with styles that are ready to go.
Let’s do a little cleanup for things we don’t need. We’ll start by simplifying our components.header.js
import React from 'react'; import './style.scss'; const Header = ({ siteTitle }) => ( <section className="hero gradientBg "> <div className="hero-body"> <div className="container container--small center"> <div className="content"> <h1 className="is-uppercase is-size-1 has-text-white"> Sign our Virtual Guestbook </h1> <p className="subtitle has-text-white is-size-3"> If you like all the things that we do, be sure to sign our virtual guestbook </p> </div> </div> </div> </section>); export default Header;
This will get rid of much of the branded content. Feel free to customize this section, but we won’t write any of our code here.
Next we’ll clean out the components/midsection.js file. This will be where our app’s code will render.
import React, { useState } from 'react';import Signatures from './signatures';import SignForm from './sign-form'; const Midsection = () => { const [sigData, setSigData] = useState(data.allSignatures.nodes); return ( <section className="section"> <div className="container container--small"> <section className="section is-small"> <h2 className="title is-4">Sign here</h2> <SignForm></SignForm> </section> <section className="section"> <h2 className="title is-5">View Signatures</h2> <Signatures></Signatures> </section> </div> </section> )} export default Midsection;
In this code, we’ve mostly removed the “site” content and added in a couple new components. A <SignForm> that will contain our form for submitting a signature and a <Signatures> component to contain the list of signatures.
Now that we have a relatively blank slate, we can set up our FaunaDB database.
Setting Up A FaunaDB Collection
After logging into Fauna (or signing up for an account), you’ll be given the option to create a new Database. We’ll create a new database called guestbook.
The initial state of our signatures Collection after we add our first Document. (Large preview)
Inside this database, we’ll create a “Collection” called signature. Collections in Fauna a group of Documents that are in turn JSON objects.
In this new Collection, we’ll create a new Document with the following JSON:
{ name: "Bryan Robinson", message: "Lorem ipsum dolor amet sum Lorem ipsum dolor amet sum Lorem ipsum dolor amet sum Lorem ipsum dolor amet sum"}
This will be the simple data schema for each of our signatures. For each of these Documents, Fauna will create additional data surrounding it.
{ "ref": Ref(Collection("signatures"), "262884172900598291"), "ts": 1586964733980000, "data": { "name": "Bryan Robinson", "message": "Lorem ipsum dolor amet sum Lorem ipsum dolor amet sum Lorem ipsum dolor amet sum Lorem ipsum dolor amet sum " }}
The ref is the unique identifier inside of Fauna and the ts is the time (as a Unix timestamp) the document was created/updated.
After creating our data, we want an easy way to grab all that data and use it in our site. In Fauna, the most efficient way to get data is via an Index. We’ll create an Index called allSignatures. This will grab and return all of our signature Documents in the Collection.
Now that we have an efficient way of accessing the data in Gatsby, we need Gatsby to know where to get it. Gatsby has a repository of plugins that can fetch data from a variety of sources, Fauna included.
Setting up the Fauna Gatsby Data Source Plugin
npm install gatsby-source-faunadb
After we install this plugin to our project, we need to configure it in our gatsby-config.js file. In the plugins array of our project, we’ll add a new item.
{ resolve: `gatsby-source-faunadb`, options: { // The secret for the key you're using to connect to your Fauna database. // You can generate on of these in the "Security" tab of your Fauna Console. secret: process.env.YOUR_FAUNADB_SECRET, // The name of the index you want to query // You can create an index in the "Indexes" tab of your Fauna Console. index: `allSignatures`, // This is the name under which your data will appear in Gatsby GraphQL queries // The following will create queries called `allBird` and `bird`. type: "Signatures", // If you need to limit the number of documents returned, you can specify a // Optional maximum number to read. // size: 100 },},
In this configuration, you provide it your Fauna secret Key, the Index name we created and the “type” we want to access in our Gatsby GraphQL query.
Where did that process.env.YOUR_FAUNADB_SECRET come from?
In your project, create a .env file — and include that file in your .gitignore! This file will give Gatsby’s Webpack configuration the secret value. This will keep your sensitive information safe and not stored in GitHub.
YOUR_FAUNADB_SECRET = "value from fauna"
We can then head over to the “Security” tab in our Database and create a new key. Since this is a protected secret, it’s safe to use a “Server” role. When you save the Key, it’ll provide your secret. Be sure to grab that now, as you can’t get it again (without recreating the Key).
Once the configuration is set up, we can write a GraphQL query in our components to grab the data at build time.
Getting the data and building the template
We’ll add this query to our Midsection component to make it accessible by both of our components.
const Midsection = () => { const data = useStaticQuery( graphql` query GetSignatures { allSignatures { nodes { name message _ts _id } } }` );// ... rest of the component}
This will access the Signatures type we created in the configuration. It will grab all the signatures and provide an array of nodes. Those nodes will contain the data we specify we need: name, message, ts, id.
We’ll set that data into our state — this will make updating it live easier later.
const [sigData, setSigData] = useState(data.allSignatures.nodes);
Now we can pass sigData as a prop into <Signatures> and setSigData into <SignForm>.
<SignForm setSigData={setSigData}></SignForm> <Signatures sigData={sigData}></Signatures>
Let’s set up our Signatures component to use that data!
import React from 'react';import Signature from './signature' const Signatures = (props) => { const SignatureMarkup = () => { return props.sigData.map((signature, index) => { return ( <Signature key={index} signature={signature}></Signature> ) }).reverse() } return ( <SignatureMarkup></SignatureMarkup> )} export default Signatures
In this function, we’ll .map() over our signature data and create an Array of markup based on a new <Signature> component that we pass the data into.
The Signature component will handle formatting our data and returning an appropriate set of HTML.
import React from 'react'; const Signature = ({signature}) => { const dateObj = new Date(signature._ts / 1000); let dateString = `${dateObj.toLocaleString('default', {weekday: 'long'})}, ${dateObj.toLocaleString('default', { month: 'long' })} ${dateObj.getDate()} at ${dateObj.toLocaleTimeString('default', {hour: '2-digit',minute: '2-digit', hour12: false})}` return ( <article className="signature box"> <h3 className="signature__headline">{signature.name} - {dateString}</h3> <p className="signature__message"> {signature.message} </p> </article>)}; export default Signature;
At this point, if you start your Gatsby development server, you should have a list of signatures currently existing in your database. Run the following command to get up and running:
gatsby develop
Any signature stored in our database will build HTML in that component. But how can we get signatures INTO our database?
Let’s set up a signature form component to send data and update our Signatures list.
Let’s Make Our JAMstack Guestbook Interactive
First, we’ll set up the basic structure for our component. It will render a simple form onto the page with a text input, a textarea, and a button for submission.
import React from 'react'; import faunadb, { query as q } from "faunadb" var client = new faunadb.Client({ secret: process.env.GATSBY_FAUNA_CLIENT_SECRET }) export default class SignForm extends React.Component { constructor(props) { super(props) this.state = { sigName: "", sigMessage: "" } } handleSubmit = async event => { // Handle the submission } handleInputChange = event => { // When an input changes, update the state } render() { return ( <form onSubmit={this.handleSubmit}> <div className="field"> <div className="control"> <label className="label">Label <input className="input is-fullwidth" name="sigName" type="text" value={this.state.sigName} onChange={this.handleInputChange} /> </label> </div> </div> <div className="field"> <label> Your Message: <textarea rows="5" name="sigMessage" value={this.state.sigMessage} onChange={this.handleInputChange} className="textarea" placeholder="Leave us a happy note"></textarea> </label> </div> <div className="buttons"> <button className="button is-primary" type="submit">Sign the Guestbook</button> </div> </form> ) } }
To start, we’ll set up our state to include the name and the message. We’ll default them to blank strings and insert them into our <textarea> and <input>.
When a user changes the value of one of these fields, we’ll use the handleInputChange method. When a user submits the form, we’ll use the handleSubmit method.
Let’s break down both of those functions.
handleInputChange = event => { const target = event.target const value = target.value const name = target.name this.setState({ [name]: value, }) }
The input change will accept the event. From that event, it will get the current target’s value and name. We can then modify the state of the properties on our state object — sigName, sigMessage or anything else.
Once the state has changed, we can use the state in our handleSubmit method.
handleSubmit = async event => { event.preventDefault(); const placeSig = await this.createSignature(this.state.sigName, this.state.sigMessage); this.addSignature(placeSig); }
This function will call a new createSignature() method. This will connect to Fauna to create a new Document from our state items.
The addSignature() method will update our Signatures list data with the response we get back from Fauna.
In order to write to our database, we’ll need to set up a new key in Fauna with minimal permissions. Our server key is allowed higher permissions because it’s only used during build and won’t be visible in our source.
This key needs to only allow for the ability to only create new items in our signatures collection.
Note: A user could still be malicious with this key, but they can only do as much damage as a bot submitting that form, so it’s a trade-off I’m willing to make for this app.
A look at the FaunaDB security panel. In this shot, we’re creating a ‘client’ role that allows only the ‘Create’ permission for those API Keys. (Large preview)
For this, we’ll create a new “Role” in the “Security” tab of our dashboard. We can add permissions around one or more of our Collections. In this demo, we only need signatures and we can select the “Create” functionality.
After that, we generate a new key that uses that role.
To use this key, we’ll instantiate a new version of the Fauna JavaScript SDK. This is a dependency of the Gatsby plugin we installed, so we already have access to it.
import faunadb, { query as q } from "faunadb" var client = new faunadb.Client({ secret: process.env.GATSBY_FAUNA_CLIENT_SECRET })
By using an environment variable prefixed with GATSBY_, we gain access to it in our browser JavaScript (be sure to add it to your .env file).
By importing the query object from the SDK, we gain access to any of the methods available in Fauna’s first-party Fauna Query Language (FQL). In this case, we want to use the Create method to create a new document on our Collection.
createSignature = async (sigName, sigMessage) => { try { const queryResponse = await client.query( q.Create( q.Collection('signatures'), { data: { name: sigName, message: sigMessage } } ) ) const signatureInfo = { name: queryResponse.data.name, message: queryResponse.data.message, _ts: queryResponse.ts, _id: queryResponse.id} return signatureInfo } catch(err) { console.log(err); } }
We pass the Create function to the client.query() method. Create takes a Collection reference and an object of information to pass to a new Document. In this case, we use q.Collection and a string of our Collection name to get the reference to the Collection. The second argument is for our data. You can pass other items in the object, so we need to tell Fauna, we’re specifically sending it the data property on that object.
Next, we pass it the name and message we collected in our state. The response we get back from Fauna is the entire object of our Document. This includes our data in a data object, as well as a Fauna ID and timestamp. We reformat that data in a way that our Signatures list can use and return that back to our handleSubmit function.
Our submit handler will then pass that data into our setSigData prop which will notify our Signatures component to rerender with that new data. This gives our user immediate feedback that their submission has been accepted.
Rebuilding the site
This is all working in the browser, but the data hasn’t been updated in our static application yet.
From here, we need to tell our JAMstack host to rebuild our site. Many have the ability to specify a webhook to trigger a deployment. Since I’m hosting this demo on Netlify, I can create a new “Deploy webhook” in their admin and create a new triggerBuild function. This function will use the native JavaScript fetch() method and send a post request to that URL. Netlify will then rebuild the application and pull in the latest signatures.
triggerBuild = async () => { const response = await fetch(process.env.GATSBY_BUILD_HOOK, { method: "POST", body: "{}" }); return response; }
Both Gatsby Cloud and Netlify have implemented ways of handling “incremental” builds with Gatsby drastically speeding up build times. This sort of build can happen very quickly now and feel almost as fast as a traditional server-rendered site.
Every signature that gets added gets quick feedback to the user that it’s been submitted, is perpetually stored in a database, and served as HTML via a build process.
Still feels a little too much like a typical website? Let’s take all these concepts a step further.
Create A Mindful App With Auth0, Fauna Identity And Fauna User-Defined Functions (UDF)
Being mindful is an important skill to cultivate. Whether it’s thinking about your relationships, your career, your family, or just going for a walk in nature, it’s important to be mindful of the people and places around you.
A look at the final app screen showing a ‘Mindful Mission,’ ‘Past Missions’ and a ‘Log Out’ button. (Large preview)
This app intends to help you focus on one randomized idea every day and review the various ideas from recent days.
To do this, we need to introduce a key element to most apps: authentication. With authentication, comes extra security concerns. While this data won’t be particularly sensitive, you don’t want one user accessing the history of any other user.
Since we’ll be scoping data to a specific user, we also don’t want to store any secret keys on browser code, as that would open up other security flaws.
We could create an entire authentication flow using nothing but our wits and a user database with Fauna. That may seem daunting and moves us away from the features we want to write. The great thing is that there’s certainly an API for that in the JAMstack! In this demo, we’ll explore integrating Auth0 with Fauna. We can use the integration in many ways.
Setting Up Auth0 To Connect With Fauna
Many implementations of authentication with the JAMstack rely heavily on Serverless functions. That moves much of the security concerns from a security-focused company like Auth0 to the individual developer. That doesn’t feel quite right.
A diagram outlining the convoluted method of using a serverless function to manage authentication and token generation. (Large preview)
The typical flow would be to send a login request to a serverless function. That function would request a user from Auth0. Auth0 would provide the user’s JSON Web Token (JWT) and the function would provide any additional information about the user our application needs. The function would then bundle everything up and send it to the browser.
There are a lot of places in that authentication flow where a developer could introduce a security hole.
Instead, let’s request that Auth0 bundle everything up for us inside the JWT it sends. Keeping security in the hands of the folks who know it best.
A diagram outlining the streamlined authentication and token generation flow when using Auth0’s Rule system. (Large preview)
We’ll do this by using Auth0’s Rules functionality to ask Fauna for a user token to encode into our JWT. This means that unlike our Guestbook, we won’t have any Fauna keys in our front-end code. Everything will be managed in memory from that JWT token.
Setting up Auth0 Application and Rule
First, we’ll need to set up the basics of our Auth0 Application.
Following the configuration steps in their basic walkthrough gets the important basic information filled in. Be sure to fill out the proper localhost port for your bundler of choice as one of your authorized domains.
After the basics of the application are set up, we’ll go into the “Rules” section of our account.
Click “Create Rule” and select “Empty Rule” (or start from one of their many templates that are helpful starting points).
Here’s our Rule code
async function (user, context, callback) { const FAUNADB_SECRET = 'Your Server secret'; const faunadb = require('[email protected]'); const { query: q } = faunadb; const client = new faunadb.Client({ secret: FAUNADB_SECRET }); try { const token = await client.query( q.Call('user_login_or_create', user.email, user) // Call UDF in fauna ); let newClient = new faunadb.Client({ secret: token.secret }); context.idToken['https://faunadb.com/id/secret'] = token.secret; callback(null, user, context); } catch(error) { console.log('->', error); callback(error, user, context); }}
We give the rule a function that takes the user, context, and a callback from Auth0. We need to set up and grab a Server token to initialize our Fauna JavaScript SDK and initialize our client. Just like in our Guestbook, we’ll create a new Database and manage our Tokens in “Security”.
From there, we want to send a query to Fauna to create or log in our user. To keep our Rule code simple (and make it reusable), we’ll write our first Fauna “User-Defined Function” (UDF). A UDF is a function written in FQL that runs on Fauna’s infrastructure.
First, we’ll set up a Collection for our users. You don’t need to make a first Document here, as they’ll be created behind the scenes by our Auth0 rule whenever a new Auth0 user is created.
Next, we need an Index to search our users Collection based on the email address. This Index is simpler than our Guestbook, so we can add it to the Dashboard. Name the Index user_by_email, set the Collection to users, and the Terms to data.email. This will allow us to pass an email address to the Index and get a matching user Document back.
It’s time to create our UDF. In the Dashboard, navigate to “Functions” and create a new one named user_login_or_create.
Query( Lambda( ["userEmail", "userObj"], // Arguments Let( { user: Match(Index("user_by_email"), Var("userEmail")) }, // Set user variable If( Exists(Var("user")), // Check if the User exists Create(Tokens(null), { instance: Select("ref", Get(Var("user"))) }), // Return a token for that item in the users collection (in other words, the user) Let( // Else statement: Set a variable { newUser: Create(Collection("users"), { data: Var("userObj") }), // Create a new user and get its reference token: Create(Tokens(null), { // Create a token for that user instance: Select("ref", Var("newUser")) }) }, Var("token") // return the token ) ) ) ))
Our UDF will accept a user email address and the rest of the user information. If a user exists in a users Collection, it will create a Token for the user and send that back. If a user doesn’t exist, it will create that user Document and then send a Token to our Auth0 Rule.
We can then store the Token as an idToken attached to the context in our JWT. The token needs a URL as a key. Since this is a Fauna token, we can use a Fauna URL. Whatever this is, you’ll use it to access this in your code.
This Token doesn’t have any permissions yet. We need to go into our Security rules and set up a new Role.
We’ll create an “AuthedUser” role. We don’t need to add any permissions yet, but as we create new UDFs and new Collections, we’ll update the permissions here. Instead of generating a new Key to use this Role, we want to add to this Role’s “Memberships”. On the Memberships screen, you can select a Collection to add as a member. The documents in this Collection (in our case, our Users), will have the permissions set on this role given via their Token.
Now, when a user logs in via Auth0, they’ll be returned a Token that matches their user Document and has its permissions.
From here, we come back to our application.
Implement logic for when the User is logged in
Auth0 has an excellent walkthrough for setting up a “vanilla” JavaScript single-page application. Most of this code is a refactor of that to fit the code splitting of this application.
The default Auth0 Login/Signup screen. All the login flow can be contained in the Auth0 screens. (Large preview)
First, we’ll need the Auth0 SPA SDK.
npm install @auth0/auth0-spa-js
import createAuth0Client from '@auth0/auth0-spa-js';import { changeToHome } from './layouts/home'; // Home Layoutimport { changeToMission } from './layouts/myMind'; // Current Mindfulness Mission Layout let auth0 = null;var currentUser = null;const configureClient = async () => { // Configures Auth0 SDK auth0 = await createAuth0Client({ domain: "mindfulness.auth0.com", client_id: "32i3ylPhup47PYKUtZGRnLNsGVLks3M6" });}; const checkUser = async () => { // return user info from any method const isAuthenticated = await auth0.isAuthenticated(); if (isAuthenticated) { return await auth0.getUser(); }} const loadAuth = async () => { // Loads and checks auth await configureClient(); const isAuthenticated = await auth0.isAuthenticated(); if (isAuthenticated) { // show the gated content currentUser = await auth0.getUser(); changeToMission(); // Show the "Today" screen return; } else { changeToHome(); // Show the logged out "homepage" } const query = window.location.search; if (query.includes("code=") && query.includes("state=")) { // Process the login state await auth0.handleRedirectCallback(); currentUser = await auth0.getUser(); changeToMission(); // Use replaceState to redirect the user away and remove the querystring parameters window.history.replaceState({}, document.title, "/"); }} const login = async () => { await auth0.loginWithRedirect({ redirect_uri: window.location.origin });}const logout = async () => { auth0.logout({ returnTo: window.location.origin }); window.localStorage.removeItem('currentMindfulItem') changeToHome(); // Change back to logged out state} export { auth0, loadAuth, currentUser, checkUser, login, logout }
First, we configure the SDK with our client_id from Auth0. This is safe information to store in our code.
Next, we set up a function that can be exported and used in multiple files to check if a user is logged in. The Auth0 library provides an isAuthenticated() method. If the user is authenticated, we can return the user data with auth0.getUser().
We set up a login() and logout() functions and a loadAuth() function to handle the return from Auth0 and change the state of our UI to the “Mission” screen with today’s Mindful idea.
Once this is all set up, we have our authentication and user login squared away.
We’ll create a new function for our Fauna functions to reference to get the proper token set up.
const AUTH_PROP_KEY = "https://faunad.com/id/secret";var faunadb = require('faunadb'),q = faunadb.query; async function getUserClient(currentUser) { return new faunadb.Client({ secret: currentUser[AUTH_PROP_KEY]})}
This returns a new connection to Fauna using our Token from Auth0. This token works the same as the Keys from previous examples.
Generate a random Mindful topic and store it in Fauna
To start, we need a Collection of items to store our list of Mindful objects. We’ll create a Collection called “mindful” things, and create a number of items with the following schema:
{ "title": "Career", "description": "Think about the next steps you want to make in your career. What’s the next easily attainable move you can make?", "color": "#C6D4FF", "textColor": "black" }
From here, we’ll move to our JavaScript and create a function for adding and returning a random item from that Collection.
async function getRandomMindfulFromFauna(userObj) { const client = await getUserClient(userObj); try { let mindfulThings = await client.query( q.Paginate( q.Documents(q.Collection('mindful_things')) ) ) let randomMindful = mindfulThings.data[Math.floor(Math.random()*mindfulThings.data.length)]; let creation = await client.query(q.Call('addUserMindful', randomMindful)); return creation.data.mindful; } catch (error) { console.log(error) } }
To start, we’ll instantiate our client with our getUserClient() method.
From there, we’ll grab all the Documents from our mindful_things Collection. Paginate() by default grabs 64 items per page, which is more than enough for our data. We’ll grab a random item from the array that’s returned from Fauna. This will be what Fauna refers to as a “Ref”. A Ref is a full reference to a Document that the various FQL functions can use to locate a Document.
We’ll pass that Ref to a new UDF that will handle storing a new, timestamped object for that user stored in a new user_things Collection.
We’ll create the new Collection, but we’ll have our UDF provide the data for it when called.
We’ll create a new UDF in the Fauna dashboard with the name addUserMindful that will accept that random Ref.
As with our login UDF before, we’ll use the Lambda() FQL method which takes an array of arguments.
Without passing any user information to the function, FQL is able to obtain our User Ref just calling the Identity() function. All we have from our randomRef is the reference to our Document. We’ll run a Get() to get the full object. We’ll the Create() a new Document in the user_things Collection with our User Ref and our random information.
We then return the creation object back out of our Lambda. We then go back to our JavaScript and return the data object with the mindful key back to where this function gets called.
Render our Mindful Object on the page
When our user is authenticated, you may remember it called a changeToMission() method. This function switches the items on the page from the “Home” screen to markup that can be filled in by our data. After it’s added to the page, the renderToday() function gets called to add content by a few rules.
The first rule of Serverless Data Club is not to make HTTP requests unless you have to. In other words, cache when you can. Whether that’s creating a full PWA-scale application with Service Workers or just caching your database response with localStorage, cache data, and fetch only when necessary.
The first rule of our conditional is to check localStorage. If localStorage does contain a currentMindfulItem, then we need to check its date to see if it’s from today. If it is, we’ll render that and make no new requests.
The second rule of Serverless Data Club is to make as few requests as possible without the responses of those requests being too large. In that vein, our second conditional rule is to check the latest item from the current user and see if it is from today. If it is, we’ll store it in localStorage for later and then render the results.
Finally, if none of these are true, we’ll fire our getRandomMindfulFromFauna() function, format the result, store that in localStorage, and then render the result.
Get the latest item from a user
I glossed over it in the last section, but we also need some functionality to retrieve the latest mindful object from Fauna for our specific user. In our getLatestFromFauna() method, we’ll again instantiate our Fauna client and then call a new UDF.
Our new UDF is going to call a Fauna Index. An Index is an efficient way of doing a lookup on a Fauna database. In our case, we want to return all user_things by the user field. Then we can also sort the result by timestamp and reverse the default ordering of the data to show the latest first.
Simple Indexes can be created in the Index dashboard. Since we want to do the reverse sort, we’ll need to enter some custom FQL into the Fauna Shell (you can do this in the database dashboard Shell section).
CreateIndex({ name: "getMindfulByUserReverse", serialized: true, source: Collection("user_things"), terms: [ { field: ["data", "user"] } ], values: [ { field: ["ts"], reverse: true }, { field: ["ref"] } ]})
This creates an Index named getMindfulByUserReverse, created from our user_thing Collection. The terms object is a list of fields to search by. In our case, this is just the user field on the data object. We then provide values to return. In our case, we need the Ref and the Timestamp and we’ll use the reverse property to reverse order our results by this field.
We’ll create a new UDF to use this Index.
Query( Lambda( [], If( // Check if there is at least 1 in the index GT( Count( Select( "data", Paginate(Match(Index("getMindfulByUserReverse"), Identity())) ) ), 0 ), Let( // if more than 0 { match: Paginate( Match(Index("getMindfulByUserReverse"), Identity()) // Search the index by our User ), latestObj: Take(1, Var("match")), // Grab the first item from our match latestRef: Select( ["data"], Get(Select(["data", 0, 1], Var("latestObj"))) // Get the data object from the item ), latestTime: Select(["data", 0, 0], Var("latestObj")), // Get the time merged: Merge( // merge those items into one object to return { latestTime: Var("latestTime") }, { latestMindful: Var("latestRef") } ) }, Var("merged") ), Let({ error: { err: "No data" } }, Var("error")) // if there aren't any, return an error. ) ))
This time our Lambda() function doesn’t need any arguments since we’ll have our User based on the Token used.
First, we’ll check to see if there’s at least 1 item in our Index. If there is, we’ll grab the first item’s data and time and return that back as a merged object.
After we get the latest from Fauna in our JavaScript, we’ll format it to a structure our storeCurrent() and render() methods expect it and return that object.
Now, we have an application that creates, stores, and fetches data for a daily message to contemplate. A user can use this on their phone, on their tablet, on the computer, and have it all synced. We could turn this into a PWA or even a native app with a system like Ionic.
We’re still missing one feature. Viewing a certain number of past items. Since we’ve stored this in our database, we can retrieve them in whatever way we need to.
Pull the latest X Mindful Missions to get a picture of what you’ve thought about
We’ll create a new JavaScript method paired with a new UDF to tackle this.
getSomeFromFauna will take an integer count to ask Fauna for a certain number of items.
Our UDF will be very similar to the getLatestFromFauana UDF. Instead of returning the first item, we’ll Take() the number of items from our array that matches the integer that gets passed into our UDF. We’ll also begin with the same conditional, in case a user doesn’t have any items stored yet.
Query( Lambda( ["count"], // Number of items to return If( // Check if there are any objects GT( Count( Select( "data", Paginate(Match(Index("getMindfulByUserReverse"), Identity(null))) ) ), 0 ), Let( { match: Paginate( Match(Index("getMindfulByUserReverse"), Identity(null)) // Search the Index by our User ), latestObjs: Select("data", Take(Var("count"), Var("match"))), // Get the data that is returned mergedObjs: Map( // Loop over the objects Var("latestObjs"), Lambda( "latestArray", Let( // Build the data like we did in the LatestMindful function { ref: Select(["data"], Get(Select([1], Var("latestArray")))), latestTime: Select(0, Var("latestArray")), merged: Merge( { latestTime: Var("latestTime") }, Select("mindful", Var("ref")) ) }, Var("merged") // Return this to our new array ) ) ) }, Var("mergedObjs") // return the full array ), { latestMindful: [{ title: "No additional data" }] } // if there are no items, send back a message to display ) ))
In this demo, we created a full-fledged app with serverless data. Because the data is served from a CDN, it can be as close to a user as possible. We used FaunaDB’s features, such as UDFs and Indexes, to optimize our database queries for speed and ease of use. We also made sure we only queried our database the bare minimum to reduce requests.
Where To Go With Serverless Data
The JAMstack isn’t just for sites. It can be used for robust applications as well. Whether that’s for a game, CRUD application or just to be mindful of your surroundings you can do a lot without sacrificing customization and without spinning up your own non-dist database system.
With performance on the mind of everyone creating on the JAMstack — whether for cost or for user experience — finding a good place to store and retrieve your data is a high priority. Find a spot that meets your needs, those of your users, and meets ideals of the JAMstack.
(ra, yk, il)
Website Design & SEO Delray Beach by DBL07.co
Delray Beach SEO
Via http://www.scpie.org/from-static-sites-to-end-user-jamstack-apps-with-faunadb/
source https://scpie.weebly.com/blog/from-static-sites-to-end-user-jamstack-apps-with-faunadb
0 notes
Text
From Static Sites To End User JAMstack Apps With FaunaDB
About The Author
Bryan is a designer, developer, and educator with a passion for CSS and static sites. He actively works to mentor and teach developers and designers the value … More about Bryan Robinson …
To make the move from “site” to app, we’ll need to dive into the world of “app-generated” content. In this article, we’ll get started in this world with the power of serverless data. We’ll start with a simple demo by ingesting and posting data to FaunaDB and then extend that functionality in a full-fledged application using Auth0, FaunaDB’s Token system and User-Defined Functions.
The JAMstack has proven itself to be one of the top ways of producing content-driven sites, but it’s also a great place to house applications, as well. If you’ve been using the JAMstack for your performant websites, the demos in this article will help you extend those philosophies to applications as well.
When using the JAMstack to build applications, you need a data service that fits into the most important aspects of the JAMstack philosophy:
Global distribution
Zero operational needs
A developer-friendly API.
In the JAMstack ecosystem there are plenty of software-as-a-service companies that provide ways of getting and storing specific types of data. Whether you want to send emails, SMS or make phone calls (Twilio) or accept form submissions efficiently (Formspree, Formingo, Formstack, etc.), it seems there’s an API for almost everything.
These are great services that can do a lot of the low-level work of many applications, but once your data is more complex than a spreadsheet or needs to be updated and store in real-time, it might be time to look into a database.
The service API can still be in use, but a central database managing the state and operations of your app becomes much more important. Even if you need a database, you still want it to follow the core JAMstack philosophies we outlined above. That means, we don’t want to host our own database server. We need a Database-as-a-Service solution. Our database needs to be optimized for the JAMstack:
Optimized for API calls from a browser or build process.
Flexible to model your data in the specific ways your app needs.
Global distribution of our data like a CDN houses our sites.
Hands-free scaling with no need of a database administrator or developer intervention.
Whatever service you look into needs to follow these tenets of serverless data. In our demos, we’ll explore FaunaDB, a global serverless database, featuring native GraphQL to assure that we keep our apps in step with the philosophies of the JAMstack.
Let’s dive into the code!
A JAMstack Guestbook App With Gatsby And Fauna
I’m a big fan of reimagining the internet tools and concepts of the 1990s and early 2000s. We can take these concepts and make them feel fresh with the new set of tools and interactions.
A look at the app we’re creating. A signature form with a signature list below. The form will populate a FaunaDB database and that database will create the view list. (Large preview)
In this demo, we’ll create an application that was all the rage in that time period: the guestbook. A guestbook is nothing but app-generated content and interaction. A user can come to the site, see all the signatures of past “guests” and then leave their own.
To start, we’ll statically render our site and build our data from Fauna during our build step. This will provide the fast performance we expect from a JAMstack site. To do this, we’ll use GatsbyJS.
Initial setup
Our first step will be to install Gatsby globally on our computer. If you’ve never spent much time in the command line, Gatsby’s “part 0” tutorial will help you get up and running. If you already have Node and NPM installed, you’ll install the Gatsby CLI globally and create a new site with it using the following commands:
npm install -g gatsby-cli
gatsby new <directory-to-install-into> <starter>
Gatsby comes with a large repository of starters that can help bootstrap your project. For this demo, I chose a simple starter that came equipped with the Bulma CSS framework.
gatsby new guestbook-app https://github.com/amandeepmittal/gatsby-bulma-quickstart
This gives us a good starting point and structure. It also has the added benefit of coming with styles that are ready to go.
Let’s do a little cleanup for things we don’t need. We’ll start by simplifying our components.header.js
import React from 'react'; import './style.scss'; const Header = ({ siteTitle }) => ( <section className="hero gradientBg "> <div className="hero-body"> <div className="container container--small center"> <div className="content"> <h1 className="is-uppercase is-size-1 has-text-white"> Sign our Virtual Guestbook </h1> <p className="subtitle has-text-white is-size-3"> If you like all the things that we do, be sure to sign our virtual guestbook </p> </div> </div> </div> </section> ); export default Header;
This will get rid of much of the branded content. Feel free to customize this section, but we won’t write any of our code here.
Next we’ll clean out the components/midsection.js file. This will be where our app’s code will render.
import React, { useState } from 'react'; import Signatures from './signatures'; import SignForm from './sign-form'; const Midsection = () => { const [sigData, setSigData] = useState(data.allSignatures.nodes); return ( <section className="section"> <div className="container container--small"> <section className="section is-small"> <h2 className="title is-4">Sign here</h2> <SignForm></SignForm> </section> <section className="section"> <h2 className="title is-5">View Signatures</h2> <Signatures></Signatures> </section> </div> </section> ) } export default Midsection;
In this code, we’ve mostly removed the “site” content and added in a couple new components. A <SignForm> that will contain our form for submitting a signature and a <Signatures> component to contain the list of signatures.
Now that we have a relatively blank slate, we can set up our FaunaDB database.
Setting Up A FaunaDB Collection
After logging into Fauna (or signing up for an account), you’ll be given the option to create a new Database. We’ll create a new database called guestbook.
The initial state of our signatures Collection after we add our first Document. (Large preview)
Inside this database, we’ll create a “Collection” called signature. Collections in Fauna a group of Documents that are in turn JSON objects.
In this new Collection, we’ll create a new Document with the following JSON:
{ name: "Bryan Robinson", message: "Lorem ipsum dolor amet sum Lorem ipsum dolor amet sum Lorem ipsum dolor amet sum Lorem ipsum dolor amet sum" }
This will be the simple data schema for each of our signatures. For each of these Documents, Fauna will create additional data surrounding it.
{ "ref": Ref(Collection("signatures"), "262884172900598291"), "ts": 1586964733980000, "data": { "name": "Bryan Robinson", "message": "Lorem ipsum dolor amet sum Lorem ipsum dolor amet sum Lorem ipsum dolor amet sum Lorem ipsum dolor amet sum " } }
The ref is the unique identifier inside of Fauna and the ts is the time (as a Unix timestamp) the document was created/updated.
After creating our data, we want an easy way to grab all that data and use it in our site. In Fauna, the most efficient way to get data is via an Index. We’ll create an Index called allSignatures. This will grab and return all of our signature Documents in the Collection.
Now that we have an efficient way of accessing the data in Gatsby, we need Gatsby to know where to get it. Gatsby has a repository of plugins that can fetch data from a variety of sources, Fauna included.
Setting up the Fauna Gatsby Data Source Plugin
npm install gatsby-source-faunadb
After we install this plugin to our project, we need to configure it in our gatsby-config.js file. In the plugins array of our project, we’ll add a new item.
{ resolve: `gatsby-source-faunadb`, options: { // The secret for the key you're using to connect to your Fauna database. // You can generate on of these in the "Security" tab of your Fauna Console. secret: process.env.YOUR_FAUNADB_SECRET, // The name of the index you want to query // You can create an index in the "Indexes" tab of your Fauna Console. index: `allSignatures`, // This is the name under which your data will appear in Gatsby GraphQL queries // The following will create queries called `allBird` and `bird`. type: "Signatures", // If you need to limit the number of documents returned, you can specify a // Optional maximum number to read. // size: 100 }, },
In this configuration, you provide it your Fauna secret Key, the Index name we created and the “type” we want to access in our Gatsby GraphQL query.
Where did that process.env.YOUR_FAUNADB_SECRET come from?
In your project, create a .env file — and include that file in your .gitignore! This file will give Gatsby’s Webpack configuration the secret value. This will keep your sensitive information safe and not stored in GitHub.
YOUR_FAUNADB_SECRET = "value from fauna"
We can then head over to the “Security” tab in our Database and create a new key. Since this is a protected secret, it’s safe to use a “Server” role. When you save the Key, it’ll provide your secret. Be sure to grab that now, as you can’t get it again (without recreating the Key).
Once the configuration is set up, we can write a GraphQL query in our components to grab the data at build time.
Getting the data and building the template
We’ll add this query to our Midsection component to make it accessible by both of our components.
const Midsection = () => { const data = useStaticQuery( graphql` query GetSignatures { allSignatures { nodes { name message _ts _id } } }` ); // ... rest of the component }
This will access the Signatures type we created in the configuration. It will grab all the signatures and provide an array of nodes. Those nodes will contain the data we specify we need: name, message, ts, id.
We’ll set that data into our state — this will make updating it live easier later.
const [sigData, setSigData] = useState(data.allSignatures.nodes);
Now we can pass sigData as a prop into <Signatures> and setSigData into <SignForm>.
<SignForm setSigData={setSigData}></SignForm> <Signatures sigData={sigData}></Signatures>
Let’s set up our Signatures component to use that data!
import React from 'react'; import Signature from './signature' const Signatures = (props) => { const SignatureMarkup = () => { return props.sigData.map((signature, index) => { return ( <Signature key={index} signature={signature}></Signature> ) }).reverse() } return ( <SignatureMarkup></SignatureMarkup> ) } export default Signatures
In this function, we’ll .map() over our signature data and create an Array of markup based on a new <Signature> component that we pass the data into.
The Signature component will handle formatting our data and returning an appropriate set of HTML.
import React from 'react'; const Signature = ({signature}) => { const dateObj = new Date(signature._ts / 1000); let dateString = `${dateObj.toLocaleString('default', {weekday: 'long'})}, ${dateObj.toLocaleString('default', { month: 'long' })} ${dateObj.getDate()} at ${dateObj.toLocaleTimeString('default', {hour: '2-digit',minute: '2-digit', hour12: false})}` return ( <article className="signature box"> <h3 className="signature__headline">{signature.name} - {dateString}</h3> <p className="signature__message"> {signature.message} </p> </article> )}; export default Signature;
At this point, if you start your Gatsby development server, you should have a list of signatures currently existing in your database. Run the following command to get up and running:
gatsby develop
Any signature stored in our database will build HTML in that component. But how can we get signatures INTO our database?
Let’s set up a signature form component to send data and update our Signatures list.
Let’s Make Our JAMstack Guestbook Interactive
First, we’ll set up the basic structure for our component. It will render a simple form onto the page with a text input, a textarea, and a button for submission.
import React from 'react'; import faunadb, { query as q } from "faunadb" var client = new faunadb.Client({ secret: process.env.GATSBY_FAUNA_CLIENT_SECRET }) export default class SignForm extends React.Component { constructor(props) { super(props) this.state = { sigName: "", sigMessage: "" } } handleSubmit = async event => { // Handle the submission } handleInputChange = event => { // When an input changes, update the state } render() { return ( <form onSubmit={this.handleSubmit}> <div className="field"> <div className="control"> <label className="label">Label <input className="input is-fullwidth" name="sigName" type="text" value={this.state.sigName} onChange={this.handleInputChange} /> </label> </div> </div> <div className="field"> <label> Your Message: <textarea rows="5" name="sigMessage" value={this.state.sigMessage} onChange={this.handleInputChange} className="textarea" placeholder="Leave us a happy note"></textarea> </label> </div> <div className="buttons"> <button className="button is-primary" type="submit">Sign the Guestbook</button> </div> </form> ) } }
To start, we’ll set up our state to include the name and the message. We’ll default them to blank strings and insert them into our <textarea> and <input>.
When a user changes the value of one of these fields, we’ll use the handleInputChange method. When a user submits the form, we’ll use the handleSubmit method.
Let’s break down both of those functions.
handleInputChange = event => { const target = event.target const value = target.value const name = target.name this.setState({ [name]: value, }) }
The input change will accept the event. From that event, it will get the current target’s value and name. We can then modify the state of the properties on our state object — sigName, sigMessage or anything else.
Once the state has changed, we can use the state in our handleSubmit method.
handleSubmit = async event => { event.preventDefault(); const placeSig = await this.createSignature(this.state.sigName, this.state.sigMessage); this.addSignature(placeSig); }
This function will call a new createSignature() method. This will connect to Fauna to create a new Document from our state items.
The addSignature() method will update our Signatures list data with the response we get back from Fauna.
In order to write to our database, we’ll need to set up a new key in Fauna with minimal permissions. Our server key is allowed higher permissions because it’s only used during build and won’t be visible in our source.
This key needs to only allow for the ability to only create new items in our signatures collection.
Note: A user could still be malicious with this key, but they can only do as much damage as a bot submitting that form, so it’s a trade-off I’m willing to make for this app.
A look at the FaunaDB security panel. In this shot, we’re creating a ‘client’ role that allows only the ‘Create’ permission for those API Keys. (Large preview)
For this, we’ll create a new “Role” in the “Security” tab of our dashboard. We can add permissions around one or more of our Collections. In this demo, we only need signatures and we can select the “Create” functionality.
After that, we generate a new key that uses that role.
To use this key, we’ll instantiate a new version of the Fauna JavaScript SDK. This is a dependency of the Gatsby plugin we installed, so we already have access to it.
import faunadb, { query as q } from "faunadb" var client = new faunadb.Client({ secret: process.env.GATSBY_FAUNA_CLIENT_SECRET })
By using an environment variable prefixed with GATSBY_, we gain access to it in our browser JavaScript (be sure to add it to your .env file).
By importing the query object from the SDK, we gain access to any of the methods available in Fauna’s first-party Fauna Query Language (FQL). In this case, we want to use the Create method to create a new document on our Collection.
createSignature = async (sigName, sigMessage) => { try { const queryResponse = await client.query( q.Create( q.Collection('signatures'), { data: { name: sigName, message: sigMessage } } ) ) const signatureInfo = { name: queryResponse.data.name, message: queryResponse.data.message, _ts: queryResponse.ts, _id: queryResponse.id} return signatureInfo } catch(err) { console.log(err); } }
We pass the Create function to the client.query() method. Create takes a Collection reference and an object of information to pass to a new Document. In this case, we use q.Collection and a string of our Collection name to get the reference to the Collection. The second argument is for our data. You can pass other items in the object, so we need to tell Fauna, we’re specifically sending it the data property on that object.
Next, we pass it the name and message we collected in our state. The response we get back from Fauna is the entire object of our Document. This includes our data in a data object, as well as a Fauna ID and timestamp. We reformat that data in a way that our Signatures list can use and return that back to our handleSubmit function.
Our submit handler will then pass that data into our setSigData prop which will notify our Signatures component to rerender with that new data. This gives our user immediate feedback that their submission has been accepted.
Rebuilding the site
This is all working in the browser, but the data hasn’t been updated in our static application yet.
From here, we need to tell our JAMstack host to rebuild our site. Many have the ability to specify a webhook to trigger a deployment. Since I’m hosting this demo on Netlify, I can create a new “Deploy webhook” in their admin and create a new triggerBuild function. This function will use the native JavaScript fetch() method and send a post request to that URL. Netlify will then rebuild the application and pull in the latest signatures.
triggerBuild = async () => { const response = await fetch(process.env.GATSBY_BUILD_HOOK, { method: "POST", body: "{}" }); return response; }
Both Gatsby Cloud and Netlify have implemented ways of handling “incremental” builds with Gatsby drastically speeding up build times. This sort of build can happen very quickly now and feel almost as fast as a traditional server-rendered site.
Every signature that gets added gets quick feedback to the user that it’s been submitted, is perpetually stored in a database, and served as HTML via a build process.
Still feels a little too much like a typical website? Let’s take all these concepts a step further.
Create A Mindful App With Auth0, Fauna Identity And Fauna User-Defined Functions (UDF)
Being mindful is an important skill to cultivate. Whether it’s thinking about your relationships, your career, your family, or just going for a walk in nature, it’s important to be mindful of the people and places around you.
A look at the final app screen showing a ‘Mindful Mission,’ ‘Past Missions’ and a ‘Log Out’ button. (Large preview)
This app intends to help you focus on one randomized idea every day and review the various ideas from recent days.
To do this, we need to introduce a key element to most apps: authentication. With authentication, comes extra security concerns. While this data won’t be particularly sensitive, you don’t want one user accessing the history of any other user.
Since we’ll be scoping data to a specific user, we also don’t want to store any secret keys on browser code, as that would open up other security flaws.
We could create an entire authentication flow using nothing but our wits and a user database with Fauna. That may seem daunting and moves us away from the features we want to write. The great thing is that there’s certainly an API for that in the JAMstack! In this demo, we’ll explore integrating Auth0 with Fauna. We can use the integration in many ways.
Setting Up Auth0 To Connect With Fauna
Many implementations of authentication with the JAMstack rely heavily on Serverless functions. That moves much of the security concerns from a security-focused company like Auth0 to the individual developer. That doesn’t feel quite right.
A diagram outlining the convoluted method of using a serverless function to manage authentication and token generation. (Large preview)
The typical flow would be to send a login request to a serverless function. That function would request a user from Auth0. Auth0 would provide the user’s JSON Web Token (JWT) and the function would provide any additional information about the user our application needs. The function would then bundle everything up and send it to the browser.
There are a lot of places in that authentication flow where a developer could introduce a security hole.
Instead, let’s request that Auth0 bundle everything up for us inside the JWT it sends. Keeping security in the hands of the folks who know it best.
A diagram outlining the streamlined authentication and token generation flow when using Auth0’s Rule system. (Large preview)
We’ll do this by using Auth0’s Rules functionality to ask Fauna for a user token to encode into our JWT. This means that unlike our Guestbook, we won’t have any Fauna keys in our front-end code. Everything will be managed in memory from that JWT token.
Setting up Auth0 Application and Rule
First, we’ll need to set up the basics of our Auth0 Application.
Following the configuration steps in their basic walkthrough gets the important basic information filled in. Be sure to fill out the proper localhost port for your bundler of choice as one of your authorized domains.
After the basics of the application are set up, we’ll go into the “Rules” section of our account.
Click “Create Rule” and select “Empty Rule” (or start from one of their many templates that are helpful starting points).
Here’s our Rule code
async function (user, context, callback) { const FAUNADB_SECRET = 'Your Server secret'; const faunadb = require('[email protected]'); const { query: q } = faunadb; const client = new faunadb.Client({ secret: FAUNADB_SECRET }); try { const token = await client.query( q.Call('user_login_or_create', user.email, user) // Call UDF in fauna ); let newClient = new faunadb.Client({ secret: token.secret }); context.idToken['https://faunadb.com/id/secret'] = token.secret; callback(null, user, context); } catch(error) { console.log('->', error); callback(error, user, context); } }
We give the rule a function that takes the user, context, and a callback from Auth0. We need to set up and grab a Server token to initialize our Fauna JavaScript SDK and initialize our client. Just like in our Guestbook, we’ll create a new Database and manage our Tokens in “Security”.
From there, we want to send a query to Fauna to create or log in our user. To keep our Rule code simple (and make it reusable), we’ll write our first Fauna “User-Defined Function” (UDF). A UDF is a function written in FQL that runs on Fauna’s infrastructure.
First, we’ll set up a Collection for our users. You don’t need to make a first Document here, as they’ll be created behind the scenes by our Auth0 rule whenever a new Auth0 user is created.
Next, we need an Index to search our users Collection based on the email address. This Index is simpler than our Guestbook, so we can add it to the Dashboard. Name the Index user_by_email, set the Collection to users, and the Terms to data.email. This will allow us to pass an email address to the Index and get a matching user Document back.
It’s time to create our UDF. In the Dashboard, navigate to “Functions” and create a new one named user_login_or_create.
Query( Lambda( ["userEmail", "userObj"], // Arguments Let( { user: Match(Index("user_by_email"), Var("userEmail")) }, // Set user variable If( Exists(Var("user")), // Check if the User exists Create(Tokens(null), { instance: Select("ref", Get(Var("user"))) }), // Return a token for that item in the users collection (in other words, the user) Let( // Else statement: Set a variable { newUser: Create(Collection("users"), { data: Var("userObj") }), // Create a new user and get its reference token: Create(Tokens(null), { // Create a token for that user instance: Select("ref", Var("newUser")) }) }, Var("token") // return the token ) ) ) ) )
Our UDF will accept a user email address and the rest of the user information. If a user exists in a users Collection, it will create a Token for the user and send that back. If a user doesn’t exist, it will create that user Document and then send a Token to our Auth0 Rule.
We can then store the Token as an idToken attached to the context in our JWT. The token needs a URL as a key. Since this is a Fauna token, we can use a Fauna URL. Whatever this is, you’ll use it to access this in your code.
This Token doesn’t have any permissions yet. We need to go into our Security rules and set up a new Role.
We’ll create an “AuthedUser” role. We don’t need to add any permissions yet, but as we create new UDFs and new Collections, we’ll update the permissions here. Instead of generating a new Key to use this Role, we want to add to this Role’s “Memberships”. On the Memberships screen, you can select a Collection to add as a member. The documents in this Collection (in our case, our Users), will have the permissions set on this role given via their Token.
Now, when a user logs in via Auth0, they’ll be returned a Token that matches their user Document and has its permissions.
From here, we come back to our application.
Implement logic for when the User is logged in
Auth0 has an excellent walkthrough for setting up a “vanilla” JavaScript single-page application. Most of this code is a refactor of that to fit the code splitting of this application.
The default Auth0 Login/Signup screen. All the login flow can be contained in the Auth0 screens. (Large preview)
First, we’ll need the Auth0 SPA SDK.
npm install @auth0/auth0-spa-js
import createAuth0Client from '@auth0/auth0-spa-js'; import { changeToHome } from './layouts/home'; // Home Layout import { changeToMission } from './layouts/myMind'; // Current Mindfulness Mission Layout let auth0 = null; var currentUser = null; const configureClient = async () => { // Configures Auth0 SDK auth0 = await createAuth0Client({ domain: "mindfulness.auth0.com", client_id: "32i3ylPhup47PYKUtZGRnLNsGVLks3M6" }); }; const checkUser = async () => { // return user info from any method const isAuthenticated = await auth0.isAuthenticated(); if (isAuthenticated) { return await auth0.getUser(); } } const loadAuth = async () => { // Loads and checks auth await configureClient(); const isAuthenticated = await auth0.isAuthenticated(); if (isAuthenticated) { // show the gated content currentUser = await auth0.getUser(); changeToMission(); // Show the "Today" screen return; } else { changeToHome(); // Show the logged out "homepage" } const query = window.location.search; if (query.includes("code=") && query.includes("state=")) { // Process the login state await auth0.handleRedirectCallback(); currentUser = await auth0.getUser(); changeToMission(); // Use replaceState to redirect the user away and remove the querystring parameters window.history.replaceState({}, document.title, "/"); } } const login = async () => { await auth0.loginWithRedirect({ redirect_uri: window.location.origin }); } const logout = async () => { auth0.logout({ returnTo: window.location.origin }); window.localStorage.removeItem('currentMindfulItem') changeToHome(); // Change back to logged out state } export { auth0, loadAuth, currentUser, checkUser, login, logout }
First, we configure the SDK with our client_id from Auth0. This is safe information to store in our code.
Next, we set up a function that can be exported and used in multiple files to check if a user is logged in. The Auth0 library provides an isAuthenticated() method. If the user is authenticated, we can return the user data with auth0.getUser().
We set up a login() and logout() functions and a loadAuth() function to handle the return from Auth0 and change the state of our UI to the “Mission” screen with today’s Mindful idea.
Once this is all set up, we have our authentication and user login squared away.
We’ll create a new function for our Fauna functions to reference to get the proper token set up.
const AUTH_PROP_KEY = "https://faunad.com/id/secret"; var faunadb = require('faunadb'), q = faunadb.query; async function getUserClient(currentUser) { return new faunadb.Client({ secret: currentUser[AUTH_PROP_KEY]}) }
This returns a new connection to Fauna using our Token from Auth0. This token works the same as the Keys from previous examples.
Generate a random Mindful topic and store it in Fauna
To start, we need a Collection of items to store our list of Mindful objects. We’ll create a Collection called “mindful” things, and create a number of items with the following schema:
{ "title": "Career", "description": "Think about the next steps you want to make in your career. What’s the next easily attainable move you can make?", "color": "#C6D4FF", "textColor": "black" }
From here, we’ll move to our JavaScript and create a function for adding and returning a random item from that Collection.
async function getRandomMindfulFromFauna(userObj) { const client = await getUserClient(userObj); try { let mindfulThings = await client.query( q.Paginate( q.Documents(q.Collection('mindful_things')) ) ) let randomMindful = mindfulThings.data[Math.floor(Math.random()*mindfulThings.data.length)]; let creation = await client.query(q.Call('addUserMindful', randomMindful)); return creation.data.mindful; } catch (error) { console.log(error) } }
To start, we’ll instantiate our client with our getUserClient() method.
From there, we’ll grab all the Documents from our mindful_things Collection. Paginate() by default grabs 64 items per page, which is more than enough for our data. We’ll grab a random item from the array that’s returned from Fauna. This will be what Fauna refers to as a “Ref”. A Ref is a full reference to a Document that the various FQL functions can use to locate a Document.
We’ll pass that Ref to a new UDF that will handle storing a new, timestamped object for that user stored in a new user_things Collection.
We’ll create the new Collection, but we’ll have our UDF provide the data for it when called.
We’ll create a new UDF in the Fauna dashboard with the name addUserMindful that will accept that random Ref.
As with our login UDF before, we’ll use the Lambda() FQL method which takes an array of arguments.
Without passing any user information to the function, FQL is able to obtain our User Ref just calling the Identity() function. All we have from our randomRef is the reference to our Document. We’ll run a Get() to get the full object. We’ll the Create() a new Document in the user_things Collection with our User Ref and our random information.
We then return the creation object back out of our Lambda. We then go back to our JavaScript and return the data object with the mindful key back to where this function gets called.
Render our Mindful Object on the page
When our user is authenticated, you may remember it called a changeToMission() method. This function switches the items on the page from the “Home” screen to markup that can be filled in by our data. After it’s added to the page, the renderToday() function gets called to add content by a few rules.
The first rule of Serverless Data Club is not to make HTTP requests unless you have to. In other words, cache when you can. Whether that’s creating a full PWA-scale application with Service Workers or just caching your database response with localStorage, cache data, and fetch only when necessary.
The first rule of our conditional is to check localStorage. If localStorage does contain a currentMindfulItem, then we need to check its date to see if it’s from today. If it is, we’ll render that and make no new requests.
The second rule of Serverless Data Club is to make as few requests as possible without the responses of those requests being too large. In that vein, our second conditional rule is to check the latest item from the current user and see if it is from today. If it is, we’ll store it in localStorage for later and then render the results.
Finally, if none of these are true, we’ll fire our getRandomMindfulFromFauna() function, format the result, store that in localStorage, and then render the result.
Get the latest item from a user
I glossed over it in the last section, but we also need some functionality to retrieve the latest mindful object from Fauna for our specific user. In our getLatestFromFauna() method, we’ll again instantiate our Fauna client and then call a new UDF.
Our new UDF is going to call a Fauna Index. An Index is an efficient way of doing a lookup on a Fauna database. In our case, we want to return all user_things by the user field. Then we can also sort the result by timestamp and reverse the default ordering of the data to show the latest first.
Simple Indexes can be created in the Index dashboard. Since we want to do the reverse sort, we’ll need to enter some custom FQL into the Fauna Shell (you can do this in the database dashboard Shell section).
CreateIndex({ name: "getMindfulByUserReverse", serialized: true, source: Collection("user_things"), terms: [ { field: ["data", "user"] } ], values: [ { field: ["ts"], reverse: true }, { field: ["ref"] } ] })
This creates an Index named getMindfulByUserReverse, created from our user_thing Collection. The terms object is a list of fields to search by. In our case, this is just the user field on the data object. We then provide values to return. In our case, we need the Ref and the Timestamp and we’ll use the reverse property to reverse order our results by this field.
We’ll create a new UDF to use this Index.
Query( Lambda( [], If( // Check if there is at least 1 in the index GT( Count( Select( "data", Paginate(Match(Index("getMindfulByUserReverse"), Identity())) ) ), 0 ), Let( // if more than 0 { match: Paginate( Match(Index("getMindfulByUserReverse"), Identity()) // Search the index by our User ), latestObj: Take(1, Var("match")), // Grab the first item from our match latestRef: Select( ["data"], Get(Select(["data", 0, 1], Var("latestObj"))) // Get the data object from the item ), latestTime: Select(["data", 0, 0], Var("latestObj")), // Get the time merged: Merge( // merge those items into one object to return { latestTime: Var("latestTime") }, { latestMindful: Var("latestRef") } ) }, Var("merged") ), Let({ error: { err: "No data" } }, Var("error")) // if there aren't any, return an error. ) ) )
This time our Lambda() function doesn’t need any arguments since we’ll have our User based on the Token used.
First, we’ll check to see if there’s at least 1 item in our Index. If there is, we’ll grab the first item’s data and time and return that back as a merged object.
After we get the latest from Fauna in our JavaScript, we’ll format it to a structure our storeCurrent() and render() methods expect it and return that object.
Now, we have an application that creates, stores, and fetches data for a daily message to contemplate. A user can use this on their phone, on their tablet, on the computer, and have it all synced. We could turn this into a PWA or even a native app with a system like Ionic.
We’re still missing one feature. Viewing a certain number of past items. Since we’ve stored this in our database, we can retrieve them in whatever way we need to.
Pull the latest X Mindful Missions to get a picture of what you’ve thought about
We’ll create a new JavaScript method paired with a new UDF to tackle this.
getSomeFromFauna will take an integer count to ask Fauna for a certain number of items.
Our UDF will be very similar to the getLatestFromFauana UDF. Instead of returning the first item, we’ll Take() the number of items from our array that matches the integer that gets passed into our UDF. We’ll also begin with the same conditional, in case a user doesn’t have any items stored yet.
Query( Lambda( ["count"], // Number of items to return If( // Check if there are any objects GT( Count( Select( "data", Paginate(Match(Index("getMindfulByUserReverse"), Identity(null))) ) ), 0 ), Let( { match: Paginate( Match(Index("getMindfulByUserReverse"), Identity(null)) // Search the Index by our User ), latestObjs: Select("data", Take(Var("count"), Var("match"))), // Get the data that is returned mergedObjs: Map( // Loop over the objects Var("latestObjs"), Lambda( "latestArray", Let( // Build the data like we did in the LatestMindful function { ref: Select(["data"], Get(Select([1], Var("latestArray")))), latestTime: Select(0, Var("latestArray")), merged: Merge( { latestTime: Var("latestTime") }, Select("mindful", Var("ref")) ) }, Var("merged") // Return this to our new array ) ) ) }, Var("mergedObjs") // return the full array ), { latestMindful: [{ title: "No additional data" }] } // if there are no items, send back a message to display ) ) )
In this demo, we created a full-fledged app with serverless data. Because the data is served from a CDN, it can be as close to a user as possible. We used FaunaDB’s features, such as UDFs and Indexes, to optimize our database queries for speed and ease of use. We also made sure we only queried our database the bare minimum to reduce requests.
Where To Go With Serverless Data
The JAMstack isn’t just for sites. It can be used for robust applications as well. Whether that’s for a game, CRUD application or just to be mindful of your surroundings you can do a lot without sacrificing customization and without spinning up your own non-dist database system.
With performance on the mind of everyone creating on the JAMstack — whether for cost or for user experience — finding a good place to store and retrieve your data is a high priority. Find a spot that meets your needs, those of your users, and meets ideals of the JAMstack.
(ra, yk, il)
Website Design & SEO Delray Beach by DBL07.co
Delray Beach SEO
source http://www.scpie.org/from-static-sites-to-end-user-jamstack-apps-with-faunadb/ source https://scpie.tumblr.com/post/620485446847299584
0 notes
Text
From Static Sites To End User JAMstack Apps With FaunaDB
About The Author
Bryan is a designer, developer, and educator with a passion for CSS and static sites. He actively works to mentor and teach developers and designers the value … More about Bryan Robinson …
To make the move from “site” to app, we’ll need to dive into the world of “app-generated” content. In this article, we’ll get started in this world with the power of serverless data. We’ll start with a simple demo by ingesting and posting data to FaunaDB and then extend that functionality in a full-fledged application using Auth0, FaunaDB’s Token system and User-Defined Functions.
The JAMstack has proven itself to be one of the top ways of producing content-driven sites, but it’s also a great place to house applications, as well. If you’ve been using the JAMstack for your performant websites, the demos in this article will help you extend those philosophies to applications as well.
When using the JAMstack to build applications, you need a data service that fits into the most important aspects of the JAMstack philosophy:
Global distribution
Zero operational needs
A developer-friendly API.
In the JAMstack ecosystem there are plenty of software-as-a-service companies that provide ways of getting and storing specific types of data. Whether you want to send emails, SMS or make phone calls (Twilio) or accept form submissions efficiently (Formspree, Formingo, Formstack, etc.), it seems there’s an API for almost everything.
These are great services that can do a lot of the low-level work of many applications, but once your data is more complex than a spreadsheet or needs to be updated and store in real-time, it might be time to look into a database.
The service API can still be in use, but a central database managing the state and operations of your app becomes much more important. Even if you need a database, you still want it to follow the core JAMstack philosophies we outlined above. That means, we don’t want to host our own database server. We need a Database-as-a-Service solution. Our database needs to be optimized for the JAMstack:
Optimized for API calls from a browser or build process.
Flexible to model your data in the specific ways your app needs.
Global distribution of our data like a CDN houses our sites.
Hands-free scaling with no need of a database administrator or developer intervention.
Whatever service you look into needs to follow these tenets of serverless data. In our demos, we’ll explore FaunaDB, a global serverless database, featuring native GraphQL to assure that we keep our apps in step with the philosophies of the JAMstack.
Let’s dive into the code!
A JAMstack Guestbook App With Gatsby And Fauna
I’m a big fan of reimagining the internet tools and concepts of the 1990s and early 2000s. We can take these concepts and make them feel fresh with the new set of tools and interactions.
A look at the app we’re creating. A signature form with a signature list below. The form will populate a FaunaDB database and that database will create the view list. (Large preview)
In this demo, we’ll create an application that was all the rage in that time period: the guestbook. A guestbook is nothing but app-generated content and interaction. A user can come to the site, see all the signatures of past “guests” and then leave their own.
To start, we’ll statically render our site and build our data from Fauna during our build step. This will provide the fast performance we expect from a JAMstack site. To do this, we’ll use GatsbyJS.
Initial setup
Our first step will be to install Gatsby globally on our computer. If you’ve never spent much time in the command line, Gatsby’s “part 0” tutorial will help you get up and running. If you already have Node and NPM installed, you’ll install the Gatsby CLI globally and create a new site with it using the following commands:
npm install -g gatsby-cli
gatsby new <directory-to-install-into> <starter>
Gatsby comes with a large repository of starters that can help bootstrap your project. For this demo, I chose a simple starter that came equipped with the Bulma CSS framework.
gatsby new guestbook-app https://github.com/amandeepmittal/gatsby-bulma-quickstart
This gives us a good starting point and structure. It also has the added benefit of coming with styles that are ready to go.
Let’s do a little cleanup for things we don’t need. We’ll start by simplifying our components.header.js
import React from 'react'; import './style.scss'; const Header = ({ siteTitle }) => ( <section className="hero gradientBg "> <div className="hero-body"> <div className="container container--small center"> <div className="content"> <h1 className="is-uppercase is-size-1 has-text-white"> Sign our Virtual Guestbook </h1> <p className="subtitle has-text-white is-size-3"> If you like all the things that we do, be sure to sign our virtual guestbook </p> </div> </div> </div> </section> ); export default Header;
This will get rid of much of the branded content. Feel free to customize this section, but we won’t write any of our code here.
Next we’ll clean out the components/midsection.js file. This will be where our app’s code will render.
import React, { useState } from 'react'; import Signatures from './signatures'; import SignForm from './sign-form'; const Midsection = () => { const [sigData, setSigData] = useState(data.allSignatures.nodes); return ( <section className="section"> <div className="container container--small"> <section className="section is-small"> <h2 className="title is-4">Sign here</h2> <SignForm></SignForm> </section> <section className="section"> <h2 className="title is-5">View Signatures</h2> <Signatures></Signatures> </section> </div> </section> ) } export default Midsection;
In this code, we’ve mostly removed the “site” content and added in a couple new components. A <SignForm> that will contain our form for submitting a signature and a <Signatures> component to contain the list of signatures.
Now that we have a relatively blank slate, we can set up our FaunaDB database.
Setting Up A FaunaDB Collection
After logging into Fauna (or signing up for an account), you’ll be given the option to create a new Database. We’ll create a new database called guestbook.
The initial state of our signatures Collection after we add our first Document. (Large preview)
Inside this database, we’ll create a “Collection” called signature. Collections in Fauna a group of Documents that are in turn JSON objects.
In this new Collection, we’ll create a new Document with the following JSON:
{ name: "Bryan Robinson", message: "Lorem ipsum dolor amet sum Lorem ipsum dolor amet sum Lorem ipsum dolor amet sum Lorem ipsum dolor amet sum" }
This will be the simple data schema for each of our signatures. For each of these Documents, Fauna will create additional data surrounding it.
{ "ref": Ref(Collection("signatures"), "262884172900598291"), "ts": 1586964733980000, "data": { "name": "Bryan Robinson", "message": "Lorem ipsum dolor amet sum Lorem ipsum dolor amet sum Lorem ipsum dolor amet sum Lorem ipsum dolor amet sum " } }
The ref is the unique identifier inside of Fauna and the ts is the time (as a Unix timestamp) the document was created/updated.
After creating our data, we want an easy way to grab all that data and use it in our site. In Fauna, the most efficient way to get data is via an Index. We’ll create an Index called allSignatures. This will grab and return all of our signature Documents in the Collection.
Now that we have an efficient way of accessing the data in Gatsby, we need Gatsby to know where to get it. Gatsby has a repository of plugins that can fetch data from a variety of sources, Fauna included.
Setting up the Fauna Gatsby Data Source Plugin
npm install gatsby-source-faunadb
After we install this plugin to our project, we need to configure it in our gatsby-config.js file. In the plugins array of our project, we’ll add a new item.
{ resolve: `gatsby-source-faunadb`, options: { // The secret for the key you're using to connect to your Fauna database. // You can generate on of these in the "Security" tab of your Fauna Console. secret: process.env.YOUR_FAUNADB_SECRET, // The name of the index you want to query // You can create an index in the "Indexes" tab of your Fauna Console. index: `allSignatures`, // This is the name under which your data will appear in Gatsby GraphQL queries // The following will create queries called `allBird` and `bird`. type: "Signatures", // If you need to limit the number of documents returned, you can specify a // Optional maximum number to read. // size: 100 }, },
In this configuration, you provide it your Fauna secret Key, the Index name we created and the “type” we want to access in our Gatsby GraphQL query.
Where did that process.env.YOUR_FAUNADB_SECRET come from?
In your project, create a .env file — and include that file in your .gitignore! This file will give Gatsby’s Webpack configuration the secret value. This will keep your sensitive information safe and not stored in GitHub.
YOUR_FAUNADB_SECRET = "value from fauna"
We can then head over to the “Security” tab in our Database and create a new key. Since this is a protected secret, it’s safe to use a “Server” role. When you save the Key, it’ll provide your secret. Be sure to grab that now, as you can’t get it again (without recreating the Key).
Once the configuration is set up, we can write a GraphQL query in our components to grab the data at build time.
Getting the data and building the template
We’ll add this query to our Midsection component to make it accessible by both of our components.
const Midsection = () => { const data = useStaticQuery( graphql` query GetSignatures { allSignatures { nodes { name message _ts _id } } }` ); // ... rest of the component }
This will access the Signatures type we created in the configuration. It will grab all the signatures and provide an array of nodes. Those nodes will contain the data we specify we need: name, message, ts, id.
We’ll set that data into our state — this will make updating it live easier later.
const [sigData, setSigData] = useState(data.allSignatures.nodes);
Now we can pass sigData as a prop into <Signatures> and setSigData into <SignForm>.
<SignForm setSigData={setSigData}></SignForm> <Signatures sigData={sigData}></Signatures>
Let’s set up our Signatures component to use that data!
import React from 'react'; import Signature from './signature' const Signatures = (props) => { const SignatureMarkup = () => { return props.sigData.map((signature, index) => { return ( <Signature key={index} signature={signature}></Signature> ) }).reverse() } return ( <SignatureMarkup></SignatureMarkup> ) } export default Signatures
In this function, we’ll .map() over our signature data and create an Array of markup based on a new <Signature> component that we pass the data into.
The Signature component will handle formatting our data and returning an appropriate set of HTML.
import React from 'react'; const Signature = ({signature}) => { const dateObj = new Date(signature._ts / 1000); let dateString = `${dateObj.toLocaleString('default', {weekday: 'long'})}, ${dateObj.toLocaleString('default', { month: 'long' })} ${dateObj.getDate()} at ${dateObj.toLocaleTimeString('default', {hour: '2-digit',minute: '2-digit', hour12: false})}` return ( <article className="signature box"> <h3 className="signature__headline">{signature.name} - {dateString}</h3> <p className="signature__message"> {signature.message} </p> </article> )}; export default Signature;
At this point, if you start your Gatsby development server, you should have a list of signatures currently existing in your database. Run the following command to get up and running:
gatsby develop
Any signature stored in our database will build HTML in that component. But how can we get signatures INTO our database?
Let’s set up a signature form component to send data and update our Signatures list.
Let’s Make Our JAMstack Guestbook Interactive
First, we’ll set up the basic structure for our component. It will render a simple form onto the page with a text input, a textarea, and a button for submission.
import React from 'react'; import faunadb, { query as q } from "faunadb" var client = new faunadb.Client({ secret: process.env.GATSBY_FAUNA_CLIENT_SECRET }) export default class SignForm extends React.Component { constructor(props) { super(props) this.state = { sigName: "", sigMessage: "" } } handleSubmit = async event => { // Handle the submission } handleInputChange = event => { // When an input changes, update the state } render() { return ( <form onSubmit={this.handleSubmit}> <div className="field"> <div className="control"> <label className="label">Label <input className="input is-fullwidth" name="sigName" type="text" value={this.state.sigName} onChange={this.handleInputChange} /> </label> </div> </div> <div className="field"> <label> Your Message: <textarea rows="5" name="sigMessage" value={this.state.sigMessage} onChange={this.handleInputChange} className="textarea" placeholder="Leave us a happy note"></textarea> </label> </div> <div className="buttons"> <button className="button is-primary" type="submit">Sign the Guestbook</button> </div> </form> ) } }
To start, we’ll set up our state to include the name and the message. We’ll default them to blank strings and insert them into our <textarea> and <input>.
When a user changes the value of one of these fields, we’ll use the handleInputChange method. When a user submits the form, we’ll use the handleSubmit method.
Let’s break down both of those functions.
handleInputChange = event => { const target = event.target const value = target.value const name = target.name this.setState({ [name]: value, }) }
The input change will accept the event. From that event, it will get the current target’s value and name. We can then modify the state of the properties on our state object — sigName, sigMessage or anything else.
Once the state has changed, we can use the state in our handleSubmit method.
handleSubmit = async event => { event.preventDefault(); const placeSig = await this.createSignature(this.state.sigName, this.state.sigMessage); this.addSignature(placeSig); }
This function will call a new createSignature() method. This will connect to Fauna to create a new Document from our state items.
The addSignature() method will update our Signatures list data with the response we get back from Fauna.
In order to write to our database, we’ll need to set up a new key in Fauna with minimal permissions. Our server key is allowed higher permissions because it’s only used during build and won’t be visible in our source.
This key needs to only allow for the ability to only create new items in our signatures collection.
Note: A user could still be malicious with this key, but they can only do as much damage as a bot submitting that form, so it’s a trade-off I’m willing to make for this app.
A look at the FaunaDB security panel. In this shot, we’re creating a ‘client’ role that allows only the ‘Create’ permission for those API Keys. (Large preview)
For this, we’ll create a new “Role” in the “Security” tab of our dashboard. We can add permissions around one or more of our Collections. In this demo, we only need signatures and we can select the “Create” functionality.
After that, we generate a new key that uses that role.
To use this key, we’ll instantiate a new version of the Fauna JavaScript SDK. This is a dependency of the Gatsby plugin we installed, so we already have access to it.
import faunadb, { query as q } from "faunadb" var client = new faunadb.Client({ secret: process.env.GATSBY_FAUNA_CLIENT_SECRET })
By using an environment variable prefixed with GATSBY_, we gain access to it in our browser JavaScript (be sure to add it to your .env file).
By importing the query object from the SDK, we gain access to any of the methods available in Fauna’s first-party Fauna Query Language (FQL). In this case, we want to use the Create method to create a new document on our Collection.
createSignature = async (sigName, sigMessage) => { try { const queryResponse = await client.query( q.Create( q.Collection('signatures'), { data: { name: sigName, message: sigMessage } } ) ) const signatureInfo = { name: queryResponse.data.name, message: queryResponse.data.message, _ts: queryResponse.ts, _id: queryResponse.id} return signatureInfo } catch(err) { console.log(err); } }
We pass the Create function to the client.query() method. Create takes a Collection reference and an object of information to pass to a new Document. In this case, we use q.Collection and a string of our Collection name to get the reference to the Collection. The second argument is for our data. You can pass other items in the object, so we need to tell Fauna, we’re specifically sending it the data property on that object.
Next, we pass it the name and message we collected in our state. The response we get back from Fauna is the entire object of our Document. This includes our data in a data object, as well as a Fauna ID and timestamp. We reformat that data in a way that our Signatures list can use and return that back to our handleSubmit function.
Our submit handler will then pass that data into our setSigData prop which will notify our Signatures component to rerender with that new data. This gives our user immediate feedback that their submission has been accepted.
Rebuilding the site
This is all working in the browser, but the data hasn’t been updated in our static application yet.
From here, we need to tell our JAMstack host to rebuild our site. Many have the ability to specify a webhook to trigger a deployment. Since I’m hosting this demo on Netlify, I can create a new “Deploy webhook” in their admin and create a new triggerBuild function. This function will use the native JavaScript fetch() method and send a post request to that URL. Netlify will then rebuild the application and pull in the latest signatures.
triggerBuild = async () => { const response = await fetch(process.env.GATSBY_BUILD_HOOK, { method: "POST", body: "{}" }); return response; }
Both Gatsby Cloud and Netlify have implemented ways of handling “incremental” builds with Gatsby drastically speeding up build times. This sort of build can happen very quickly now and feel almost as fast as a traditional server-rendered site.
Every signature that gets added gets quick feedback to the user that it’s been submitted, is perpetually stored in a database, and served as HTML via a build process.
Still feels a little too much like a typical website? Let’s take all these concepts a step further.
Create A Mindful App With Auth0, Fauna Identity And Fauna User-Defined Functions (UDF)
Being mindful is an important skill to cultivate. Whether it’s thinking about your relationships, your career, your family, or just going for a walk in nature, it’s important to be mindful of the people and places around you.
A look at the final app screen showing a ‘Mindful Mission,’ ‘Past Missions’ and a ‘Log Out’ button. (Large preview)
This app intends to help you focus on one randomized idea every day and review the various ideas from recent days.
To do this, we need to introduce a key element to most apps: authentication. With authentication, comes extra security concerns. While this data won’t be particularly sensitive, you don’t want one user accessing the history of any other user.
Since we’ll be scoping data to a specific user, we also don’t want to store any secret keys on browser code, as that would open up other security flaws.
We could create an entire authentication flow using nothing but our wits and a user database with Fauna. That may seem daunting and moves us away from the features we want to write. The great thing is that there’s certainly an API for that in the JAMstack! In this demo, we’ll explore integrating Auth0 with Fauna. We can use the integration in many ways.
Setting Up Auth0 To Connect With Fauna
Many implementations of authentication with the JAMstack rely heavily on Serverless functions. That moves much of the security concerns from a security-focused company like Auth0 to the individual developer. That doesn’t feel quite right.
A diagram outlining the convoluted method of using a serverless function to manage authentication and token generation. (Large preview)
The typical flow would be to send a login request to a serverless function. That function would request a user from Auth0. Auth0 would provide the user’s JSON Web Token (JWT) and the function would provide any additional information about the user our application needs. The function would then bundle everything up and send it to the browser.
There are a lot of places in that authentication flow where a developer could introduce a security hole.
Instead, let’s request that Auth0 bundle everything up for us inside the JWT it sends. Keeping security in the hands of the folks who know it best.
A diagram outlining the streamlined authentication and token generation flow when using Auth0’s Rule system. (Large preview)
We’ll do this by using Auth0’s Rules functionality to ask Fauna for a user token to encode into our JWT. This means that unlike our Guestbook, we won’t have any Fauna keys in our front-end code. Everything will be managed in memory from that JWT token.
Setting up Auth0 Application and Rule
First, we’ll need to set up the basics of our Auth0 Application.
Following the configuration steps in their basic walkthrough gets the important basic information filled in. Be sure to fill out the proper localhost port for your bundler of choice as one of your authorized domains.
After the basics of the application are set up, we’ll go into the “Rules” section of our account.
Click “Create Rule” and select “Empty Rule” (or start from one of their many templates that are helpful starting points).
Here’s our Rule code
async function (user, context, callback) { const FAUNADB_SECRET = 'Your Server secret'; const faunadb = require('[email protected]'); const { query: q } = faunadb; const client = new faunadb.Client({ secret: FAUNADB_SECRET }); try { const token = await client.query( q.Call('user_login_or_create', user.email, user) // Call UDF in fauna ); let newClient = new faunadb.Client({ secret: token.secret }); context.idToken['https://faunadb.com/id/secret'] = token.secret; callback(null, user, context); } catch(error) { console.log('->', error); callback(error, user, context); } }
We give the rule a function that takes the user, context, and a callback from Auth0. We need to set up and grab a Server token to initialize our Fauna JavaScript SDK and initialize our client. Just like in our Guestbook, we’ll create a new Database and manage our Tokens in “Security”.
From there, we want to send a query to Fauna to create or log in our user. To keep our Rule code simple (and make it reusable), we’ll write our first Fauna “User-Defined Function” (UDF). A UDF is a function written in FQL that runs on Fauna’s infrastructure.
First, we’ll set up a Collection for our users. You don’t need to make a first Document here, as they’ll be created behind the scenes by our Auth0 rule whenever a new Auth0 user is created.
Next, we need an Index to search our users Collection based on the email address. This Index is simpler than our Guestbook, so we can add it to the Dashboard. Name the Index user_by_email, set the Collection to users, and the Terms to data.email. This will allow us to pass an email address to the Index and get a matching user Document back.
It’s time to create our UDF. In the Dashboard, navigate to “Functions” and create a new one named user_login_or_create.
Query( Lambda( ["userEmail", "userObj"], // Arguments Let( { user: Match(Index("user_by_email"), Var("userEmail")) }, // Set user variable If( Exists(Var("user")), // Check if the User exists Create(Tokens(null), { instance: Select("ref", Get(Var("user"))) }), // Return a token for that item in the users collection (in other words, the user) Let( // Else statement: Set a variable { newUser: Create(Collection("users"), { data: Var("userObj") }), // Create a new user and get its reference token: Create(Tokens(null), { // Create a token for that user instance: Select("ref", Var("newUser")) }) }, Var("token") // return the token ) ) ) ) )
Our UDF will accept a user email address and the rest of the user information. If a user exists in a users Collection, it will create a Token for the user and send that back. If a user doesn’t exist, it will create that user Document and then send a Token to our Auth0 Rule.
We can then store the Token as an idToken attached to the context in our JWT. The token needs a URL as a key. Since this is a Fauna token, we can use a Fauna URL. Whatever this is, you’ll use it to access this in your code.
This Token doesn’t have any permissions yet. We need to go into our Security rules and set up a new Role.
We’ll create an “AuthedUser” role. We don’t need to add any permissions yet, but as we create new UDFs and new Collections, we’ll update the permissions here. Instead of generating a new Key to use this Role, we want to add to this Role’s “Memberships”. On the Memberships screen, you can select a Collection to add as a member. The documents in this Collection (in our case, our Users), will have the permissions set on this role given via their Token.
Now, when a user logs in via Auth0, they’ll be returned a Token that matches their user Document and has its permissions.
From here, we come back to our application.
Implement logic for when the User is logged in
Auth0 has an excellent walkthrough for setting up a “vanilla” JavaScript single-page application. Most of this code is a refactor of that to fit the code splitting of this application.
The default Auth0 Login/Signup screen. All the login flow can be contained in the Auth0 screens. (Large preview)
First, we’ll need the Auth0 SPA SDK.
npm install @auth0/auth0-spa-js
import createAuth0Client from '@auth0/auth0-spa-js'; import { changeToHome } from './layouts/home'; // Home Layout import { changeToMission } from './layouts/myMind'; // Current Mindfulness Mission Layout let auth0 = null; var currentUser = null; const configureClient = async () => { // Configures Auth0 SDK auth0 = await createAuth0Client({ domain: "mindfulness.auth0.com", client_id: "32i3ylPhup47PYKUtZGRnLNsGVLks3M6" }); }; const checkUser = async () => { // return user info from any method const isAuthenticated = await auth0.isAuthenticated(); if (isAuthenticated) { return await auth0.getUser(); } } const loadAuth = async () => { // Loads and checks auth await configureClient(); const isAuthenticated = await auth0.isAuthenticated(); if (isAuthenticated) { // show the gated content currentUser = await auth0.getUser(); changeToMission(); // Show the "Today" screen return; } else { changeToHome(); // Show the logged out "homepage" } const query = window.location.search; if (query.includes("code=") && query.includes("state=")) { // Process the login state await auth0.handleRedirectCallback(); currentUser = await auth0.getUser(); changeToMission(); // Use replaceState to redirect the user away and remove the querystring parameters window.history.replaceState({}, document.title, "/"); } } const login = async () => { await auth0.loginWithRedirect({ redirect_uri: window.location.origin }); } const logout = async () => { auth0.logout({ returnTo: window.location.origin }); window.localStorage.removeItem('currentMindfulItem') changeToHome(); // Change back to logged out state } export { auth0, loadAuth, currentUser, checkUser, login, logout }
First, we configure the SDK with our client_id from Auth0. This is safe information to store in our code.
Next, we set up a function that can be exported and used in multiple files to check if a user is logged in. The Auth0 library provides an isAuthenticated() method. If the user is authenticated, we can return the user data with auth0.getUser().
We set up a login() and logout() functions and a loadAuth() function to handle the return from Auth0 and change the state of our UI to the “Mission” screen with today’s Mindful idea.
Once this is all set up, we have our authentication and user login squared away.
We’ll create a new function for our Fauna functions to reference to get the proper token set up.
const AUTH_PROP_KEY = "https://faunad.com/id/secret"; var faunadb = require('faunadb'), q = faunadb.query; async function getUserClient(currentUser) { return new faunadb.Client({ secret: currentUser[AUTH_PROP_KEY]}) }
This returns a new connection to Fauna using our Token from Auth0. This token works the same as the Keys from previous examples.
Generate a random Mindful topic and store it in Fauna
To start, we need a Collection of items to store our list of Mindful objects. We’ll create a Collection called “mindful” things, and create a number of items with the following schema:
{ "title": "Career", "description": "Think about the next steps you want to make in your career. What’s the next easily attainable move you can make?", "color": "#C6D4FF", "textColor": "black" }
From here, we’ll move to our JavaScript and create a function for adding and returning a random item from that Collection.
async function getRandomMindfulFromFauna(userObj) { const client = await getUserClient(userObj); try { let mindfulThings = await client.query( q.Paginate( q.Documents(q.Collection('mindful_things')) ) ) let randomMindful = mindfulThings.data[Math.floor(Math.random()*mindfulThings.data.length)]; let creation = await client.query(q.Call('addUserMindful', randomMindful)); return creation.data.mindful; } catch (error) { console.log(error) } }
To start, we’ll instantiate our client with our getUserClient() method.
From there, we’ll grab all the Documents from our mindful_things Collection. Paginate() by default grabs 64 items per page, which is more than enough for our data. We’ll grab a random item from the array that’s returned from Fauna. This will be what Fauna refers to as a “Ref”. A Ref is a full reference to a Document that the various FQL functions can use to locate a Document.
We’ll pass that Ref to a new UDF that will handle storing a new, timestamped object for that user stored in a new user_things Collection.
We’ll create the new Collection, but we’ll have our UDF provide the data for it when called.
We’ll create a new UDF in the Fauna dashboard with the name addUserMindful that will accept that random Ref.
As with our login UDF before, we’ll use the Lambda() FQL method which takes an array of arguments.
Without passing any user information to the function, FQL is able to obtain our User Ref just calling the Identity() function. All we have from our randomRef is the reference to our Document. We’ll run a Get() to get the full object. We’ll the Create() a new Document in the user_things Collection with our User Ref and our random information.
We then return the creation object back out of our Lambda. We then go back to our JavaScript and return the data object with the mindful key back to where this function gets called.
Render our Mindful Object on the page
When our user is authenticated, you may remember it called a changeToMission() method. This function switches the items on the page from the “Home” screen to markup that can be filled in by our data. After it’s added to the page, the renderToday() function gets called to add content by a few rules.
The first rule of Serverless Data Club is not to make HTTP requests unless you have to. In other words, cache when you can. Whether that’s creating a full PWA-scale application with Service Workers or just caching your database response with localStorage, cache data, and fetch only when necessary.
The first rule of our conditional is to check localStorage. If localStorage does contain a currentMindfulItem, then we need to check its date to see if it’s from today. If it is, we’ll render that and make no new requests.
The second rule of Serverless Data Club is to make as few requests as possible without the responses of those requests being too large. In that vein, our second conditional rule is to check the latest item from the current user and see if it is from today. If it is, we’ll store it in localStorage for later and then render the results.
Finally, if none of these are true, we’ll fire our getRandomMindfulFromFauna() function, format the result, store that in localStorage, and then render the result.
Get the latest item from a user
I glossed over it in the last section, but we also need some functionality to retrieve the latest mindful object from Fauna for our specific user. In our getLatestFromFauna() method, we’ll again instantiate our Fauna client and then call a new UDF.
Our new UDF is going to call a Fauna Index. An Index is an efficient way of doing a lookup on a Fauna database. In our case, we want to return all user_things by the user field. Then we can also sort the result by timestamp and reverse the default ordering of the data to show the latest first.
Simple Indexes can be created in the Index dashboard. Since we want to do the reverse sort, we’ll need to enter some custom FQL into the Fauna Shell (you can do this in the database dashboard Shell section).
CreateIndex({ name: "getMindfulByUserReverse", serialized: true, source: Collection("user_things"), terms: [ { field: ["data", "user"] } ], values: [ { field: ["ts"], reverse: true }, { field: ["ref"] } ] })
This creates an Index named getMindfulByUserReverse, created from our user_thing Collection. The terms object is a list of fields to search by. In our case, this is just the user field on the data object. We then provide values to return. In our case, we need the Ref and the Timestamp and we’ll use the reverse property to reverse order our results by this field.
We’ll create a new UDF to use this Index.
Query( Lambda( [], If( // Check if there is at least 1 in the index GT( Count( Select( "data", Paginate(Match(Index("getMindfulByUserReverse"), Identity())) ) ), 0 ), Let( // if more than 0 { match: Paginate( Match(Index("getMindfulByUserReverse"), Identity()) // Search the index by our User ), latestObj: Take(1, Var("match")), // Grab the first item from our match latestRef: Select( ["data"], Get(Select(["data", 0, 1], Var("latestObj"))) // Get the data object from the item ), latestTime: Select(["data", 0, 0], Var("latestObj")), // Get the time merged: Merge( // merge those items into one object to return { latestTime: Var("latestTime") }, { latestMindful: Var("latestRef") } ) }, Var("merged") ), Let({ error: { err: "No data" } }, Var("error")) // if there aren't any, return an error. ) ) )
This time our Lambda() function doesn’t need any arguments since we’ll have our User based on the Token used.
First, we’ll check to see if there’s at least 1 item in our Index. If there is, we’ll grab the first item’s data and time and return that back as a merged object.
After we get the latest from Fauna in our JavaScript, we’ll format it to a structure our storeCurrent() and render() methods expect it and return that object.
Now, we have an application that creates, stores, and fetches data for a daily message to contemplate. A user can use this on their phone, on their tablet, on the computer, and have it all synced. We could turn this into a PWA or even a native app with a system like Ionic.
We’re still missing one feature. Viewing a certain number of past items. Since we’ve stored this in our database, we can retrieve them in whatever way we need to.
Pull the latest X Mindful Missions to get a picture of what you’ve thought about
We’ll create a new JavaScript method paired with a new UDF to tackle this.
getSomeFromFauna will take an integer count to ask Fauna for a certain number of items.
Our UDF will be very similar to the getLatestFromFauana UDF. Instead of returning the first item, we’ll Take() the number of items from our array that matches the integer that gets passed into our UDF. We’ll also begin with the same conditional, in case a user doesn’t have any items stored yet.
Query( Lambda( ["count"], // Number of items to return If( // Check if there are any objects GT( Count( Select( "data", Paginate(Match(Index("getMindfulByUserReverse"), Identity(null))) ) ), 0 ), Let( { match: Paginate( Match(Index("getMindfulByUserReverse"), Identity(null)) // Search the Index by our User ), latestObjs: Select("data", Take(Var("count"), Var("match"))), // Get the data that is returned mergedObjs: Map( // Loop over the objects Var("latestObjs"), Lambda( "latestArray", Let( // Build the data like we did in the LatestMindful function { ref: Select(["data"], Get(Select([1], Var("latestArray")))), latestTime: Select(0, Var("latestArray")), merged: Merge( { latestTime: Var("latestTime") }, Select("mindful", Var("ref")) ) }, Var("merged") // Return this to our new array ) ) ) }, Var("mergedObjs") // return the full array ), { latestMindful: [{ title: "No additional data" }] } // if there are no items, send back a message to display ) ) )
In this demo, we created a full-fledged app with serverless data. Because the data is served from a CDN, it can be as close to a user as possible. We used FaunaDB’s features, such as UDFs and Indexes, to optimize our database queries for speed and ease of use. We also made sure we only queried our database the bare minimum to reduce requests.
Where To Go With Serverless Data
The JAMstack isn’t just for sites. It can be used for robust applications as well. Whether that’s for a game, CRUD application or just to be mindful of your surroundings you can do a lot without sacrificing customization and without spinning up your own non-dist database system.
With performance on the mind of everyone creating on the JAMstack — whether for cost or for user experience — finding a good place to store and retrieve your data is a high priority. Find a spot that meets your needs, those of your users, and meets ideals of the JAMstack.
(ra, yk, il)
Website Design & SEO Delray Beach by DBL07.co
Delray Beach SEO
source http://www.scpie.org/from-static-sites-to-end-user-jamstack-apps-with-faunadb/
0 notes
Text
From Static Sites To End User JAMstack Apps With FaunaDB
About The Author
Bryan is a designer, developer, and educator with a passion for CSS and static sites. He actively works to mentor and teach developers and designers the value … More about Bryan Robinson …
To make the move from “site” to app, we’ll need to dive into the world of “app-generated” content. In this article, we’ll get started in this world with the power of serverless data. We’ll start with a simple demo by ingesting and posting data to FaunaDB and then extend that functionality in a full-fledged application using Auth0, FaunaDB’s Token system and User-Defined Functions.
The JAMstack has proven itself to be one of the top ways of producing content-driven sites, but it’s also a great place to house applications, as well. If you’ve been using the JAMstack for your performant websites, the demos in this article will help you extend those philosophies to applications as well.
When using the JAMstack to build applications, you need a data service that fits into the most important aspects of the JAMstack philosophy:
Global distribution
Zero operational needs
A developer-friendly API.
In the JAMstack ecosystem there are plenty of software-as-a-service companies that provide ways of getting and storing specific types of data. Whether you want to send emails, SMS or make phone calls (Twilio) or accept form submissions efficiently (Formspree, Formingo, Formstack, etc.), it seems there’s an API for almost everything.
These are great services that can do a lot of the low-level work of many applications, but once your data is more complex than a spreadsheet or needs to be updated and store in real-time, it might be time to look into a database.
The service API can still be in use, but a central database managing the state and operations of your app becomes much more important. Even if you need a database, you still want it to follow the core JAMstack philosophies we outlined above. That means, we don’t want to host our own database server. We need a Database-as-a-Service solution. Our database needs to be optimized for the JAMstack:
Optimized for API calls from a browser or build process.
Flexible to model your data in the specific ways your app needs.
Global distribution of our data like a CDN houses our sites.
Hands-free scaling with no need of a database administrator or developer intervention.
Whatever service you look into needs to follow these tenets of serverless data. In our demos, we’ll explore FaunaDB, a global serverless database, featuring native GraphQL to assure that we keep our apps in step with the philosophies of the JAMstack.
Let’s dive into the code!
A JAMstack Guestbook App With Gatsby And Fauna
I’m a big fan of reimagining the internet tools and concepts of the 1990s and early 2000s. We can take these concepts and make them feel fresh with the new set of tools and interactions.
A look at the app we’re creating. A signature form with a signature list below. The form will populate a FaunaDB database and that database will create the view list. (Large preview)
In this demo, we’ll create an application that was all the rage in that time period: the guestbook. A guestbook is nothing but app-generated content and interaction. A user can come to the site, see all the signatures of past “guests” and then leave their own.
To start, we’ll statically render our site and build our data from Fauna during our build step. This will provide the fast performance we expect from a JAMstack site. To do this, we’ll use GatsbyJS.
Initial setup
Our first step will be to install Gatsby globally on our computer. If you’ve never spent much time in the command line, Gatsby’s “part 0” tutorial will help you get up and running. If you already have Node and NPM installed, you’ll install the Gatsby CLI globally and create a new site with it using the following commands:
npm install -g gatsby-cli
gatsby new <directory-to-install-into> <starter>
Gatsby comes with a large repository of starters that can help bootstrap your project. For this demo, I chose a simple starter that came equipped with the Bulma CSS framework.
gatsby new guestbook-app https://github.com/amandeepmittal/gatsby-bulma-quickstart
This gives us a good starting point and structure. It also has the added benefit of coming with styles that are ready to go.
Let’s do a little cleanup for things we don’t need. We’ll start by simplifying our components.header.js
import React from 'react'; import './style.scss'; const Header = ({ siteTitle }) => ( <section className="hero gradientBg "> <div className="hero-body"> <div className="container container--small center"> <div className="content"> <h1 className="is-uppercase is-size-1 has-text-white"> Sign our Virtual Guestbook </h1> <p className="subtitle has-text-white is-size-3"> If you like all the things that we do, be sure to sign our virtual guestbook </p> </div> </div> </div> </section> ); export default Header;
This will get rid of much of the branded content. Feel free to customize this section, but we won’t write any of our code here.
Next we’ll clean out the components/midsection.js file. This will be where our app’s code will render.
import React, { useState } from 'react'; import Signatures from './signatures'; import SignForm from './sign-form'; const Midsection = () => { const [sigData, setSigData] = useState(data.allSignatures.nodes); return ( <section className="section"> <div className="container container--small"> <section className="section is-small"> <h2 className="title is-4">Sign here</h2> <SignForm></SignForm> </section> <section className="section"> <h2 className="title is-5">View Signatures</h2> <Signatures></Signatures> </section> </div> </section> ) } export default Midsection;
In this code, we’ve mostly removed the “site” content and added in a couple new components. A <SignForm> that will contain our form for submitting a signature and a <Signatures> component to contain the list of signatures.
Now that we have a relatively blank slate, we can set up our FaunaDB database.
Setting Up A FaunaDB Collection
After logging into Fauna (or signing up for an account), you’ll be given the option to create a new Database. We’ll create a new database called guestbook.
The initial state of our signatures Collection after we add our first Document. (Large preview)
Inside this database, we’ll create a “Collection” called signature. Collections in Fauna a group of Documents that are in turn JSON objects.
In this new Collection, we’ll create a new Document with the following JSON:
{ name: "Bryan Robinson", message: "Lorem ipsum dolor amet sum Lorem ipsum dolor amet sum Lorem ipsum dolor amet sum Lorem ipsum dolor amet sum" }
This will be the simple data schema for each of our signatures. For each of these Documents, Fauna will create additional data surrounding it.
{ "ref": Ref(Collection("signatures"), "262884172900598291"), "ts": 1586964733980000, "data": { "name": "Bryan Robinson", "message": "Lorem ipsum dolor amet sum Lorem ipsum dolor amet sum Lorem ipsum dolor amet sum Lorem ipsum dolor amet sum " } }
The ref is the unique identifier inside of Fauna and the ts is the time (as a Unix timestamp) the document was created/updated.
After creating our data, we want an easy way to grab all that data and use it in our site. In Fauna, the most efficient way to get data is via an Index. We’ll create an Index called allSignatures. This will grab and return all of our signature Documents in the Collection.
Now that we have an efficient way of accessing the data in Gatsby, we need Gatsby to know where to get it. Gatsby has a repository of plugins that can fetch data from a variety of sources, Fauna included.
Setting up the Fauna Gatsby Data Source Plugin
npm install gatsby-source-faunadb
After we install this plugin to our project, we need to configure it in our gatsby-config.js file. In the plugins array of our project, we’ll add a new item.
{ resolve: `gatsby-source-faunadb`, options: { // The secret for the key you're using to connect to your Fauna database. // You can generate on of these in the "Security" tab of your Fauna Console. secret: process.env.YOUR_FAUNADB_SECRET, // The name of the index you want to query // You can create an index in the "Indexes" tab of your Fauna Console. index: `allSignatures`, // This is the name under which your data will appear in Gatsby GraphQL queries // The following will create queries called `allBird` and `bird`. type: "Signatures", // If you need to limit the number of documents returned, you can specify a // Optional maximum number to read. // size: 100 }, },
In this configuration, you provide it your Fauna secret Key, the Index name we created and the “type” we want to access in our Gatsby GraphQL query.
Where did that process.env.YOUR_FAUNADB_SECRET come from?
In your project, create a .env file — and include that file in your .gitignore! This file will give Gatsby’s Webpack configuration the secret value. This will keep your sensitive information safe and not stored in GitHub.
YOUR_FAUNADB_SECRET = "value from fauna"
We can then head over to the “Security” tab in our Database and create a new key. Since this is a protected secret, it’s safe to use a “Server” role. When you save the Key, it’ll provide your secret. Be sure to grab that now, as you can’t get it again (without recreating the Key).
Once the configuration is set up, we can write a GraphQL query in our components to grab the data at build time.
Getting the data and building the template
We’ll add this query to our Midsection component to make it accessible by both of our components.
const Midsection = () => { const data = useStaticQuery( graphql` query GetSignatures { allSignatures { nodes { name message _ts _id } } }` ); // ... rest of the component }
This will access the Signatures type we created in the configuration. It will grab all the signatures and provide an array of nodes. Those nodes will contain the data we specify we need: name, message, ts, id.
We’ll set that data into our state — this will make updating it live easier later.
const [sigData, setSigData] = useState(data.allSignatures.nodes);
Now we can pass sigData as a prop into <Signatures> and setSigData into <SignForm>.
<SignForm setSigData={setSigData}></SignForm> <Signatures sigData={sigData}></Signatures>
Let’s set up our Signatures component to use that data!
import React from 'react'; import Signature from './signature' const Signatures = (props) => { const SignatureMarkup = () => { return props.sigData.map((signature, index) => { return ( <Signature key={index} signature={signature}></Signature> ) }).reverse() } return ( <SignatureMarkup></SignatureMarkup> ) } export default Signatures
In this function, we’ll .map() over our signature data and create an Array of markup based on a new <Signature> component that we pass the data into.
The Signature component will handle formatting our data and returning an appropriate set of HTML.
import React from 'react'; const Signature = ({signature}) => { const dateObj = new Date(signature._ts / 1000); let dateString = `${dateObj.toLocaleString('default', {weekday: 'long'})}, ${dateObj.toLocaleString('default', { month: 'long' })} ${dateObj.getDate()} at ${dateObj.toLocaleTimeString('default', {hour: '2-digit',minute: '2-digit', hour12: false})}` return ( <article className="signature box"> <h3 className="signature__headline">{signature.name} - {dateString}</h3> <p className="signature__message"> {signature.message} </p> </article> )}; export default Signature;
At this point, if you start your Gatsby development server, you should have a list of signatures currently existing in your database. Run the following command to get up and running:
gatsby develop
Any signature stored in our database will build HTML in that component. But how can we get signatures INTO our database?
Let’s set up a signature form component to send data and update our Signatures list.
Let’s Make Our JAMstack Guestbook Interactive
First, we’ll set up the basic structure for our component. It will render a simple form onto the page with a text input, a textarea, and a button for submission.
import React from 'react'; import faunadb, { query as q } from "faunadb" var client = new faunadb.Client({ secret: process.env.GATSBY_FAUNA_CLIENT_SECRET }) export default class SignForm extends React.Component { constructor(props) { super(props) this.state = { sigName: "", sigMessage: "" } } handleSubmit = async event => { // Handle the submission } handleInputChange = event => { // When an input changes, update the state } render() { return ( <form onSubmit={this.handleSubmit}> <div className="field"> <div className="control"> <label className="label">Label <input className="input is-fullwidth" name="sigName" type="text" value={this.state.sigName} onChange={this.handleInputChange} /> </label> </div> </div> <div className="field"> <label> Your Message: <textarea rows="5" name="sigMessage" value={this.state.sigMessage} onChange={this.handleInputChange} className="textarea" placeholder="Leave us a happy note"></textarea> </label> </div> <div className="buttons"> <button className="button is-primary" type="submit">Sign the Guestbook</button> </div> </form> ) } }
To start, we’ll set up our state to include the name and the message. We’ll default them to blank strings and insert them into our <textarea> and <input>.
When a user changes the value of one of these fields, we’ll use the handleInputChange method. When a user submits the form, we’ll use the handleSubmit method.
Let’s break down both of those functions.
handleInputChange = event => { const target = event.target const value = target.value const name = target.name this.setState({ [name]: value, }) }
The input change will accept the event. From that event, it will get the current target’s value and name. We can then modify the state of the properties on our state object — sigName, sigMessage or anything else.
Once the state has changed, we can use the state in our handleSubmit method.
handleSubmit = async event => { event.preventDefault(); const placeSig = await this.createSignature(this.state.sigName, this.state.sigMessage); this.addSignature(placeSig); }
This function will call a new createSignature() method. This will connect to Fauna to create a new Document from our state items.
The addSignature() method will update our Signatures list data with the response we get back from Fauna.
In order to write to our database, we’ll need to set up a new key in Fauna with minimal permissions. Our server key is allowed higher permissions because it’s only used during build and won’t be visible in our source.
This key needs to only allow for the ability to only create new items in our signatures collection.
Note: A user could still be malicious with this key, but they can only do as much damage as a bot submitting that form, so it’s a trade-off I’m willing to make for this app.
A look at the FaunaDB security panel. In this shot, we’re creating a ‘client’ role that allows only the ‘Create’ permission for those API Keys. (Large preview)
For this, we’ll create a new “Role” in the “Security” tab of our dashboard. We can add permissions around one or more of our Collections. In this demo, we only need signatures and we can select the “Create” functionality.
After that, we generate a new key that uses that role.
To use this key, we’ll instantiate a new version of the Fauna JavaScript SDK. This is a dependency of the Gatsby plugin we installed, so we already have access to it.
import faunadb, { query as q } from "faunadb" var client = new faunadb.Client({ secret: process.env.GATSBY_FAUNA_CLIENT_SECRET })
By using an environment variable prefixed with GATSBY_, we gain access to it in our browser JavaScript (be sure to add it to your .env file).
By importing the query object from the SDK, we gain access to any of the methods available in Fauna’s first-party Fauna Query Language (FQL). In this case, we want to use the Create method to create a new document on our Collection.
createSignature = async (sigName, sigMessage) => { try { const queryResponse = await client.query( q.Create( q.Collection('signatures'), { data: { name: sigName, message: sigMessage } } ) ) const signatureInfo = { name: queryResponse.data.name, message: queryResponse.data.message, _ts: queryResponse.ts, _id: queryResponse.id} return signatureInfo } catch(err) { console.log(err); } }
We pass the Create function to the client.query() method. Create takes a Collection reference and an object of information to pass to a new Document. In this case, we use q.Collection and a string of our Collection name to get the reference to the Collection. The second argument is for our data. You can pass other items in the object, so we need to tell Fauna, we’re specifically sending it the data property on that object.
Next, we pass it the name and message we collected in our state. The response we get back from Fauna is the entire object of our Document. This includes our data in a data object, as well as a Fauna ID and timestamp. We reformat that data in a way that our Signatures list can use and return that back to our handleSubmit function.
Our submit handler will then pass that data into our setSigData prop which will notify our Signatures component to rerender with that new data. This gives our user immediate feedback that their submission has been accepted.
Rebuilding the site
This is all working in the browser, but the data hasn’t been updated in our static application yet.
From here, we need to tell our JAMstack host to rebuild our site. Many have the ability to specify a webhook to trigger a deployment. Since I’m hosting this demo on Netlify, I can create a new “Deploy webhook” in their admin and create a new triggerBuild function. This function will use the native JavaScript fetch() method and send a post request to that URL. Netlify will then rebuild the application and pull in the latest signatures.
triggerBuild = async () => { const response = await fetch(process.env.GATSBY_BUILD_HOOK, { method: "POST", body: "{}" }); return response; }
Both Gatsby Cloud and Netlify have implemented ways of handling “incremental” builds with Gatsby drastically speeding up build times. This sort of build can happen very quickly now and feel almost as fast as a traditional server-rendered site.
Every signature that gets added gets quick feedback to the user that it’s been submitted, is perpetually stored in a database, and served as HTML via a build process.
Still feels a little too much like a typical website? Let’s take all these concepts a step further.
Create A Mindful App With Auth0, Fauna Identity And Fauna User-Defined Functions (UDF)
Being mindful is an important skill to cultivate. Whether it’s thinking about your relationships, your career, your family, or just going for a walk in nature, it’s important to be mindful of the people and places around you.
A look at the final app screen showing a ‘Mindful Mission,’ ‘Past Missions’ and a ‘Log Out’ button. (Large preview)
This app intends to help you focus on one randomized idea every day and review the various ideas from recent days.
To do this, we need to introduce a key element to most apps: authentication. With authentication, comes extra security concerns. While this data won’t be particularly sensitive, you don’t want one user accessing the history of any other user.
Since we’ll be scoping data to a specific user, we also don’t want to store any secret keys on browser code, as that would open up other security flaws.
We could create an entire authentication flow using nothing but our wits and a user database with Fauna. That may seem daunting and moves us away from the features we want to write. The great thing is that there’s certainly an API for that in the JAMstack! In this demo, we’ll explore integrating Auth0 with Fauna. We can use the integration in many ways.
Setting Up Auth0 To Connect With Fauna
Many implementations of authentication with the JAMstack rely heavily on Serverless functions. That moves much of the security concerns from a security-focused company like Auth0 to the individual developer. That doesn’t feel quite right.
A diagram outlining the convoluted method of using a serverless function to manage authentication and token generation. (Large preview)
The typical flow would be to send a login request to a serverless function. That function would request a user from Auth0. Auth0 would provide the user’s JSON Web Token (JWT) and the function would provide any additional information about the user our application needs. The function would then bundle everything up and send it to the browser.
There are a lot of places in that authentication flow where a developer could introduce a security hole.
Instead, let’s request that Auth0 bundle everything up for us inside the JWT it sends. Keeping security in the hands of the folks who know it best.
A diagram outlining the streamlined authentication and token generation flow when using Auth0’s Rule system. (Large preview)
We’ll do this by using Auth0’s Rules functionality to ask Fauna for a user token to encode into our JWT. This means that unlike our Guestbook, we won’t have any Fauna keys in our front-end code. Everything will be managed in memory from that JWT token.
Setting up Auth0 Application and Rule
First, we’ll need to set up the basics of our Auth0 Application.
Following the configuration steps in their basic walkthrough gets the important basic information filled in. Be sure to fill out the proper localhost port for your bundler of choice as one of your authorized domains.
After the basics of the application are set up, we’ll go into the “Rules” section of our account.
Click “Create Rule” and select “Empty Rule” (or start from one of their many templates that are helpful starting points).
Here’s our Rule code
async function (user, context, callback) { const FAUNADB_SECRET = 'Your Server secret'; const faunadb = require('[email protected]'); const { query: q } = faunadb; const client = new faunadb.Client({ secret: FAUNADB_SECRET }); try { const token = await client.query( q.Call('user_login_or_create', user.email, user) // Call UDF in fauna ); let newClient = new faunadb.Client({ secret: token.secret }); context.idToken['https://faunadb.com/id/secret'] = token.secret; callback(null, user, context); } catch(error) { console.log('->', error); callback(error, user, context); } }
We give the rule a function that takes the user, context, and a callback from Auth0. We need to set up and grab a Server token to initialize our Fauna JavaScript SDK and initialize our client. Just like in our Guestbook, we’ll create a new Database and manage our Tokens in “Security”.
From there, we want to send a query to Fauna to create or log in our user. To keep our Rule code simple (and make it reusable), we’ll write our first Fauna “User-Defined Function” (UDF). A UDF is a function written in FQL that runs on Fauna’s infrastructure.
First, we’ll set up a Collection for our users. You don’t need to make a first Document here, as they’ll be created behind the scenes by our Auth0 rule whenever a new Auth0 user is created.
Next, we need an Index to search our users Collection based on the email address. This Index is simpler than our Guestbook, so we can add it to the Dashboard. Name the Index user_by_email, set the Collection to users, and the Terms to data.email. This will allow us to pass an email address to the Index and get a matching user Document back.
It’s time to create our UDF. In the Dashboard, navigate to “Functions” and create a new one named user_login_or_create.
Query( Lambda( ["userEmail", "userObj"], // Arguments Let( { user: Match(Index("user_by_email"), Var("userEmail")) }, // Set user variable If( Exists(Var("user")), // Check if the User exists Create(Tokens(null), { instance: Select("ref", Get(Var("user"))) }), // Return a token for that item in the users collection (in other words, the user) Let( // Else statement: Set a variable { newUser: Create(Collection("users"), { data: Var("userObj") }), // Create a new user and get its reference token: Create(Tokens(null), { // Create a token for that user instance: Select("ref", Var("newUser")) }) }, Var("token") // return the token ) ) ) ) )
Our UDF will accept a user email address and the rest of the user information. If a user exists in a users Collection, it will create a Token for the user and send that back. If a user doesn’t exist, it will create that user Document and then send a Token to our Auth0 Rule.
We can then store the Token as an idToken attached to the context in our JWT. The token needs a URL as a key. Since this is a Fauna token, we can use a Fauna URL. Whatever this is, you’ll use it to access this in your code.
This Token doesn’t have any permissions yet. We need to go into our Security rules and set up a new Role.
We’ll create an “AuthedUser” role. We don’t need to add any permissions yet, but as we create new UDFs and new Collections, we’ll update the permissions here. Instead of generating a new Key to use this Role, we want to add to this Role’s “Memberships”. On the Memberships screen, you can select a Collection to add as a member. The documents in this Collection (in our case, our Users), will have the permissions set on this role given via their Token.
Now, when a user logs in via Auth0, they’ll be returned a Token that matches their user Document and has its permissions.
From here, we come back to our application.
Implement logic for when the User is logged in
Auth0 has an excellent walkthrough for setting up a “vanilla” JavaScript single-page application. Most of this code is a refactor of that to fit the code splitting of this application.
The default Auth0 Login/Signup screen. All the login flow can be contained in the Auth0 screens. (Large preview)
First, we’ll need the Auth0 SPA SDK.
npm install @auth0/auth0-spa-js
import createAuth0Client from '@auth0/auth0-spa-js'; import { changeToHome } from './layouts/home'; // Home Layout import { changeToMission } from './layouts/myMind'; // Current Mindfulness Mission Layout let auth0 = null; var currentUser = null; const configureClient = async () => { // Configures Auth0 SDK auth0 = await createAuth0Client({ domain: "mindfulness.auth0.com", client_id: "32i3ylPhup47PYKUtZGRnLNsGVLks3M6" }); }; const checkUser = async () => { // return user info from any method const isAuthenticated = await auth0.isAuthenticated(); if (isAuthenticated) { return await auth0.getUser(); } } const loadAuth = async () => { // Loads and checks auth await configureClient(); const isAuthenticated = await auth0.isAuthenticated(); if (isAuthenticated) { // show the gated content currentUser = await auth0.getUser(); changeToMission(); // Show the "Today" screen return; } else { changeToHome(); // Show the logged out "homepage" } const query = window.location.search; if (query.includes("code=") && query.includes("state=")) { // Process the login state await auth0.handleRedirectCallback(); currentUser = await auth0.getUser(); changeToMission(); // Use replaceState to redirect the user away and remove the querystring parameters window.history.replaceState({}, document.title, "/"); } } const login = async () => { await auth0.loginWithRedirect({ redirect_uri: window.location.origin }); } const logout = async () => { auth0.logout({ returnTo: window.location.origin }); window.localStorage.removeItem('currentMindfulItem') changeToHome(); // Change back to logged out state } export { auth0, loadAuth, currentUser, checkUser, login, logout }
First, we configure the SDK with our client_id from Auth0. This is safe information to store in our code.
Next, we set up a function that can be exported and used in multiple files to check if a user is logged in. The Auth0 library provides an isAuthenticated() method. If the user is authenticated, we can return the user data with auth0.getUser().
We set up a login() and logout() functions and a loadAuth() function to handle the return from Auth0 and change the state of our UI to the “Mission” screen with today’s Mindful idea.
Once this is all set up, we have our authentication and user login squared away.
We’ll create a new function for our Fauna functions to reference to get the proper token set up.
const AUTH_PROP_KEY = "https://faunad.com/id/secret"; var faunadb = require('faunadb'), q = faunadb.query; async function getUserClient(currentUser) { return new faunadb.Client({ secret: currentUser[AUTH_PROP_KEY]}) }
This returns a new connection to Fauna using our Token from Auth0. This token works the same as the Keys from previous examples.
Generate a random Mindful topic and store it in Fauna
To start, we need a Collection of items to store our list of Mindful objects. We’ll create a Collection called “mindful” things, and create a number of items with the following schema:
{ "title": "Career", "description": "Think about the next steps you want to make in your career. What’s the next easily attainable move you can make?", "color": "#C6D4FF", "textColor": "black" }
From here, we’ll move to our JavaScript and create a function for adding and returning a random item from that Collection.
async function getRandomMindfulFromFauna(userObj) { const client = await getUserClient(userObj); try { let mindfulThings = await client.query( q.Paginate( q.Documents(q.Collection('mindful_things')) ) ) let randomMindful = mindfulThings.data[Math.floor(Math.random()*mindfulThings.data.length)]; let creation = await client.query(q.Call('addUserMindful', randomMindful)); return creation.data.mindful; } catch (error) { console.log(error) } }
To start, we’ll instantiate our client with our getUserClient() method.
From there, we’ll grab all the Documents from our mindful_things Collection. Paginate() by default grabs 64 items per page, which is more than enough for our data. We’ll grab a random item from the array that’s returned from Fauna. This will be what Fauna refers to as a “Ref”. A Ref is a full reference to a Document that the various FQL functions can use to locate a Document.
We’ll pass that Ref to a new UDF that will handle storing a new, timestamped object for that user stored in a new user_things Collection.
We’ll create the new Collection, but we’ll have our UDF provide the data for it when called.
We’ll create a new UDF in the Fauna dashboard with the name addUserMindful that will accept that random Ref.
As with our login UDF before, we’ll use the Lambda() FQL method which takes an array of arguments.
Without passing any user information to the function, FQL is able to obtain our User Ref just calling the Identity() function. All we have from our randomRef is the reference to our Document. We’ll run a Get() to get the full object. We’ll the Create() a new Document in the user_things Collection with our User Ref and our random information.
We then return the creation object back out of our Lambda. We then go back to our JavaScript and return the data object with the mindful key back to where this function gets called.
Render our Mindful Object on the page
When our user is authenticated, you may remember it called a changeToMission() method. This function switches the items on the page from the “Home” screen to markup that can be filled in by our data. After it’s added to the page, the renderToday() function gets called to add content by a few rules.
The first rule of Serverless Data Club is not to make HTTP requests unless you have to. In other words, cache when you can. Whether that’s creating a full PWA-scale application with Service Workers or just caching your database response with localStorage, cache data, and fetch only when necessary.
The first rule of our conditional is to check localStorage. If localStorage does contain a currentMindfulItem, then we need to check its date to see if it’s from today. If it is, we’ll render that and make no new requests.
The second rule of Serverless Data Club is to make as few requests as possible without the responses of those requests being too large. In that vein, our second conditional rule is to check the latest item from the current user and see if it is from today. If it is, we’ll store it in localStorage for later and then render the results.
Finally, if none of these are true, we’ll fire our getRandomMindfulFromFauna() function, format the result, store that in localStorage, and then render the result.
Get the latest item from a user
I glossed over it in the last section, but we also need some functionality to retrieve the latest mindful object from Fauna for our specific user. In our getLatestFromFauna() method, we’ll again instantiate our Fauna client and then call a new UDF.
Our new UDF is going to call a Fauna Index. An Index is an efficient way of doing a lookup on a Fauna database. In our case, we want to return all user_things by the user field. Then we can also sort the result by timestamp and reverse the default ordering of the data to show the latest first.
Simple Indexes can be created in the Index dashboard. Since we want to do the reverse sort, we’ll need to enter some custom FQL into the Fauna Shell (you can do this in the database dashboard Shell section).
CreateIndex({ name: "getMindfulByUserReverse", serialized: true, source: Collection("user_things"), terms: [ { field: ["data", "user"] } ], values: [ { field: ["ts"], reverse: true }, { field: ["ref"] } ] })
This creates an Index named getMindfulByUserReverse, created from our user_thing Collection. The terms object is a list of fields to search by. In our case, this is just the user field on the data object. We then provide values to return. In our case, we need the Ref and the Timestamp and we’ll use the reverse property to reverse order our results by this field.
We’ll create a new UDF to use this Index.
Query( Lambda( [], If( // Check if there is at least 1 in the index GT( Count( Select( "data", Paginate(Match(Index("getMindfulByUserReverse"), Identity())) ) ), 0 ), Let( // if more than 0 { match: Paginate( Match(Index("getMindfulByUserReverse"), Identity()) // Search the index by our User ), latestObj: Take(1, Var("match")), // Grab the first item from our match latestRef: Select( ["data"], Get(Select(["data", 0, 1], Var("latestObj"))) // Get the data object from the item ), latestTime: Select(["data", 0, 0], Var("latestObj")), // Get the time merged: Merge( // merge those items into one object to return { latestTime: Var("latestTime") }, { latestMindful: Var("latestRef") } ) }, Var("merged") ), Let({ error: { err: "No data" } }, Var("error")) // if there aren't any, return an error. ) ) )
This time our Lambda() function doesn’t need any arguments since we’ll have our User based on the Token used.
First, we’ll check to see if there’s at least 1 item in our Index. If there is, we’ll grab the first item’s data and time and return that back as a merged object.
After we get the latest from Fauna in our JavaScript, we’ll format it to a structure our storeCurrent() and render() methods expect it and return that object.
Now, we have an application that creates, stores, and fetches data for a daily message to contemplate. A user can use this on their phone, on their tablet, on the computer, and have it all synced. We could turn this into a PWA or even a native app with a system like Ionic.
We’re still missing one feature. Viewing a certain number of past items. Since we’ve stored this in our database, we can retrieve them in whatever way we need to.
Pull the latest X Mindful Missions to get a picture of what you’ve thought about
We’ll create a new JavaScript method paired with a new UDF to tackle this.
getSomeFromFauna will take an integer count to ask Fauna for a certain number of items.
Our UDF will be very similar to the getLatestFromFauana UDF. Instead of returning the first item, we’ll Take() the number of items from our array that matches the integer that gets passed into our UDF. We’ll also begin with the same conditional, in case a user doesn’t have any items stored yet.
Query( Lambda( ["count"], // Number of items to return If( // Check if there are any objects GT( Count( Select( "data", Paginate(Match(Index("getMindfulByUserReverse"), Identity(null))) ) ), 0 ), Let( { match: Paginate( Match(Index("getMindfulByUserReverse"), Identity(null)) // Search the Index by our User ), latestObjs: Select("data", Take(Var("count"), Var("match"))), // Get the data that is returned mergedObjs: Map( // Loop over the objects Var("latestObjs"), Lambda( "latestArray", Let( // Build the data like we did in the LatestMindful function { ref: Select(["data"], Get(Select([1], Var("latestArray")))), latestTime: Select(0, Var("latestArray")), merged: Merge( { latestTime: Var("latestTime") }, Select("mindful", Var("ref")) ) }, Var("merged") // Return this to our new array ) ) ) }, Var("mergedObjs") // return the full array ), { latestMindful: [{ title: "No additional data" }] } // if there are no items, send back a message to display ) ) )
In this demo, we created a full-fledged app with serverless data. Because the data is served from a CDN, it can be as close to a user as possible. We used FaunaDB’s features, such as UDFs and Indexes, to optimize our database queries for speed and ease of use. We also made sure we only queried our database the bare minimum to reduce requests.
Where To Go With Serverless Data
The JAMstack isn’t just for sites. It can be used for robust applications as well. Whether that’s for a game, CRUD application or just to be mindful of your surroundings you can do a lot without sacrificing customization and without spinning up your own non-dist database system.
With performance on the mind of everyone creating on the JAMstack — whether for cost or for user experience — finding a good place to store and retrieve your data is a high priority. Find a spot that meets your needs, those of your users, and meets ideals of the JAMstack.
(ra, yk, il)
Website Design & SEO Delray Beach by DBL07.co
Delray Beach SEO
source http://www.scpie.org/from-static-sites-to-end-user-jamstack-apps-with-faunadb/ source https://scpie1.blogspot.com/2020/06/from-static-sites-to-end-user-jamstack.html
0 notes
Link
Lean Modern React 16.8+ Including Hooks, Context API, Full Stack MERN & Redux By Building Real Life Projects
What you’ll learn
Learn Modern React 16.8 By Building 3 Projects
Flux Pattern Using Context & useContext/useReducer Hooks
Learn Redux From Scratch
Full Stack Development with MERN (MongoDB, Express, React, Node)
Suitable For Both Beginners & Intermediate React Developers
Requirements
You should know JavaScript pretty well, including ES6 (Arrow functions, promises, etc)
Description
In this course you will learn to master React 16.8+ concepts including how to create a Flux pattern using the Context API with the useContext and useReducer hooks. We will also build a full stack MERN application with a custom Express backend API that uses JWT (JSON Web Token) for authentication. In addition, we will also create a project that uses Redux.
Here are some of the things you will learn in this course:
React Fundamentals (Components, props, state, etc)
React Hooks (useState, useEffect, useContext, useReducer, useRef) in real projects
Context API & App Level State
MERN – MongoDB, Express React, Node
Build a Custom API With JWT Authentication
Redux – Reducers, Actions, etc
Basic Animation
Much More…
Who this course is for:
Developers looking to learn Modern React 16.8+ with hooks & context, MERN & Redux
Created by Brad Traversy Last updated 6/2019 English English [Auto-generated]
Size: 5.80 GB
Download Now
https://ift.tt/2NsHxhr.
The post React Front To Back 2019 appeared first on Free Course Lab.
0 notes
Text
.NET Full Stack Development AI + IoT Integrated Course | TechEntry
Join the best DotNet Full Stack Development AI and IoT Integrated Course in 2025. Learn DotNet Core, become a Full Stack Developer, and build advanced web applications with TechEntry.
Why Settle for Just Full Stack Development? Become an AI Full Stack Engineer!
Advance your skills with our AI-driven Full Stack . NET Development course, where you'll seamlessly integrate cutting-edge machine learning technologies with the .NET framework to build sophisticated, data-centric web applications.
Kickstart Your Development Journey!
Frontend Development
React: Build Dynamic, Modern Web Experiences:
What is Web?
Markup with HTML & JSX
Flexbox, Grid & Responsiveness
Bootstrap Layouts & Components
Frontend UI Framework
Core JavaScript & Object Orientation
Async JS promises, async/await
DOM & Events
Event Bubbling & Delegation
Ajax, Axios & fetch API
Functional React Components
Props & State Management
Dynamic Component Styling
Functions as Props
Hooks in React: useState, useEffect
Material UI
Custom Hooks
Supplement: Redux & Redux Toolkit
Version Control: Git & Github
Angular: Master a Full-Featured Framework:
What is Web?
Markup with HTML & Angular Templates
Flexbox, Grid & Responsiveness
Angular Material Layouts & Components
Core JavaScript & TypeScript
Asynchronous Programming Promises, Observables, and RxJS
DOM Manipulation & Events
Event Binding & Event Bubbling
HTTP Client, Ajax, Axios & Fetch API
Angular Components
Input & Output Property Binding
Dynamic Component Styling
Services & Dependency Injection
Angular Directives (Structural & Attribute)
Routing & Navigation
Reactive Forms & Template-driven Forms
State Management with NgRx
Custom Pipes & Directives
Version Control: Git & GitHub
Backend
.NET
Introduction to C#
What is C#?
Setting Up a C# Development Environment
Basic Syntax and Data Types in C#
Control Structures: If Statements, Loops
Methods and Parameters
Object-Oriented Programming Concepts
Classes and Objects
Inheritance and Polymorphism
Interfaces and Abstract Classes
Exception Handling in C#
Working with Collections: Arrays, Lists, Dictionaries
Introduction to .NET
Overview of .NET Framework and .NET Core
Differences Between .NET Framework and .NET Core
Understanding Networking and HTTP Basics
REST API Overview
ASP.NET Core Development
Creating a Basic ASP.NET Core Web API Project
Project Structure and Configuration in ASP.NET Core
Routing and URL Patterns in ASP.NET Core
Handling HTTP Requests and Responses
Model Binding and Validation
JSON Serialization and Deserialization
Using Razor Views for HTML Rendering
API Development with ASP.NET Core
CRUD API Creation and RESTful Services
Entity Framework Core Overview
CRUD Operations with Entity Framework Core
Database Connection Setup in ASP.NET Core
Querying and Data Handling with LINQ
User Authentication and Security
Advanced API Concepts
Pagination, Filtering, and Sorting
Caching Techniques for Performance Improvement
Rate Limiting and Security Practices
Logging and Exception Handling in ASP.NET Core
Deployment and Best Practices
Deployment of ASP.NET Core Applications
Best Practices for .NET Development
User Authentication Basics in ASP.NET Core
Implementing JSON Web Tokens (JWT) for Security
Role-Based Access Control in ASP.NET Core
Database
MongoDB (NoSQL)
Introduction to NoSQL and MongoDB
Understanding Collections and Documents
Basic CRUD Operations in MongoDB
MongoDB Query Language (MQL) Basics
Inserting, Finding, Updating, and Deleting Documents
Using Filters and Projections in Queries
Understanding Data Types in MongoDB
Indexing Basics in MongoDB
Setting Up a Simple MongoDB Database (e.g., MongoDB Atlas)
Connecting to MongoDB from a Simple Application
Basic Data Entry and Querying with MongoDB Compass
Data Modeling in MongoDB: Embedding vs. Referencing
Overview of Aggregation Framework in MongoDB
SQL
Introduction to SQL (Structured Query Language)
Basic CRUD Operations: Create, Read, Update, Delete
Understanding Tables, Rows, and Columns
Primary Keys and Unique Constraints
Simple SQL Queries: SELECT, WHERE, and ORDER BY
Filtering Data with Conditions
Using Aggregate Functions: COUNT, SUM, AVG
Grouping Data with GROUP BY
Basic Joins: Combining Tables (INNER JOIN)
Data Types in SQL (e.g., INT, VARCHAR, DATE)
Setting Up a Simple SQL Database (e.g., SQLite or MySQL)
Connecting to a SQL Database from a Simple Application
Basic Data Entry and Querying with a GUI Tool
Data Validation Basics
Overview of Transactions and ACID Properties
AI and IoT
AI & IoT Development with .NET
Introduction to AI Concepts
Getting Started with .NET for AI
Machine Learning Essentials with ML.NET
Introduction to Deep Learning
Practical AI Project Ideas
Introduction to IoT Fundamentals
Building IoT Solutions with .NET
IoT Communication Protocols
Building IoT Applications and Dashboards
IoT Security Basics
You're Ready to Become an IT Professional
Master the Skills and Launch Your Career: Upon mastering Frontend, Backend, Database, AI, and IoT, you’ll be fully equipped to launch your IT career confidently.
TechEntry Highlights
In-Office Experience: Engage in a collaborative in-office environment (on-site) for hands-on learning and networking.
Learn from Software Engineers: Gain insights from experienced engineers actively working in the industry today.
Career Guidance: Receive tailored advice on career paths and job opportunities in tech.
Industry Trends: Explore the latest software development trends to stay ahead in your field.
1-on-1 Mentorship: Access personalized mentorship for project feedback and ongoing professional development.
Hands-On Projects: Work on real-world projects to apply your skills and build your portfolio.
What You Gain:
A deep understanding of Front-end React.js and Back-end .NET.
Practical skills in AI tools and IoT integration.
The confidence to work on real-time solutions and prepare for high-paying jobs.
The skills that are in demand across the tech industry, ensuring you're not just employable but sought-after.
Frequently Asked Questions
Q.) What is C#, what are its main features, and why is it a good choice for software development?
A: Ans: C# is a versatile and powerful programming language developed by Microsoft. It's widely used for web, desktop, and game development, offering numerous career opportunities in software development.
Q: Why should I learn Angular?
A: Angular is a powerful framework for building dynamic, single-page web applications. Learning Angular can enhance your ability to create scalable and maintainable web applications and is highly valued in the job market.
Q: What is .NET?
A: .NET is a comprehensive software development framework created by Microsoft. It supports the development and running of applications on Windows, macOS, and Linux. With .NET, you can build web, mobile, desktop, gaming, and IoT applications.
Q: What are the prerequisites for learning Angular?
A: A basic understanding of HTML, CSS, and JavaScript is recommended before learning Angular.
Q: What are the benefits of learning .NET?
A: Learning .NET offers several benefits, including cross-platform development, a large community and support, a robust framework, and seamless integration with other Microsoft services and technologies.
Q: What is React?
A: React is a JavaScript library developed by Facebook for building user interfaces, particularly for single-page applications where you need a dynamic and interactive user experience. It allows developers to create large web applications that can change data without reloading the page.
Q: Is C# suitable for beginners?
A: Yes, C# is an excellent language for beginners due to its simplicity and readability. It has a rich set of libraries and tools that make development easier, and it's well-documented, which helps new learners quickly grasp the concepts.
Q: Why use React?
A: React offers reusable components, fast performance through virtual DOM, one-way data flow, and a large community, making it ideal for developing dynamic user interfaces.
Q: What kind of projects can I create with C# and .NET?
A: With C# and .NET, you can create a wide range of projects, such as web applications, mobile apps (using Xamarin), desktop applications (Windows Forms, WPF), games (using Unity), cloud-based applications, and IoT solutions.
Q: What is JSX?
A: JSX is a syntax extension of JavaScript used to create React elements, which are rendered to the React DOM. React components are written in JSX, and JavaScript expressions within JSX are embedded using curly braces {}.
For more, visit our website:
https://techentry.in/courses/dotnet-fullstack-developer-course
0 notes
Text
React Data Layer - Part 3: Login
This post is the third part of an 8-part series going in-depth into how to build a robust real-world frontend app data layer. See the previous parts here:
Part 1: Intro
Part 2: Setting up React and Redux
Starting in this post, we’ll connect our React/Redux app to a backend web service. This post will only focus on authentication, because it’s a big enough topic in itself. The following post will handle using that authenticated access to read and write data from the web service.
We won’t be building the backend as part of this book; we’ll use an existing backend we’ve set up, sandboxapi.bignerdranch.com. Go there now and create a free account. This will allow you to create records without stepping on anyone else’s toes.
sandboxapi uses a modified form of the OAuth2 Password Grant flow for authentication, and follows the JSON:API specification for data transfer. The principles in this book aren’t specific to either of these approaches; they should work with very little change for any kind of password-based authentication and web service, and more broadly for other kinds of backends.
If you like, you can download the app as of the end of the post.
Storing Login Tokens
When setting up authentication for your backend, one important decision is how you’ll store your access token so it’s available when the user reloads the page. The answer isn’t totally clear.
One option is to store the token using the browser’s Local Storage API. This makes it easy to access from your JavaScript code, but it also makes the token vulnerable to Cross-Site Scripting (XSS) attacks, where a malicious user is able to execute their own JavaScript code on your domain and retrieve other users’ tokens.
Another option is to store the access token in a browser cookie with HttpOnly set, so it’s not accessible from JavaScript. This prevents XSS attacks, but may make your app vulnerable to Cross-Site Request Forgery (CSRF) attacks, because the cookie is automatically sent on any request to the API. CSRF can be mitigated with a combination of checking Origin and Referer headers and using a newer SameSite=strict flag, so cookies are generally considered the safer option. To learn more, check out the article “Where to Store Tokens” by Auth0.
Because the cookie-based approach has some advantages, we’ve set up sandboxapi to return your access token in a cookie. We’ll see below how to work with it.
Setting Up Axios
For sending our web requests we’ll use the Axios library, an HTTP client that is simple and nicely configurable. Add it to the project:
$ yarn add axios
Next, it’s a common pattern to configure your Axios instance in an api module. Create src/store/api.js and add the following:
import axios from 'axios'; const api = axios.create({ baseURL: 'https://sandboxapi.bignerdranch.com', withCredentials: true, headers: { 'Content-Type': 'application/vnd.api+json', }, }); export default api;
The withCredentials property indicates to Axios that it should send the cookie for the API domain along with the request.
The content type application/vnd.api+json is the content type required by the JSON:API spec. Our server will check for this content type for requests that have a body (in this guide, just POSTs), and will return an error if the content type doesn’t match.
The Login Form
Before we can get into sending store requests to read or write our data, we need to log in. Because our app won’t offer any functionality when you aren’t logged in, we’ll prompt the user with a login form right away. Once they log in, we’ll give them access to the rest of the app.
We’ll implement this with two different components, so let’s create a components/Auth folder. Underneath it, let’s start with the simple login form. Create LoginForm.js and add the following:
import React, { useState } from 'react'; import { get } from 'lodash-es'; import { Button, Col, Input, Row, } from 'react-materialize'; import api from 'store/api'; const LoginForm = ({ onLoginSuccess }) => { const [email, setEmail] = useState(''); const [password, setPassword] = useState(''); const [error, setError] = useState(null); const handleChange = (setField) => (event) => { setField(event.target.value); setError(false); } const logIn = (event) => { } return ( <form onSubmit={logIn}> {error ? <p>{error}</p> : null} <Row> <Input label="Email" value={email} onChange={handleChange(setEmail)} s={12} /> </Row> <Row> <Input label="Password" type="password" value={password} onChange={handleChange(setPassword)} s={12} /> </Row> <Row> <Col> <Button>Log In</Button> </Col> </Row> </form> ); }; export default LoginForm;
So far this is just a simple form with two controlled inputs. Next, let’s start filling in the implementation for the logIn function:
logIn = (event) => { event.preventDefault(); api.post('/oauth/token', { grant_type: 'password', username: email, password, }).then(() => { }).catch((error) => { }); }
We retrieve the email and the password from the state, then we use our API client to send a POST request to the /oauth/token endpoint. This checks a username and password and gives us back an access token. It uses the OAuth2 Password Grant standard (modified, as we’ll see, to return the access token as a cookie), so in addition to the username and password fields, we pass in a required grant_type property set to password.
Next, let’s fill in the then function:
api.post('/oauth/token', { grant_type: 'password', username: email, password, }).then(() => { onLoginSuccess(); }).catch((error) => { });
We simply call an onLoginSuccess function. We don’t need to store or pass the token; we don’t even have access to it from JavaScript because it’s stored in an HttpOnly cookie.
Finally, let’s fill in the catch function:
api.post('/oauth/token', { grant_type: 'password', username: email, password, }).then(() => { onLoginSuccess(); }).catch((error) => { const message = get( error, 'response.data.error_description', 'An error occurred while logging in. Please try again.', ); setError(message); });
We use Lodash’s get() function, which we imported at the top of the file, to dig a few levels deep, into an error.response.data.error_description property. Any of those properties might be missing, because, for example, the catch function will catch any other JavaScript errors as well. The third argument to get() is a default value. The net result is this: if the error has a response.data.error_description property, we display that as the error message; otherwise, we display a generic error message. Our server is configured to send the error “Invalid username or password” if the user enters incorrect data. If you have access to your server and can configure it to send back a human-readable message, that allows your app to be more flexible to report different kinds of error.
Controlling Access
Now we have a login form, but how will we handle showing and hiding it? We’ll use a separate Auth component for this. Create components/Auth/index.js and add the following:
import React, { useState } from 'react'; import LoginForm from './LoginForm'; const Auth = ({ children }) => { const [loggedIn, setLoggedIn] = useState(false); const handleLoginSuccess = () => { setLoggedIn(true); } if (loggedIn) { return children; } else { return <LoginForm onLoginSuccess={handleLoginSuccess} />; } } export default Auth;
The responsibility of the Auth component is to display one of two states. If the user is not logged in, the LoginForm is displayed. If the user is logged in, the component’s children are rendered.
How do we record whether the user is logged in or not? We default the user to not logged in. We also pass a handleLoginSuccess function to the LoginForm component. When that function is called, it sets the loggedIn flag to true, which will cause the rest of our app to be shown.
Now we just need to add the Auth component to App.js:
import { Col, Row } from 'react-materialize'; +import Auth from 'components/Auth'; import GameList from 'components/GameList'; const App = () => ( <Provider store={store}> <Row> <Col s={12} m={10} l={8} offset="m1 l2"> - <GameList /> + <Auth> + <GameList /> + </Auth> </Col> </Row> </Provider>
With this, logging in should work in our app. Stop and restart the server if you haven’t already, and you should see the login form.
Try entering an incorrect username and password. In the Network tab of your browser dev tools you should see a request go out. And you should see the error message “Invalid username or password” displayed. Next, in the Chrome Dev Tools Network tab, select the Offline checkbox.
Now when you attempt to submit the form, you should see the error “An error occurred while logging in. Please try again.” Now, uncheck “Offline” and enter your real username and password. You should see the list of records displayed. Great!
Saving the Redux State
You’ll notice that when you reload the app you’re prompted to log in again. This isn’t a great user experience. The user’s access code is stored in a cookie, and there is no way for the app to check for the presence of that cookie, because it’s HttpOnly and not accessible to JavaScript for security.
Instead, we should store a flag indicating whether or not the UI should consider the user logged in. We will eventually have lots more Redux data to persist as well, so let’s go ahead and store the login state in Redux and use Redux Persist to persist it.
(How can you handle persisting data if you’re working in a framework or platform other than Redux? Other state management libraries like MobX and Vuex also have packages to automatically persist their data to local storage. If you can’t find one, you may need to write the persistence yourself, and that’s outside the scope of this tutorial. The goal is just to persist all state changes to storage in real time as they’re made to the in-memory data, so it can be restored the next time the app is used.)
Start by adding the redux-persist package:
$ yarn add redux-persist
Update store/index.js to hook Redux Persist into your store as described in the Redux Persist readme:
import { createStore } from 'redux'; import { devToolsEnhancer } from 'redux-devtools-extension'; +import { persistStore, persistReducer } from 'redux-persist'; +import storage from 'redux-persist/lib/storage'; import rootReducer from './reducers'; +const persistConfig = { + key: 'video-games', + storage, +}; + +const persistedReducer = persistReducer(persistConfig, rootReducer); + const store = createStore( - rootReducer, + persistedReducer, devToolsEnhancer(), ); + +const persistor = persistStore(store); -export default store; +export { store, persistor };
First, we set up the persistConfig, which includes the key to store our data under, and the storage to use. The storage we pass is redux-persist/lib/storage, which defaults to using the browser’s localStorage. This isn’t a security concern because we aren’t storing the user’s token in local storage, only a flag indicating that they are logged in. Next, we call persistReducer to wrap our rootReducer with persistence logic.
Next, we create a persistor by passing the store to persistStore(). In addition to making the store available to the rest of the app, we now expose the new persistor as well. We need to update our App to wait for the persistor to finish restoring the data before it displays our app. Redux Persist provides the PersistGate component for this purpose.
import React from 'react'; import { Provider } from 'react-redux'; +import { PersistGate } from 'redux-persist/integration/react'; -import store from 'store'; +import { store, persistor } from 'store'; import { Col, Row } from 'react-materialize'; import Auth from 'components/Auth'; import GameList from 'components/GameList'; const App = () => ( <Provider store={store}> - <Row> - <Col s={12} m={10} l={8} offset="m1 l2"> - <Auth> - <GameList /> - </Auth> - </Col> - </Row> + <PersistGate loading={null} persistor={persistor}> + <Row> + <Col s={12} m={10} l={8} offset="m1 l2"> + <Auth> + <GameList /> + </Auth> + </Col> + </Row> + </PersistGate> </Provider> );
Inside the Provider but outside any other components, we wrap our app in the PersistGate. We pass the returned persistor to it.
With this, our app should now be persisting our Redux state. Let’s inspect the data that’s being stored. In the Chrome developer tools, choose the Application tab, then click Storage > Local Storage > http://localhost:3000. You should see a key named persist:video-games. Click on it and you should see a simple version of your Redux store’s state.
Saving the Logged-in State
Now we need to add the logged-in state to our Redux store. We’ll add it into a new reducer group, just like we created a games reducer group before. Create a store/login folder. Then create a store/login/actions.js file and add an action and action creator pair to log in and to log out:
export const LOG_IN = 'LOG_IN'; export const LOG_OUT = 'LOG_OUT'; export const logIn = () => { return { type: LOG_IN, }; }; export const logOut = () => { return { type: LOG_OUT, }; };
Next, create store/login/reducers.js and add a loggedIn reducer:
import { combineReducers } from 'redux'; import { LOG_IN, LOG_OUT, } from './actions'; export function loggedIn(state = false, action) { switch (action.type) { case LOG_IN: return true; case LOG_OUT: return false; default: return state; } } export default combineReducers({ loggedIn, });
The loggedIn state starts as false, it’s set to true upon login, and false upon log out.
Now we add the login reducers group to our main reducer in store/reducers.js:
import { combineReducers } from 'redux'; +import login from './login/reducers'; import games from './games/reducers'; export default combineReducers({ + login, games, });
Now we need to hook this state and action creator up to our app. We’ll add it to Auth/index.js. This time, we’ll create the Redux container in the same file:
-import React, { useState } from 'react'; +import React from 'react'; +import { connect } from 'react-redux'; import LoginForm from './LoginForm'; +import { + logIn, +} from 'store/login/actions'; -const Auth = ({ children }) => { +const Auth = ({ loggedIn, logIn, children }) => { - const [loggedIn, setLoggedIn] = useState(false); - - const handleLoginSuccess = () => { - setLoggedIn(true); - } - if (loggedIn) { return children; } else { - return <LoginForm onLoginSuccess={handleLoginSuccess} />; + return <LoginForm onLoginSuccess={logIn} />; } } + +function mapStateToProps(state) { + return { + loggedIn: state.login.loggedIn, + }; +} + +const mapDispatchToProps = { + logIn, +}; + +export default connect(mapStateToProps, mapDispatchToProps)(Auth);
We update the Auth component to pull the loggedIn state from Redux instead of from component state. We also remove the handleLoginSuccess method, because all we need to do now is dispatch the action creator logIn.
Run the app and log in. Then reload the app. You’re kept logged in! Now we need a way to log out too, though. Add it to the GameList Redux container:
import { pick } from 'lodash-es'; import { addGame, } from 'store/games/actions'; +import { + logOut, +} from 'store/login/actions'; import GameList from './GameList'; ... const mapDispatchToProps = { addGame, + logOut, };
And to the GameList itself:
import React, { Component } from 'react'; import { + Button, Collection, CollectionItem, } from 'react-materialize'; ... const GameList = ({ games, addGame, + logOut, }) => { return <div> <AddGameForm onAddGame={addGame} /> + <Button onClick={logOut}> + Log Out + </Button> <Collection header="Video Games"> { games.map((game) => ( <CollectionItem key={game}>{game}</CollectionItem>
Now reload the app and you should be able to log out and back in.
What’s Next?
With this, our authentication setup is working. We’re able to provide a username and password and receive back an access token as a cookie. Because of the configuration of the cookie headers, we have good protection from XSS and CSRF attacks. Our app is also keeping track of whether we’re logged in, and will remember this between page loads using a flag in our Redux store that’s persisted to local storage.
We took a little longer than is often the case on frontend projects to ensure that our security setup is as good as we can reasonably make it. Now that that’s set, we’re ready to use this authenticated access to read and write data from the server.
React Data Layer - Part 3: Login published first on https://johnellrod.weebly.com/
0 notes
Link
The Problem Let's say you have a list of user ID as props and you want to fetch and render a list of user's info. You may have an API that looks something like this:
// url const url = '/api/get-users'; // input const input = { userIds: [1, 2, 3], }; // output const output = { users: [ // ...list of user object ], };
This is great, you pass in a list of user IDs and you get a list of user objects. You can simply do the fetching inside the list component and render the items after getting the list of user objects. This is simple enough, but let's make things more challenging. What if there is a new component that also needs to fetch a list of users? The list of user ID might be different we cannot abstract the fetching logic because it is at the other side of the React tree. You can do another fetch in the new component, but this is not ideal because:
You can potentially save a request by combining the 2 requests
You might be requesting for the same data twice (some IDs might overlap)
Wouldn't it be great if somehow we can collect all the user IDs that needed to be fetched and combine them into a single request? Well, it turns out you can do just that using DataLoader!
What is DataLoader?
DataLoader is a generic utility to be used as part of your application's data fetching layer to provide a simplified and consistent API over various remote data sources such as databases or web services via batching and caching.
I came across DataLoader when researching GraphQL. It is used to solve the N + 1 problem in GraphQL, you can learn more about it here. Essentially, it provides APIs for developers to load some keys. All the keys it collects within a single frame of execution (a single tick of the event loop) will be passed into a user-defined batch function. When using GraphQL, the batching function is usually a call to DB. But when using it in the browser, we can instead define the batching function to send an API request. It will look something like this:
import DataLoader from 'dataloader'; async function batchFunction(userIds) { const response = await fetch('/api/get-users'); const json = await response.json(); const userIdMap = json.users.reduce((rest, user) => ({ ...rest, [user.id]: user, })); return userIds.map((userId) => userIdMap[userId] || null); } const userLoader = new DataLoader(batchFunction);
Let's see what's going on here:
A DataLoader takes in a batch function
The batch function accepts a list of keys and returns a Promise which resolves to an array of values.
The Array of values must be the same length as the Array of keys.
Each index in the Array of values must correspond to the same index in the Array of keys.
The result of our API might not be in the same order as the passed in user IDs and it might skip for any invalid IDs, this is why I am creating a userIdMap and iterate over userIds to map the value instead of returning json.users directly.
You can then use this userLoader like this:
// get a single user const user = await userLoader.load(userId); // get a list of user const users = await userLoader.loadMany(userIds);
You can either use load to fetch a single user or loadMany to fetch a list of users. By default, DataLoader will cache the value for each key (.load() is a memoized function), this is useful in most cases but in some situations you might want to be able to clear the cache manually. For example if there's something wrong with the user fetching API and the loader is returning nothing for some keys, you probably don't want to cache that. You can then do something like this to clear the cache manually:
// get a single user const user = await userLoader.load(userId); if (user === null) { userLoader.clear(userId); } // get a list of user const users = await userLoader.loadMany(userIds); userIds.forEach((userId, index) => { if (users[index] === null) { userLoader.clear(userId); } });
With the power of React Hook, you can abstract this user fetching logic into a custom hook:
// useUser.js import { useState, useEffect } from 'react'; import userLoader from './userLoader'; function useUser(userId) { const [isLoading, setIsLoading] = useState(false); const [user, setUser] = useState(null); useEffect(() => { const fetchUser = async () => { setIsLoading(true); const user = await userLoader.load(userId); if (user === null) { userLoader.clear(userId); } setUser(user); setIsLoading(false); }; fetchUser(); }, [userId]); return { isLoading, user, }; } export default useUser; // use it anywhere in the application const user = useUser(userId);
Isn't this great? Simply use useUser in a component and it will take care of the rest for you! You don't need to worry about abstracting the fetching logic or caching the response anymore! Here is a quick demo:
But what if the components do not render in a single frame?
Worries not, DataLoader allows providing a custom batch scheduler to account for this. As an example, here is a batch scheduler which collects all requests over a 100ms window of time (and as a consequence, adds 100ms of latency):
const userLoader = new DataLoader(batchFunction, { batchScheduleFn: (callback) => setTimeout(callback, 100), });
Ok, it looks pretty good so far, is there any downside by using DataLoader?
From my experience, there is one tiny thing that bothers me when using DataLoader. Because DataLoader requires a single frame to collect all keys, it will take at least 2 frames to returns the results, even when it's cached. Meaning if you have a loading indicator, it will still flash for a split second. I have yet to find a solution to this but I will update this post as soon as I find one.
Conclusion
By using DataLoader, you can easily batch requests initiated from different components anywhere in the render tree, and the result will be cached automatically, you also have the power to customize the scheduler and caching behavior. I have used React Hook as an example but you can easily use it in any other framework as well. What do you think of this pattern? Is there any other pitfalls that I haven't considered? Let me know!
0 notes
Text
MERN/MEAN Full Stack Developer Course with AI & IoT Integrated
Join TechEntry's MERN/MEAN Full Stack Development Course. Learn to build advanced web applications with AI and IoT integration. Master Node.js, Angular, React, and MongoDB. Enroll now to kickstart your successful career!
Why Settle for Just Full Stack Development? Become an AI Full Stack Engineer!
The tech industry is evolving fast, and companies are no longer just looking for MERN/MEAN stack developers. They want professionals who can integrate cutting edge technologies like AI and IoT into their development processes. This is where TechEntry stands out.
Kickstart Your Development Journey!
Frontend Development:
React: Build Dynamic, Modern Web Experiences:
What is Web?
Markup with HTML & JSX
Flexbox, Grid & Responsiveness
Bootstrap Layouts & Components
Frontend UI Framework
Core JavaScript & Object Orientation
Async JS promises, async/await
DOM & Events
Event Bubbling & Delegation
Ajax, Axios & fetch API
Functional React Components
Props & State Management
Dynamic Component Styling
Functions as Props
Hooks in React : useState, useEffect
Material UI
Custom Hooks
Supplement: Redux & Redux Toolkit
Version Control: Git & Github
Angular: Master a FullFeatured Framework:
What is Web?
Markup with HTML & Angular Templates
Flexbox, Grid & Responsiveness
Angular Material Layouts & Components
Core JavaScript & TypeScript
Asynchronous Programming Promises, Observables, and RxJS
DOM Manipulation & Events
Event Binding & Event Bubbling
HTTP Client, Ajax, Axios & Fetch API
Angular Components
Input & Output Property Binding
Dynamic Component Styling
Services & Dependency Injection
Angular Directives (Structural & Attribute)
Routing & Navigation
Reactive Forms & Templatedriven Forms
State Management with NgRx
Custom Pipes & Directives
Version Control: Git & GitHub
Backend:
Node.js: Power Your BackEnd with JavaScript:
Networking and HTTP
REST API overview
Node.js and NPM setup
Creating basic HTTP servers
JavaScript for Backend
Node.js modules and file handling
Process management in Node.js
Asynchronous programming: callbacks, Promises, async/await
Building APIs with Express.js
Express server setup and routing
Handling HTTP requests and responses
JSON parsing and form handling
Templating engines (EJS, Handlebars)
CRUD API creation and RESTful services
Middleware setup and error handling
Database Integration:
SQL and NoSQL database basics
CRUD operations with SQL and NoSQL
Database connection setup (e.g., MongoDB, PostgreSQL)
Querying and data handling
Authentication & Authorization:
User authentication basics
JSON Web Tokens (JWT) for security
Rolebased access control
Advanced API Concepts:
Pagination, filtering, and sorting
Caching techniques for faster response
Rate limiting and security practices
Database:
MongoDB (NoSQL)
Introduction to NoSQL and MongoDB
Understanding Collections and Documents
Basic CRUD Operations in MongoDB
MongoDB Query Language (MQL) Basics
Inserting, Finding, Updating, and Deleting Documents
Using Filters and Projections in Queries
Understanding Data Types in MongoDB
Indexing Basics in MongoDB
Setting Up a Simple MongoDB Database (e.g., MongoDB Atlas)
Connecting to MongoDB from a Simple Application
Basic Data Entry and Querying with MongoDB Compass
Data Modeling in MongoDB: Embedding vs. Referencing
Overview of Aggregation Framework in MongoDB
SQL
Introduction to SQL (Structured Query Language)
Basic CRUD Operations: Create, Read, Update, Delete
Understanding Tables, Rows, and Columns
Primary Keys and Unique Constraints
Simple SQL Queries: SELECT, WHERE, and ORDER BY
Filtering Data with Conditions
Using Aggregate Functions: COUNT, SUM, AVG
Grouping Data with GROUP BY
Basic Joins: Combining Tables (INNER JOIN)
Data Types in SQL (e.g., INT, VARCHAR, DATE)
Setting Up a Simple SQL Database (e.g., SQLite or MySQL)
Connecting to a SQL Database from a Simple Application
Basic Data Entry and Querying with a GUI Tool
Data Validation Basics
Overview of Transactions and ACID Properties
AI and IoT:
Introduction to AI Concepts
Getting Started with Node.js for AI
Machine Learning Basics with TensorFlow.js
Introduction to Natural Language Processing
Practical AI Project Ideas
Introduction to IoT Fundamentals
Building IoT Solutions with Node.js
IoT Communication Protocols
Building IoT Applications and Dashboards
IoT Security Basics
You're Ready to Become an IT Professional
Master the Skills and Launch Your Career: Upon mastering Frontend, Backend, Database, AI, and IoT, you’ll be fully equipped to launch your IT career confidently.
TechEntry Highlights
InOffice Experience: Engage in a collaborative inoffice environment (onsite) for handson learning and networking.
Learn from Software Engineers: Gain insights from experienced engineers actively working in the industry today.
Career Guidance: Receive tailored advice on career paths and job opportunities in tech.
Industry Trends: Explore the latest software development trends to stay ahead in your field.
1on1 Mentorship: Access personalized mentorship for project feedback and ongoing professional development.
HandsOn Projects: Work on realworld projects to apply your skills and build your portfolio.
What You Gain:
A deep understanding of Frontend React.js and Backend Node.js.
Practical skills in AI tools and IoT integration.
The confidence to work on realtime solutions and prepare for highpaying jobs.
The skills that are in demand across the tech industry, ensuring you're not just employable but soughtafter.
Frequently Asked Questions
Q: What is Node.js, and what is it used for?
A: Node.js is a runtime environment that allows you to execute JavaScript code outside of a web browser, typically on a server. It is used for building scalable server side applications, handling I/Oheavy operations, realtime applications, APIs, and microservices.
Q: What is the difference between class based components and functional components with hooks in React?
A: Class based components maintain state via instances, while functional components use hooks for state management and other side effects. Hooks have made functional components more popular due to their simplicity and flexibility.
Q: What are the popular frameworks for building web applications with Node.js?
A: Popular frameworks include Express.js, Koa.js, and Nest.js. They provide higher level abstractions and utilities to simplify building web applications.
Q: What is Angular, and why should I learn it?
A: Angular is a powerful framework for building dynamic, single page web applications. It provides a comprehensive solution with builtin tools for routing, forms, and dependency injection, making it highly valued in the job market.
Q: Why is Express.js preferred for beginners?
A: Express.js has a minimalistic and straightforward approach, making it easier for beginners to grasp core web development concepts without being overwhelmed by too many builtin features. It also has a large community and abundant resources.
Q: What are Angular’s life cycle hooks, and how are they used?
A: Angular’s life cycle hooks are methods that allow you to tap into specific moments in a component’s life cycle (e.g., initialization, change detection, destruction). Examples include ngOnInit, ngOnChanges, and ngOnDestroy.
Q: What is React, and why is it popular?
A: React is a JavaScript library for building user interfaces, particularly for single page applications. It is popular due to its reusable components, fast performance with virtual DOM, and one way data flow, making the code predictable and easy to debug.
Q: What are the job roles available for someone skilled in Node.js, Express.js, React, and Angular?
A: Job roles include Backend Developer, Frontend Developer, Full Stack Developer, API Developer, UI/UX Developer, DevOps Engineer, and Systems Architect.
Q: What is JSX in React?
A: JSX is a syntax extension of JavaScript used to create React elements. It allows you to write HTML elements and JavaScript together, making it easier to structure components and manage the user interface.
Q: What are some realworld applications built with these technologies?
A: Realworld applications include platforms like Netflix, LinkedIn, and PayPal (Node.js and Express.js); dynamic singlepage applications (React); and enterpriselevel applications (Angular). These technologies are used to handle high traffic, realtime features, and complex user interfaces.
For more, visit our website:
https://techentry.in/courses/nodejs-fullstack-mean-mern-course
0 notes